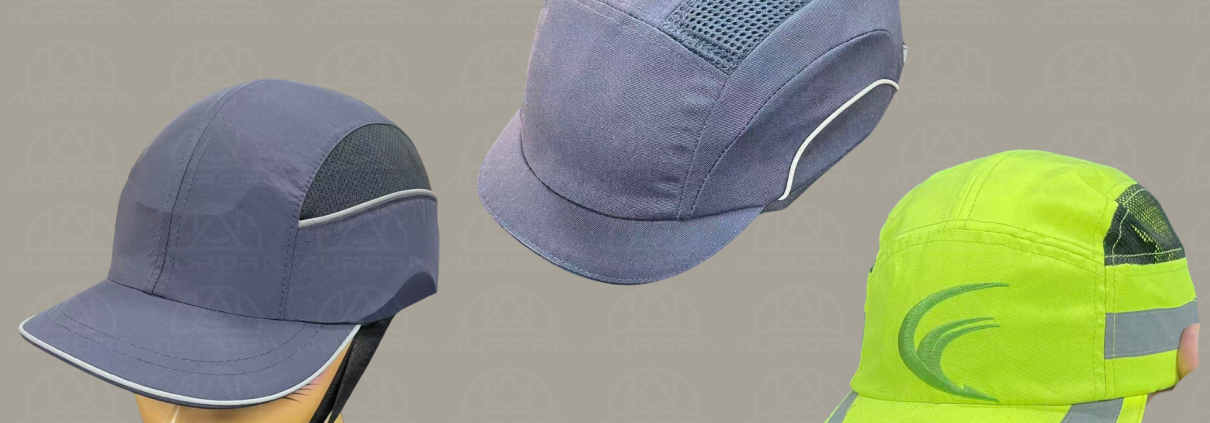
Custom Bump Cap Design: Solving Fit, Comfort & Ventilation Problems

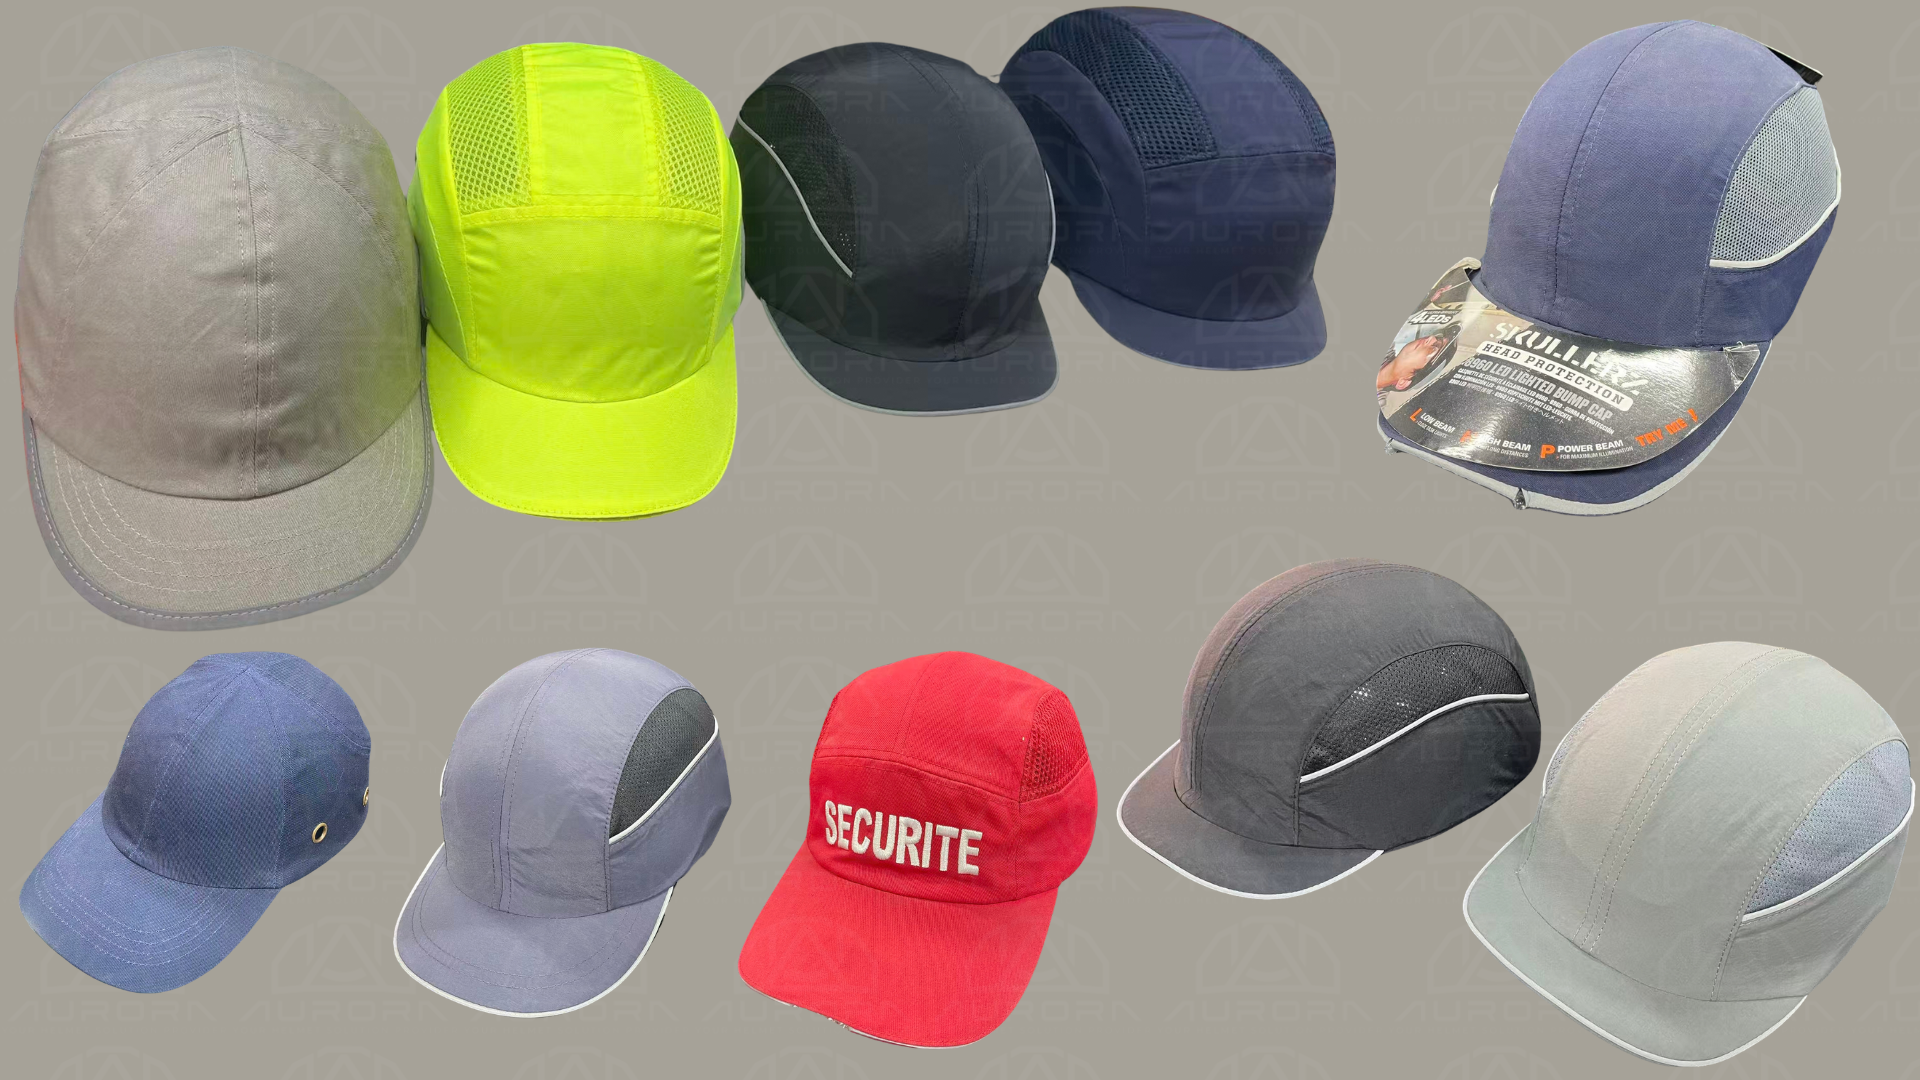
Bump caps are designed to provide lightweight head protection for workers who may accidentally strike their heads against low ceilings, shelving, pipes, machinery or other stationary objects.

Although the concept is simple, the wearing experience often is not.

Common complaints include poor fit, pressure around the forehead and temples, excessive heat, movement during use, odor, difficult cleaning and poor compatibility with different baseball caps.

At Aurora Sports, we are using these real-world concerns to guide the development of our bump-cap category.

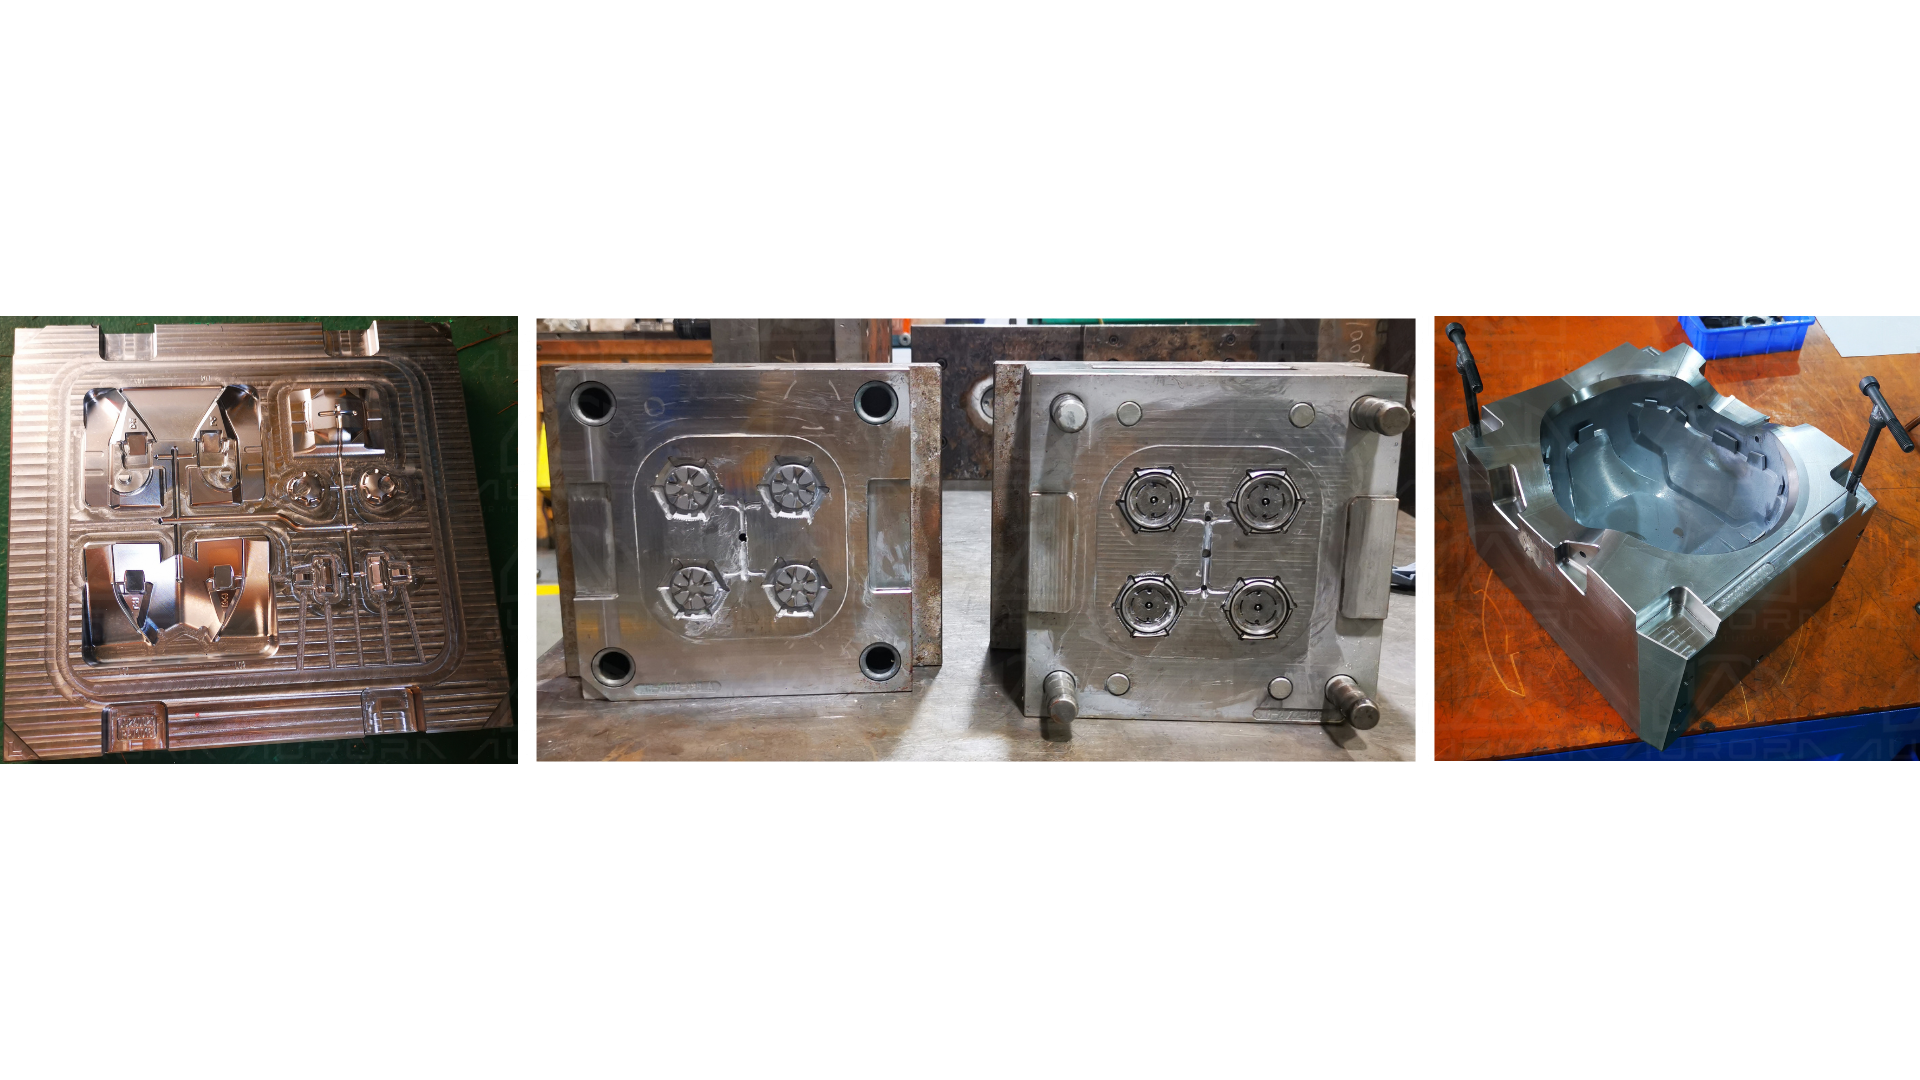
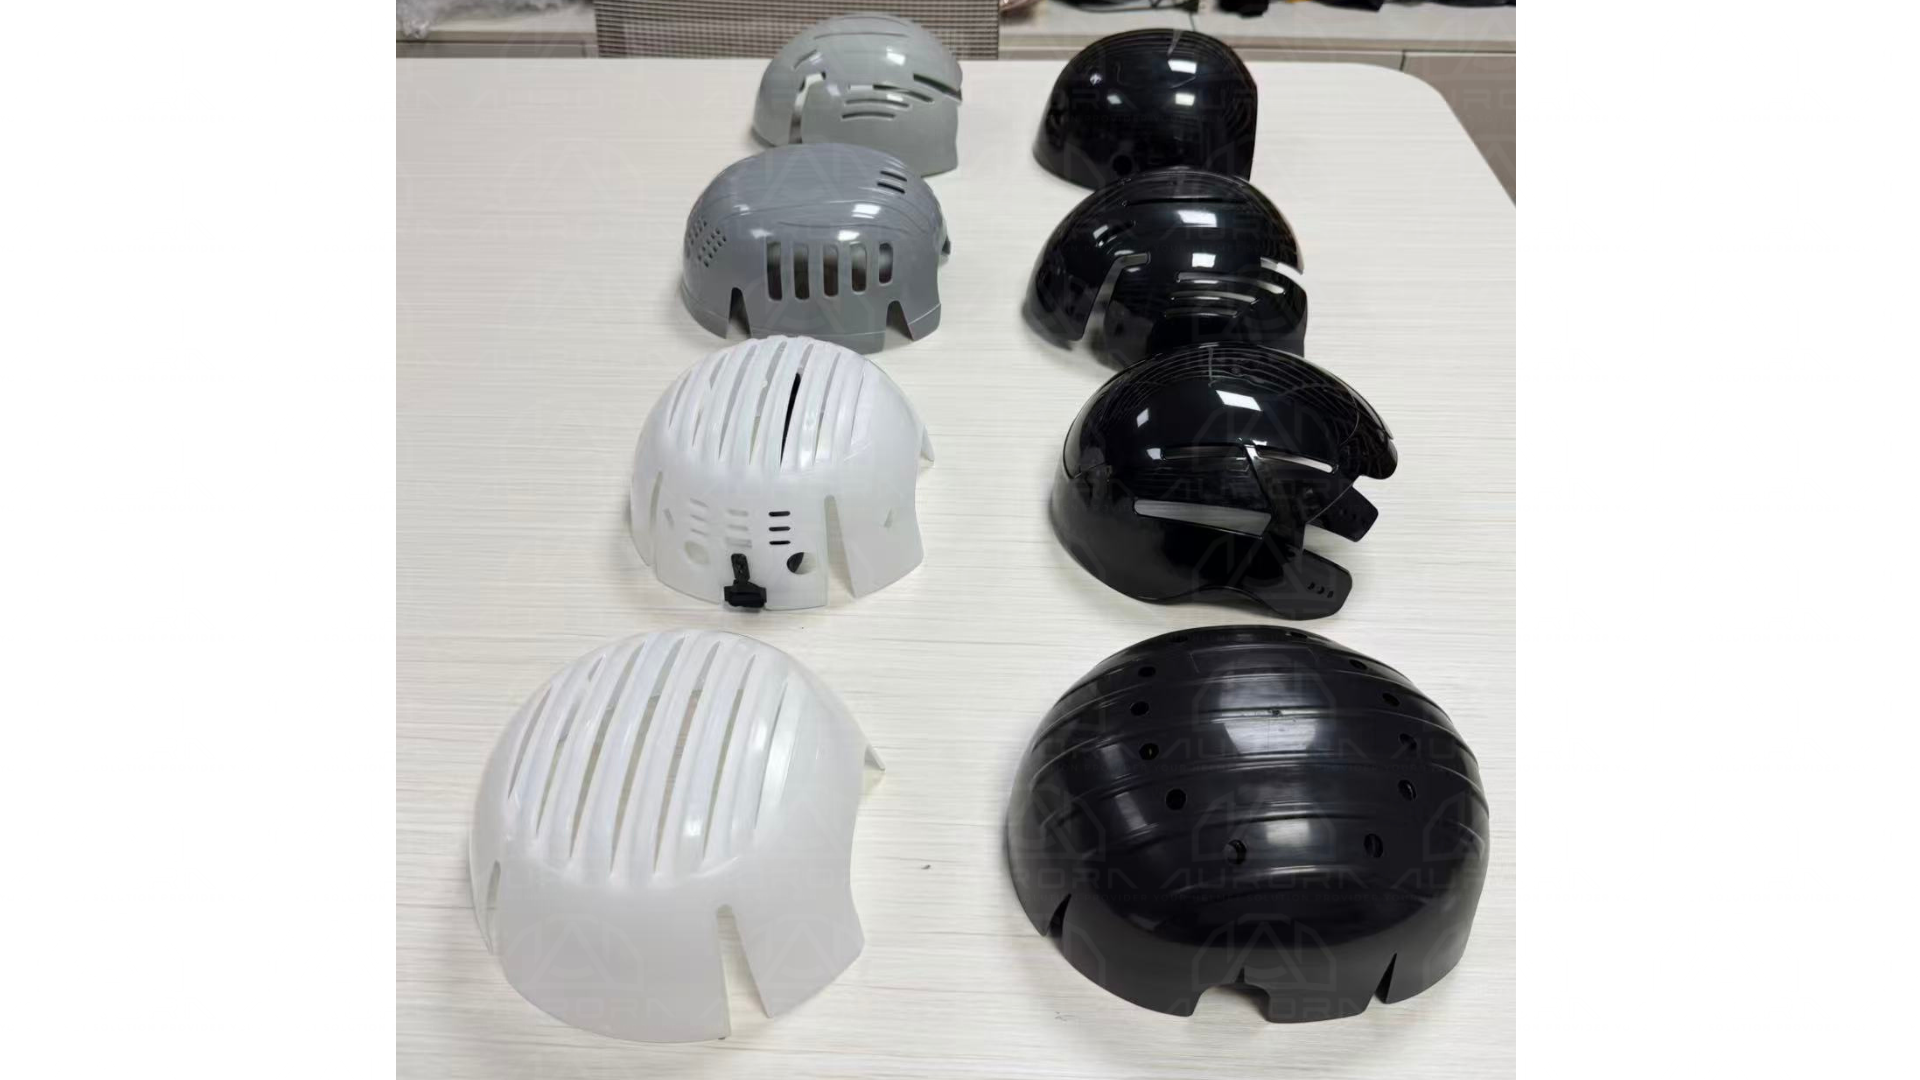
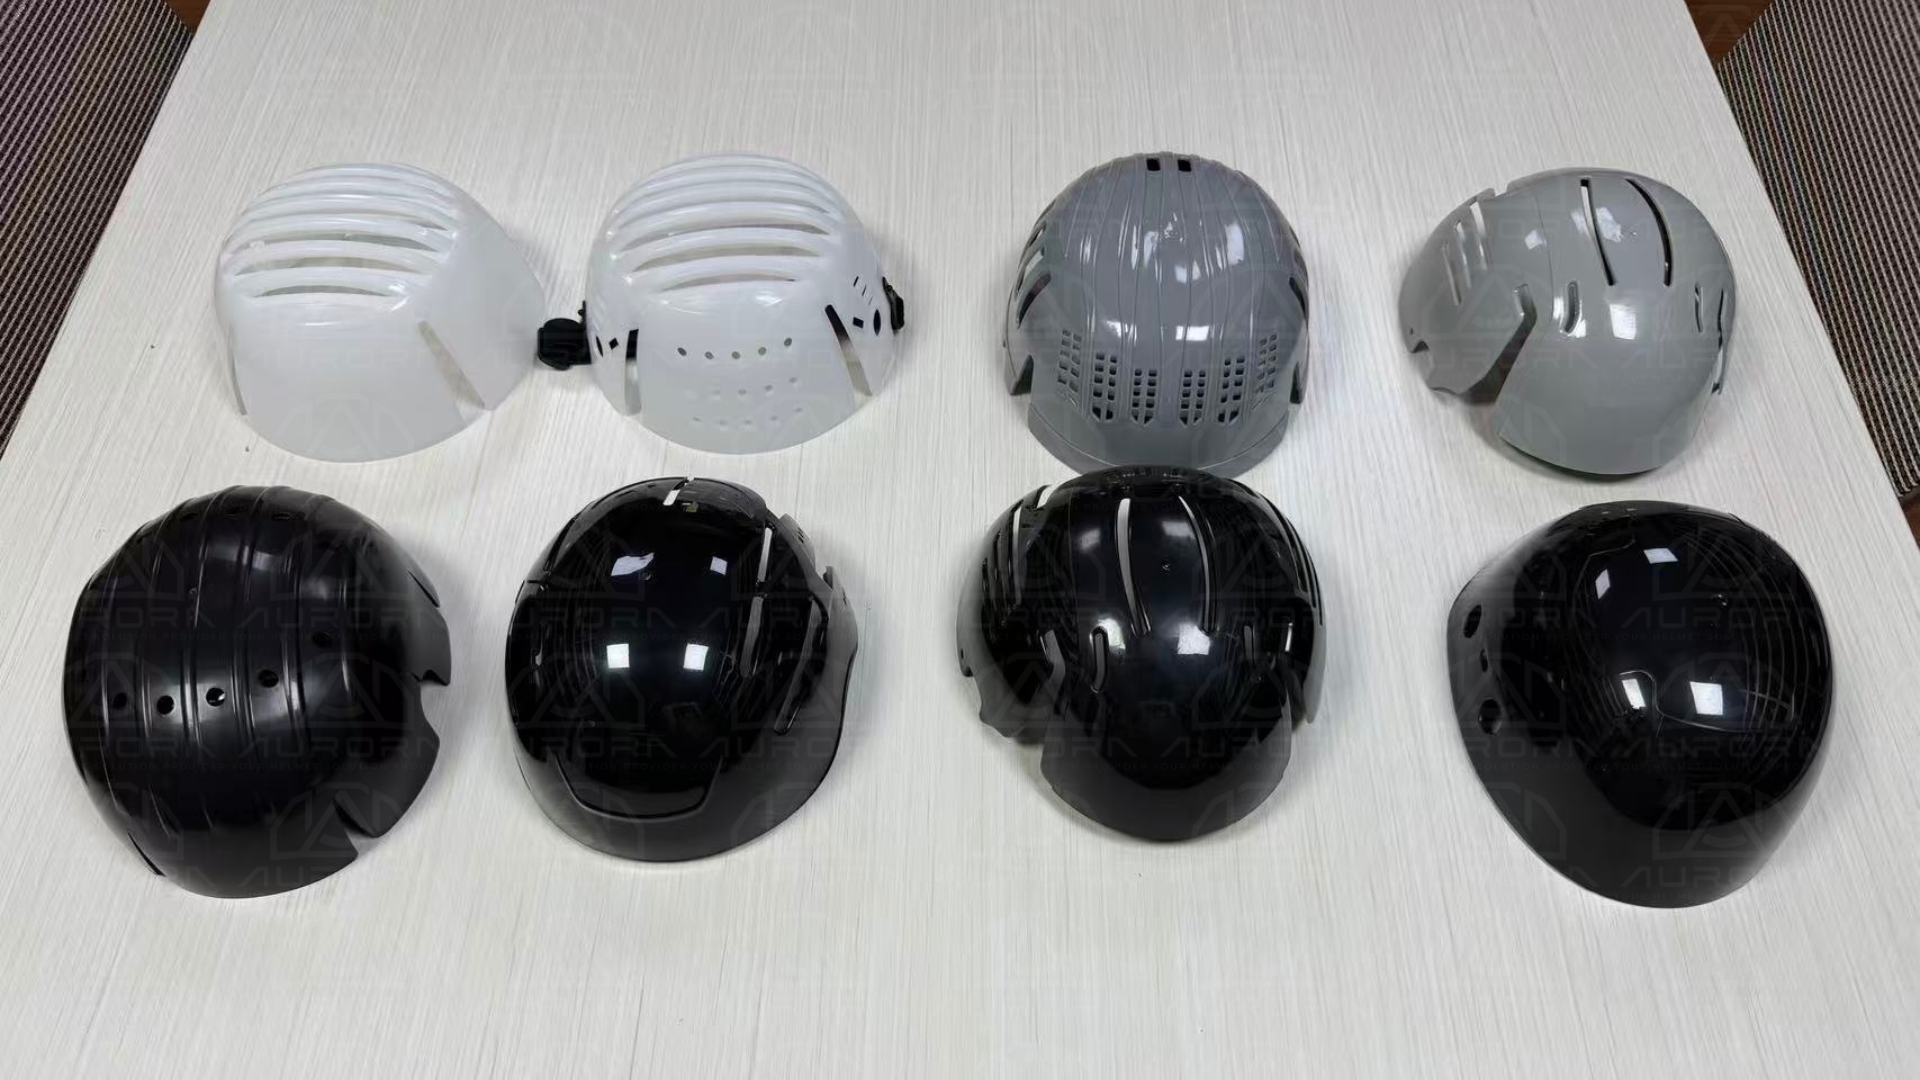
Our goal is not simply to manufacture another rigid plastic insert. We want to apply our experience in helmet engineering, industrial design, material selection, In-mold decoration (IMD) or film insert molding (FIM), padding development, sewing, prototyping, testing support and quality control to develop a more comfortable and practical bump-cap solution.

Here are some of the key areas we are focusing on.

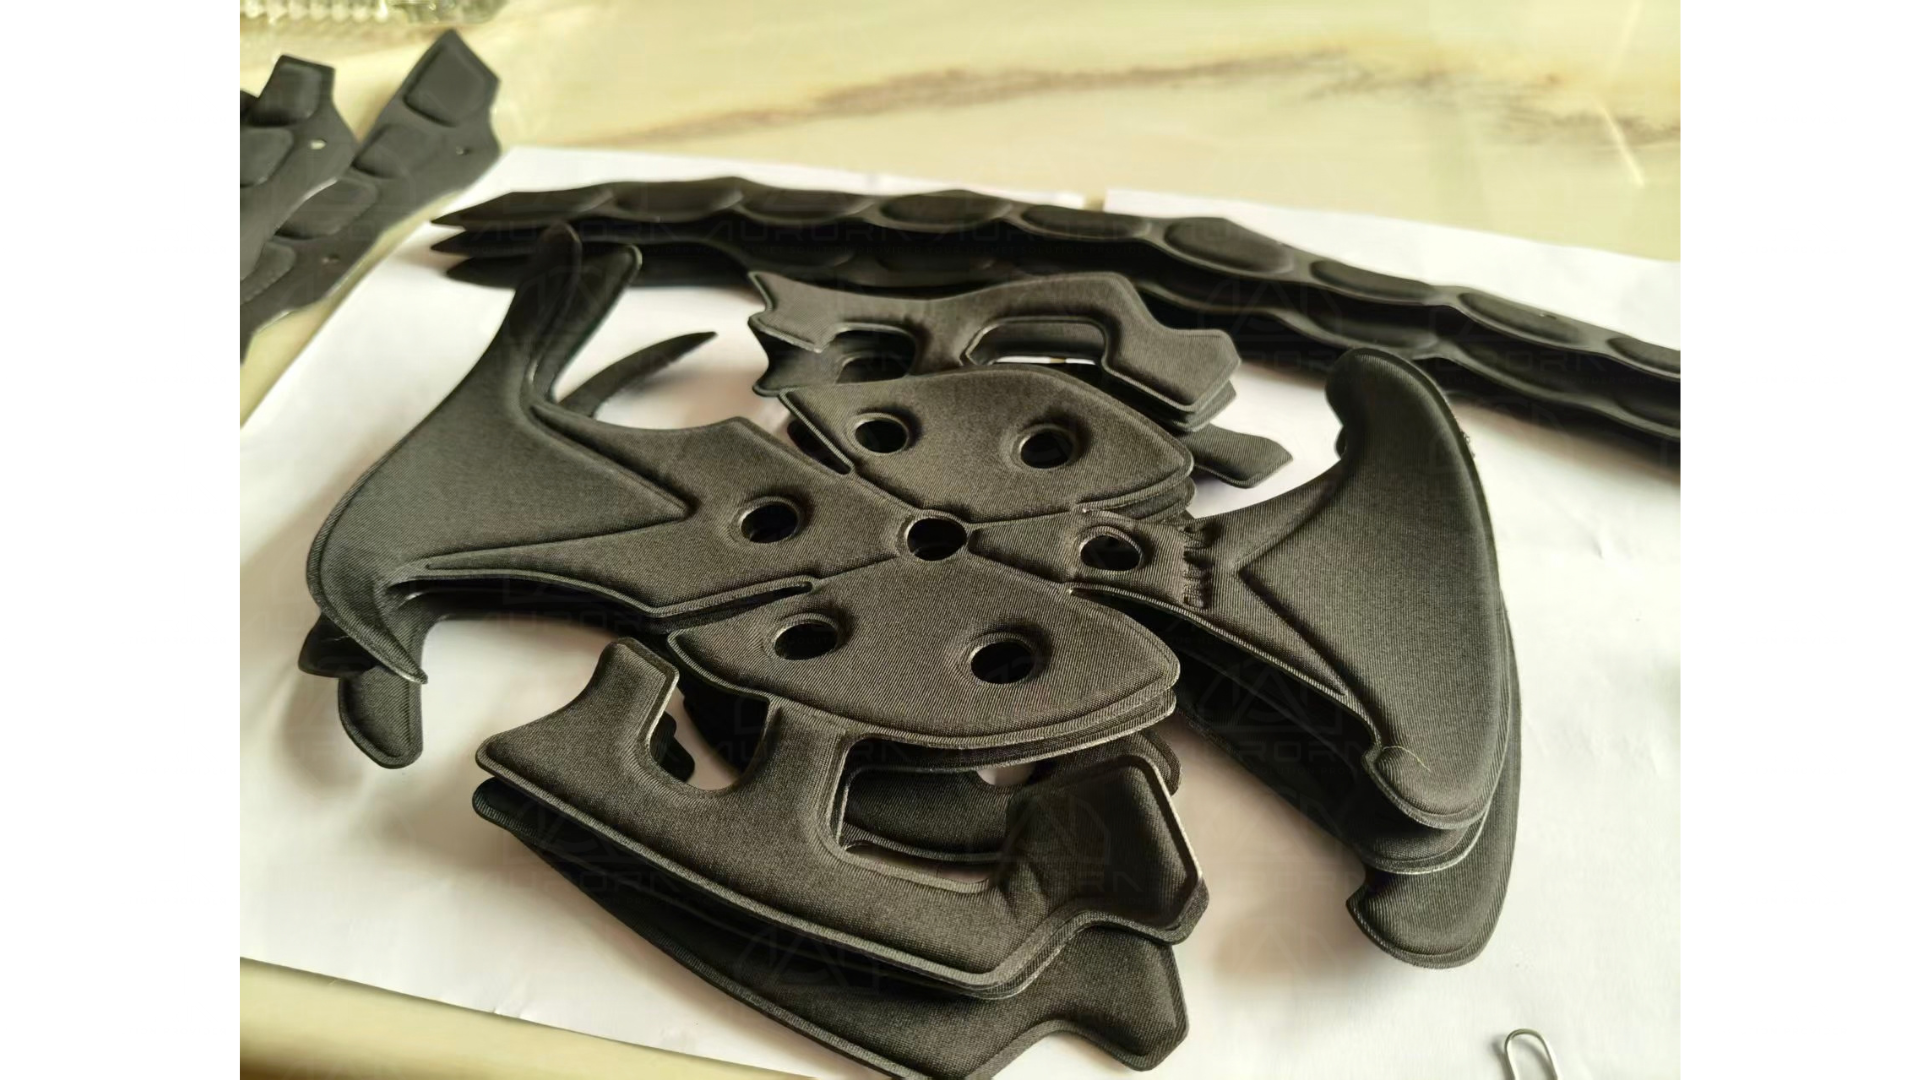
1. Improving the Fit of “Universal” Bump Caps

One of the biggest challenges with bump-cap inserts is fit.

A product described as “universal” still needs to accommodate different head shapes, head sizes and baseball-cap profiles. An insert that feels comfortable in one cap may feel too wide, too tall or too tight in another.

Aurora Sports can evaluate fit through:

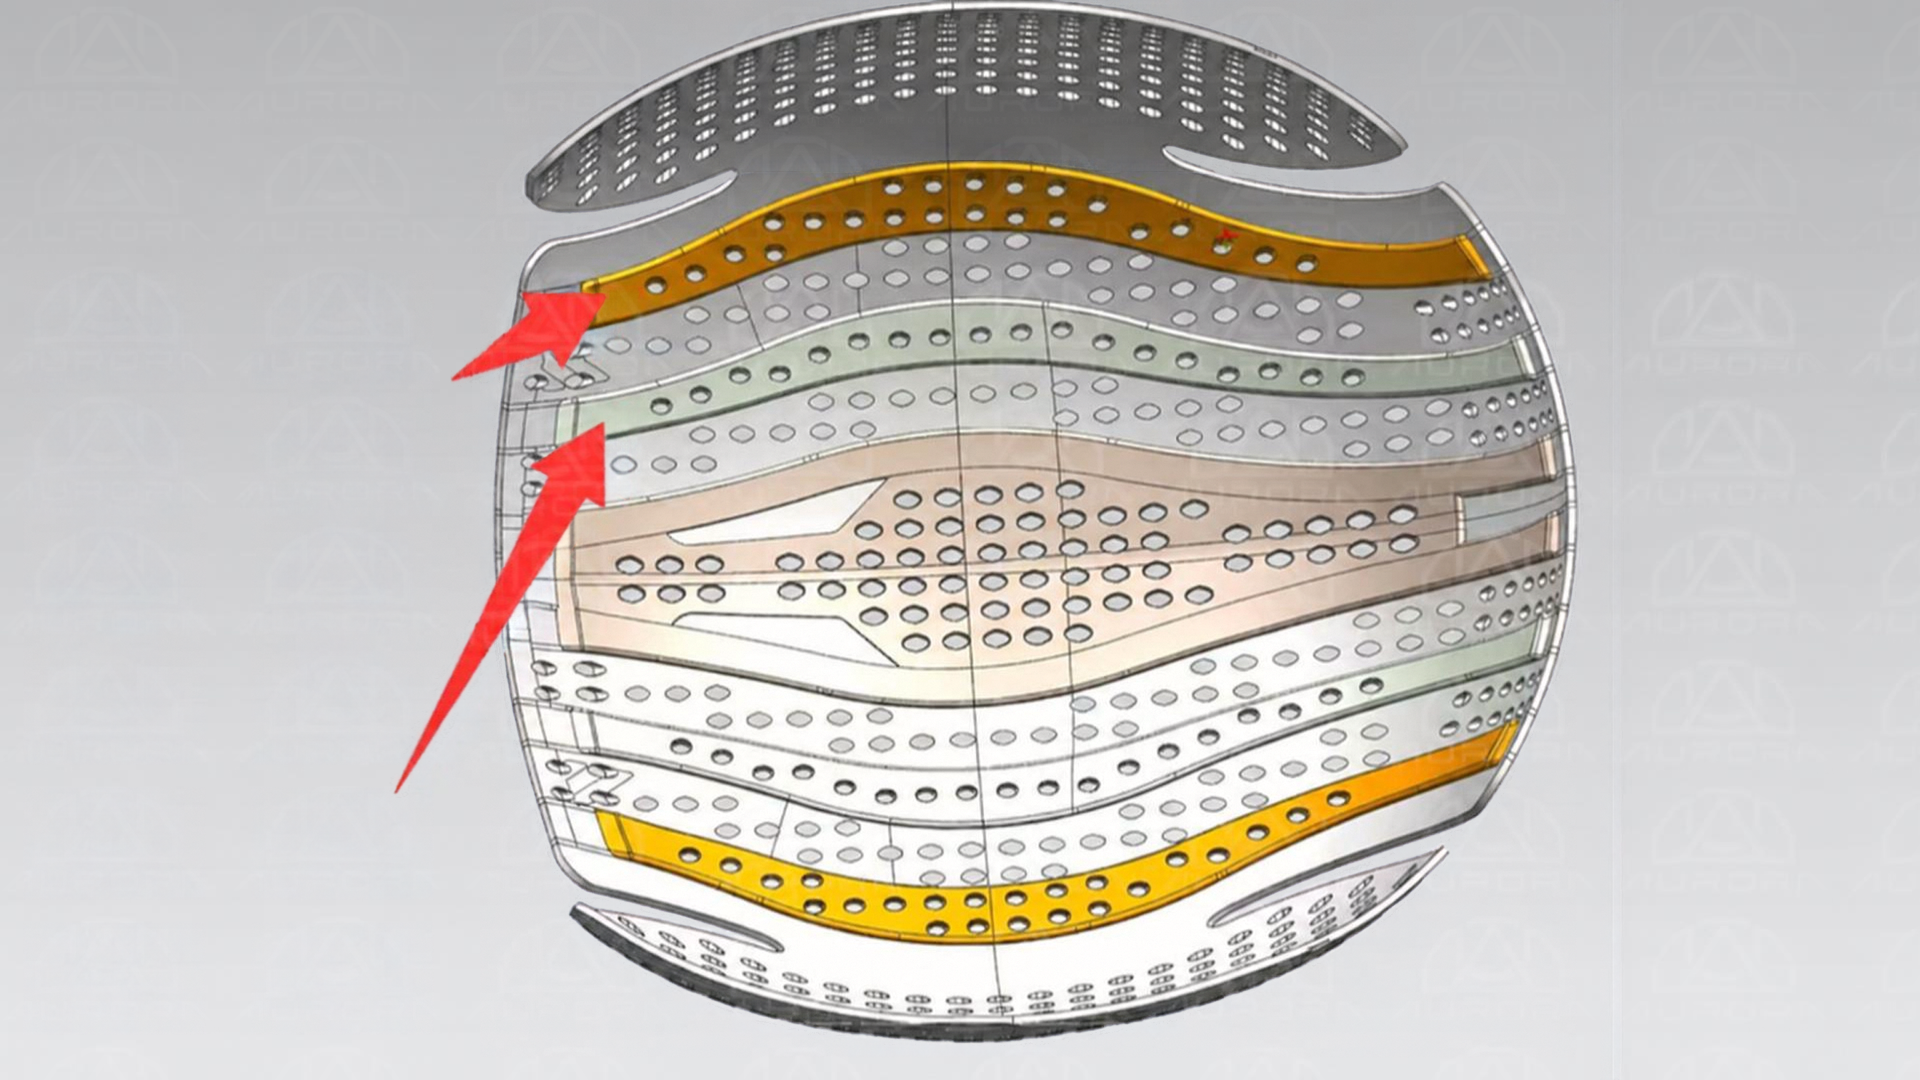
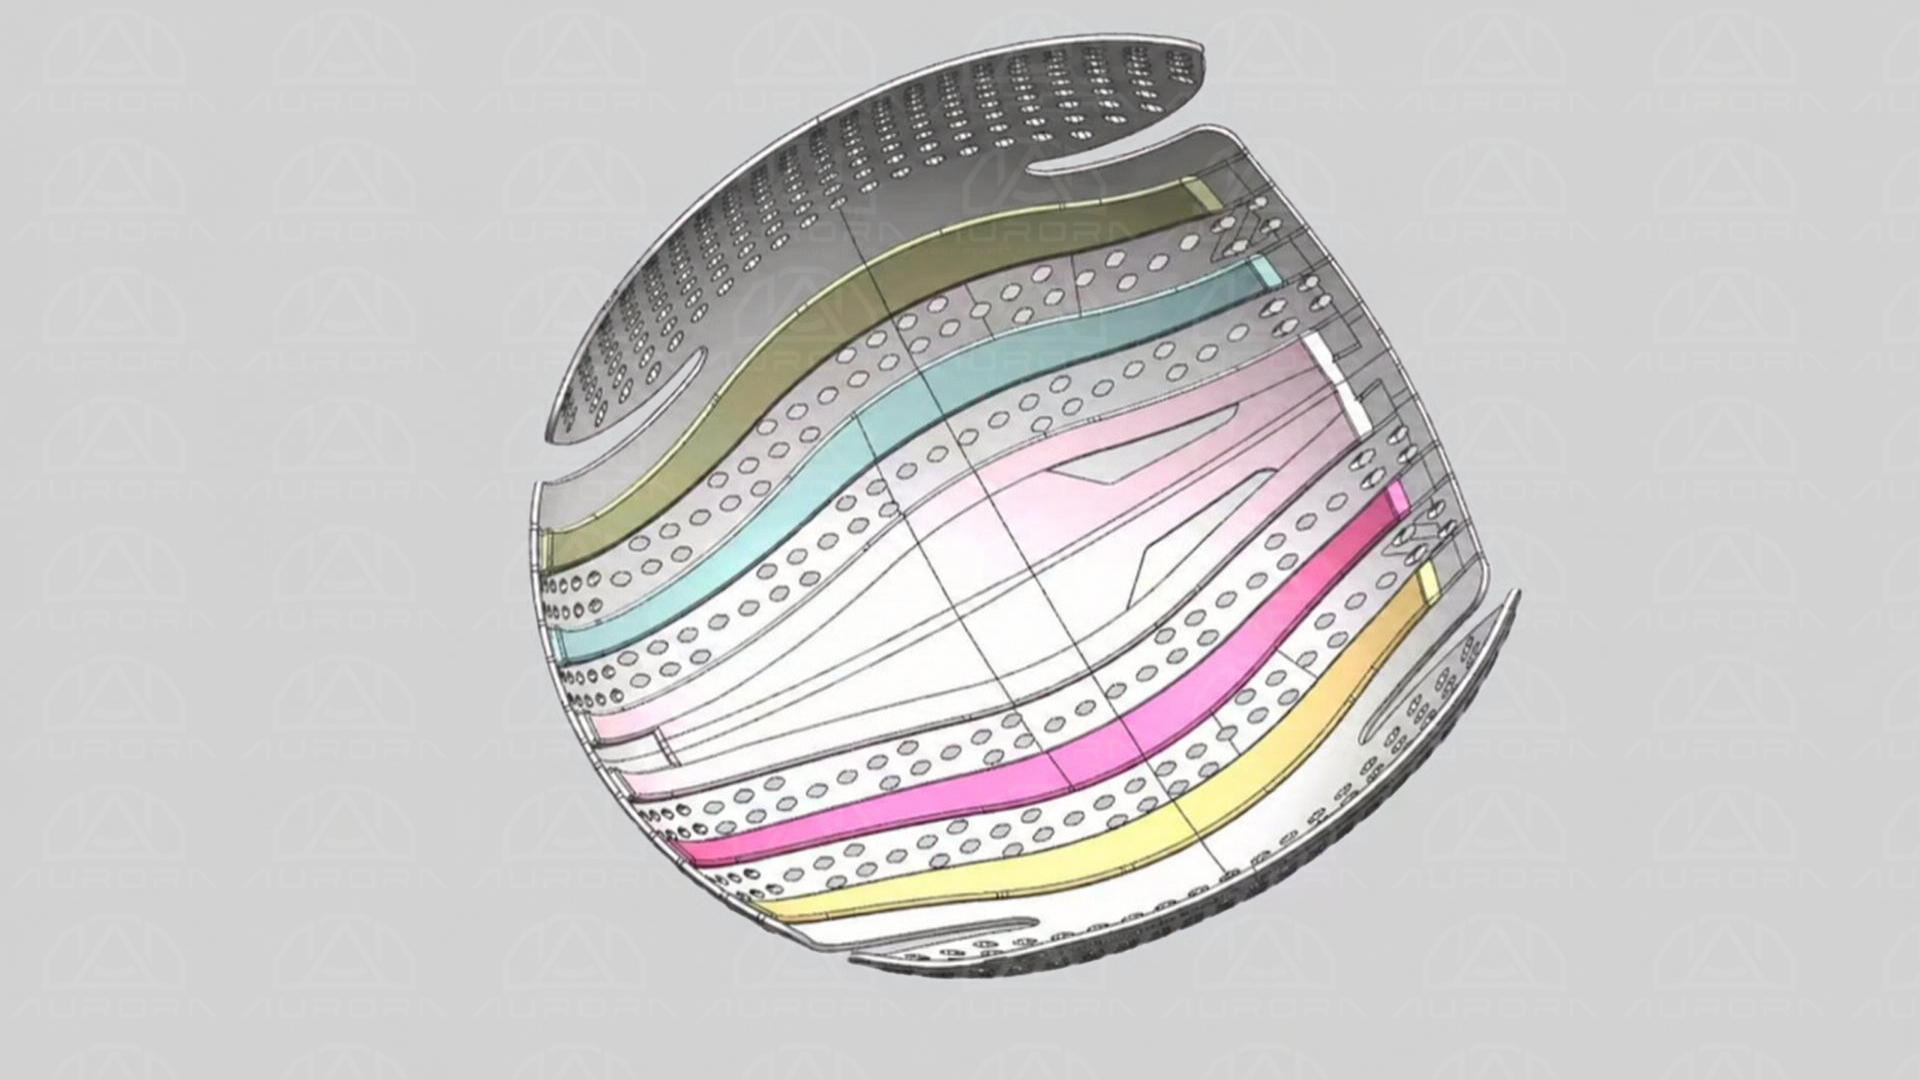
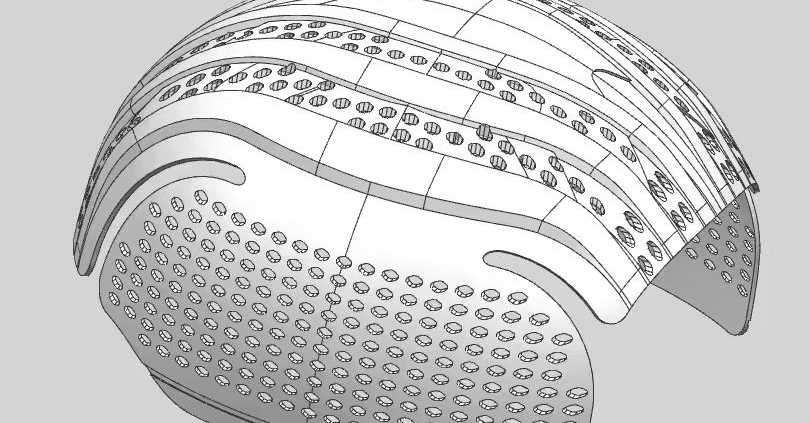
  • 3D modeling and industrial design

  • Prototype development

  • Head-form and cap-fit evaluations

  • Different shell geometries

  • Crown-height and internal-clearance studies

  • Wear trials using different head and cap profiles

Fit should not be evaluated by head circumference alone. Crown height, width, temple clearance and the internal space occupied by the protective insert can all affect comfort.

Rather than assuming one design will fit every person and every cap perfectly, we believe the better approach is to identify the variables that create poor fit and determine whether improved geometry, multiple sizes or clearer compatibility guidance can solve the problem.

2. Exploring a More Flexible TPU Insert

Many traditional bump-cap inserts use relatively rigid plastic.

Rigid materials provide structure, but they can also create pressure around the forehead, temples and sides of the head.

For future development, Aurora Sports is exploring the use of TPU as an alternative protective insert material.

TPU can be formulated with different levels of hardness, flexibility and resilience, creating opportunities to develop an insert that follows the shape of the head and cap more naturally.

However, simply changing the material does not automatically create a better product.

Material hardness, thickness, geometry, ventilation openings and manufacturing method must all work together. The final product must also be appropriately tested and validated for its intended use.

Our experience in In-mold decoration (IMD) or film insert molding (FIM) allows us to consider these variables as part of the complete product-development process rather than treating TPU as a simple material substitution.

3. Reducing Pressure Around the Forehead and Temples

A common comfort issue occurs when the lower edge of the bump-cap insert presses against the forehead or temples.

This problem may become more noticeable when the baseball cap is tightened.

Several design factors can influence pressure:

  • Edge geometry

  • Material thickness

  • Insert flexibility

  • Contact area

  • Head shape

  • Padding position

  • Cap adjustment

  • Internal clearance

Even a lightweight insert can become uncomfortable if pressure is concentrated in a small area.

Rounded transitions, controlled wall thickness and strategically positioned cushioning may help distribute pressure more evenly.

Longer wear trials are also important. A pressure point that feels acceptable during a five-minute fitting may become uncomfortable after several hours of work.

4. Creating a Lower-Profile Appearance

One of the reasons many workers prefer bump caps is that they look and feel closer to a normal baseball cap than a traditional industrial helmet.

That benefit can be reduced if the insert makes the cap appear oversized, excessively tall or unusually round.

Aurora Sports can study the relationship between protection, internal space and external appearance by evaluating:

  • Insert height

  • Crown geometry

  • Baseball-cap depth

  • Vent placement

  • Protective coverage

  • Internal component thickness

  • The way the textile cap sits over the insert

The objective is to use the available space efficiently while maintaining the intended coverage and performance of the product.

5. Improving Stability Without Making the Cap Too Tight

A bump-cap insert that moves excessively can be distracting and uncomfortable.

It may shift when the wearer bends down, climbs, looks upward or works in confined spaces.

Simply tightening the baseball cap may reduce movement, but it may also increase pressure around the forehead and temples.

For this reason, we believe the insert, cap and attachment system should be developed as one complete product.

Possible development areas include:

  • Insert geometry

  • Internal contact points

  • Cap construction

  • Hook-and-loop or nice chin strap attachment

  • Retention features

  • Padding placement

  • Head movement

  • Ease of removal for cleaning

  • Dial hat adjustor system

Aurora Sports produces attachment components and develops helmet padding in-house, allowing us to evaluate how the insert and textile components work together.

The goal is better stability without making the product unnecessarily tight or complicated.

6. Improving Ventilation as a Complete System

More ventilation holes do not automatically mean a cooler bump cap.

Actual airflow depends on the complete construction, including the insert, padding, textile cap, ventilation alignment, hair and the amount of space between the insert and the wearer’s head.

During development, we can evaluate:

  • Vent size and position

  • Internal air channels

  • Padding coverage

  • Cap-fabric breathability

  • Cap eyelet location

  • Clearance between the head and insert

  • Protective coverage

  • Material strength

Ventilation should be considered from the beginning of the design process, together with structure, comfort and manufacturability.

Physical prototypes and wear evaluations can then help determine whether the complete system actually feels cooler in realistic working conditions.

7. Developing Better Padding and Comfort Materials

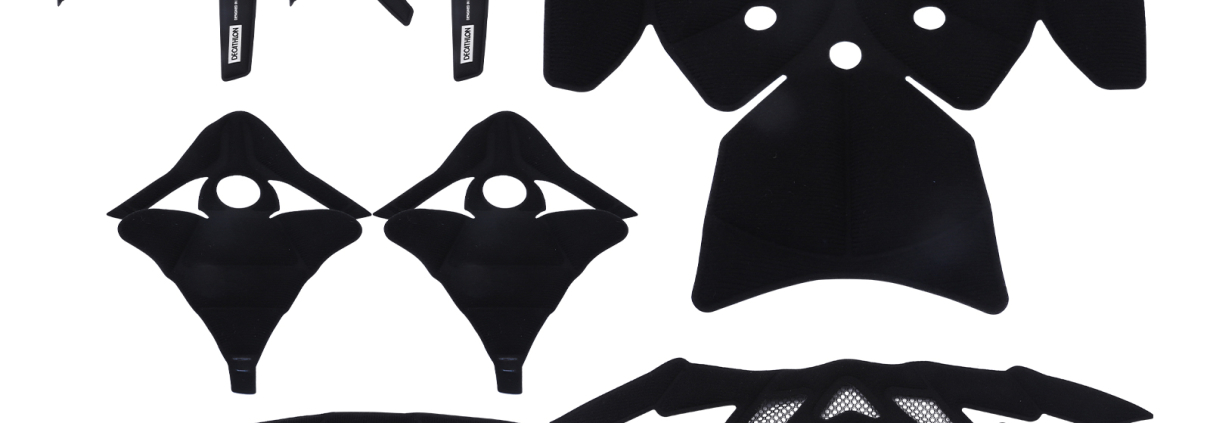
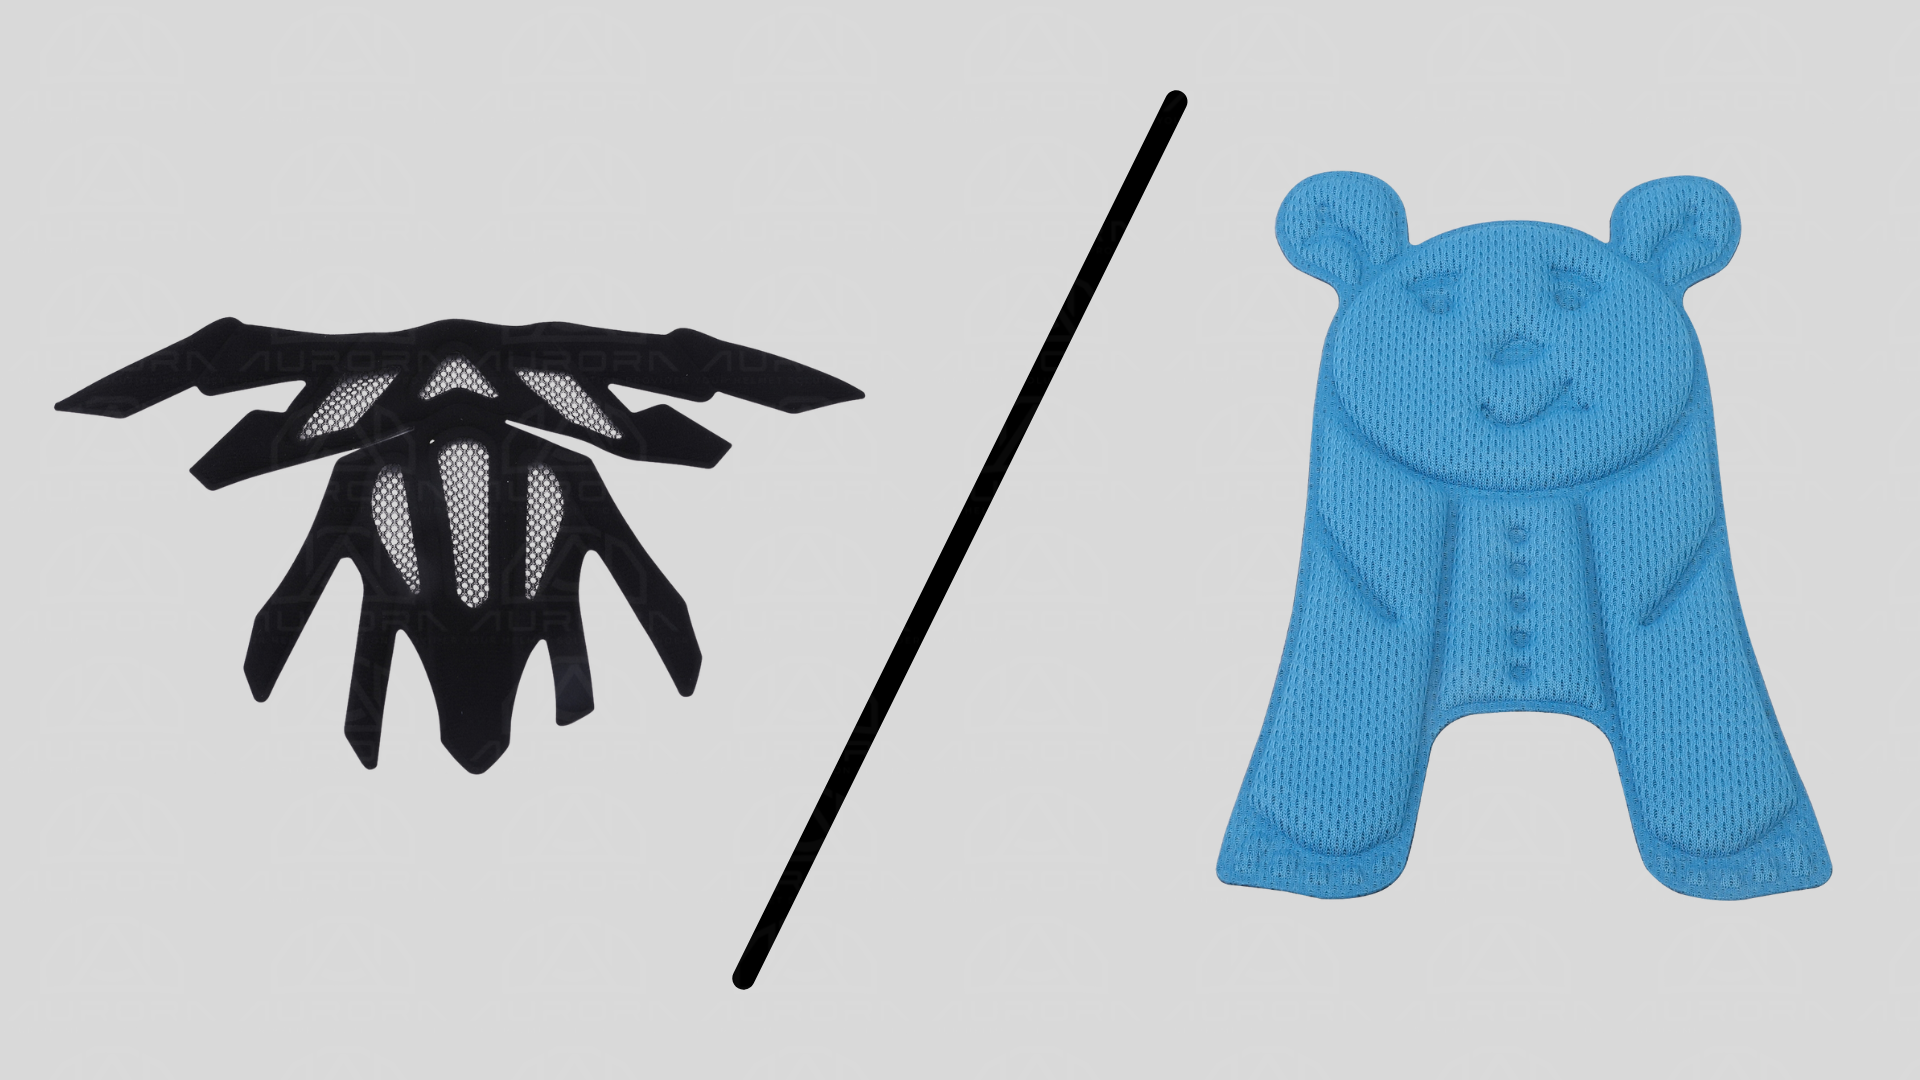
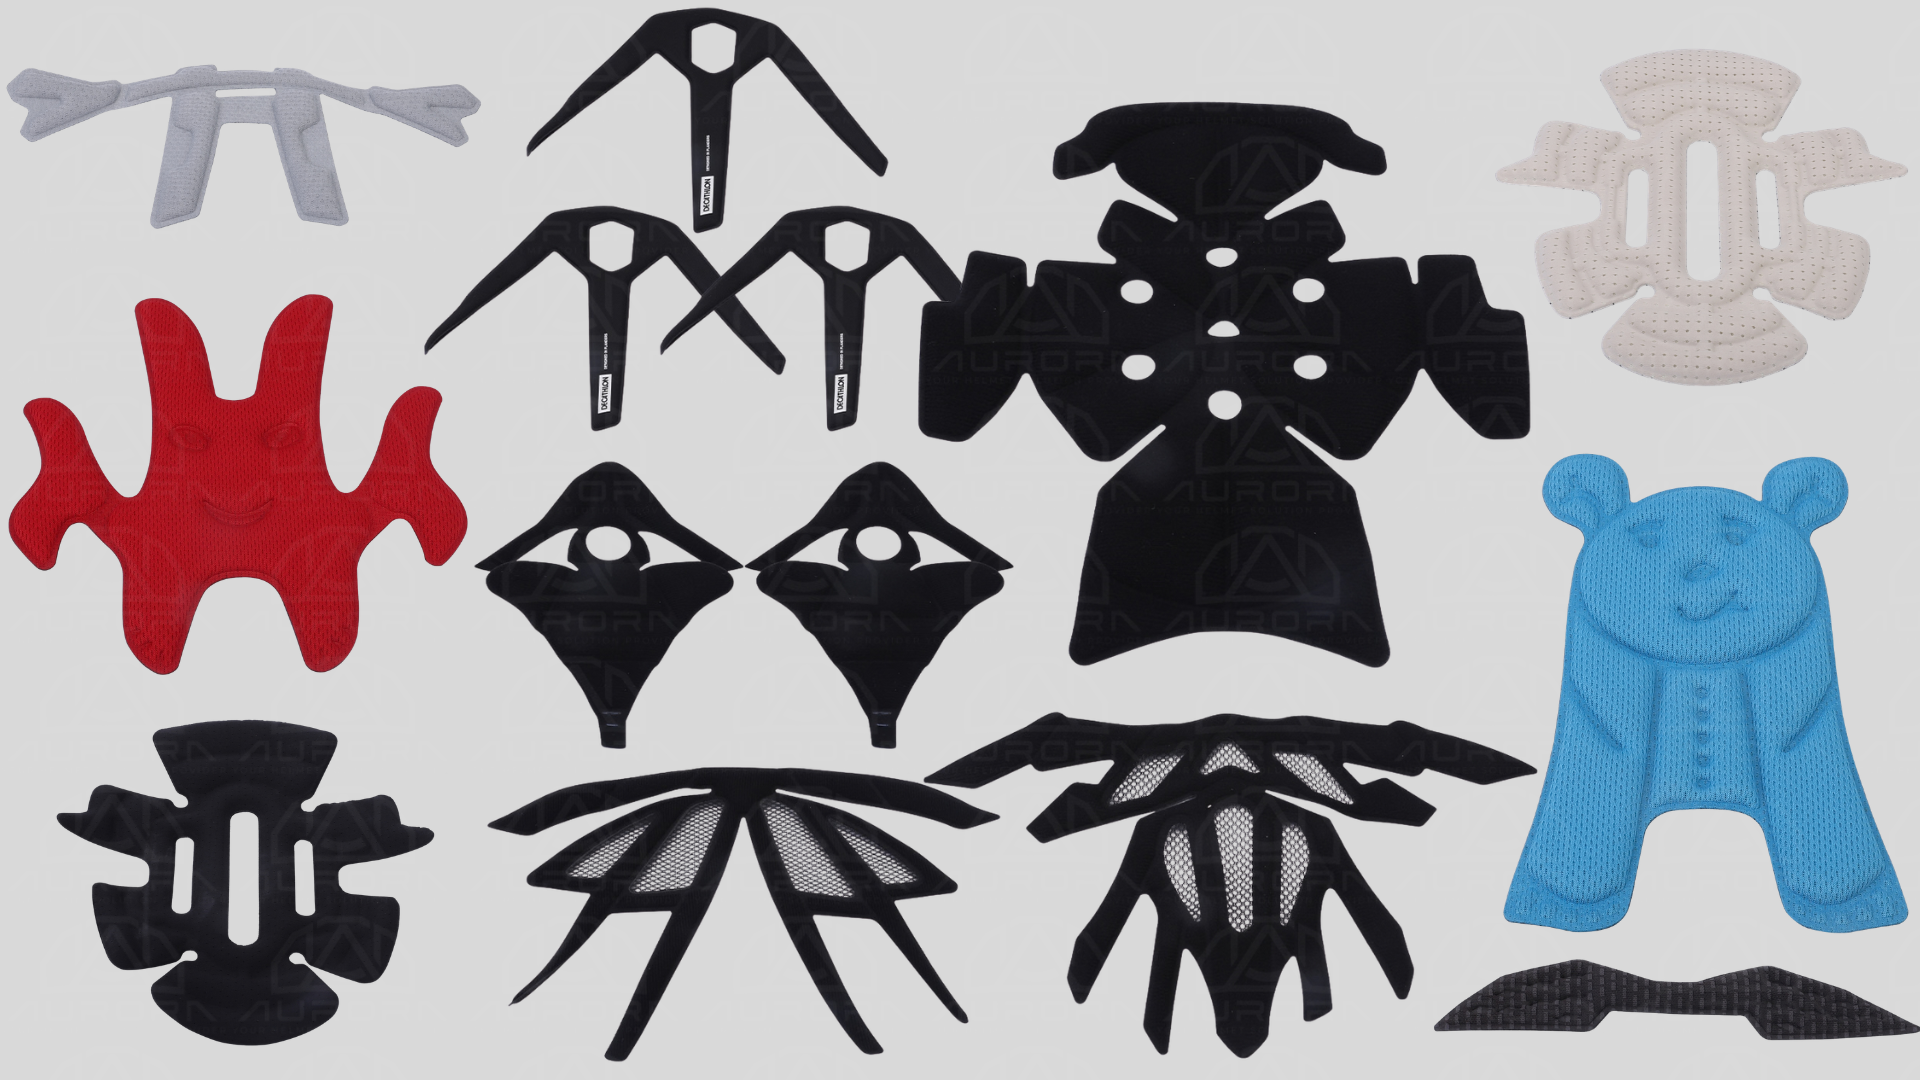
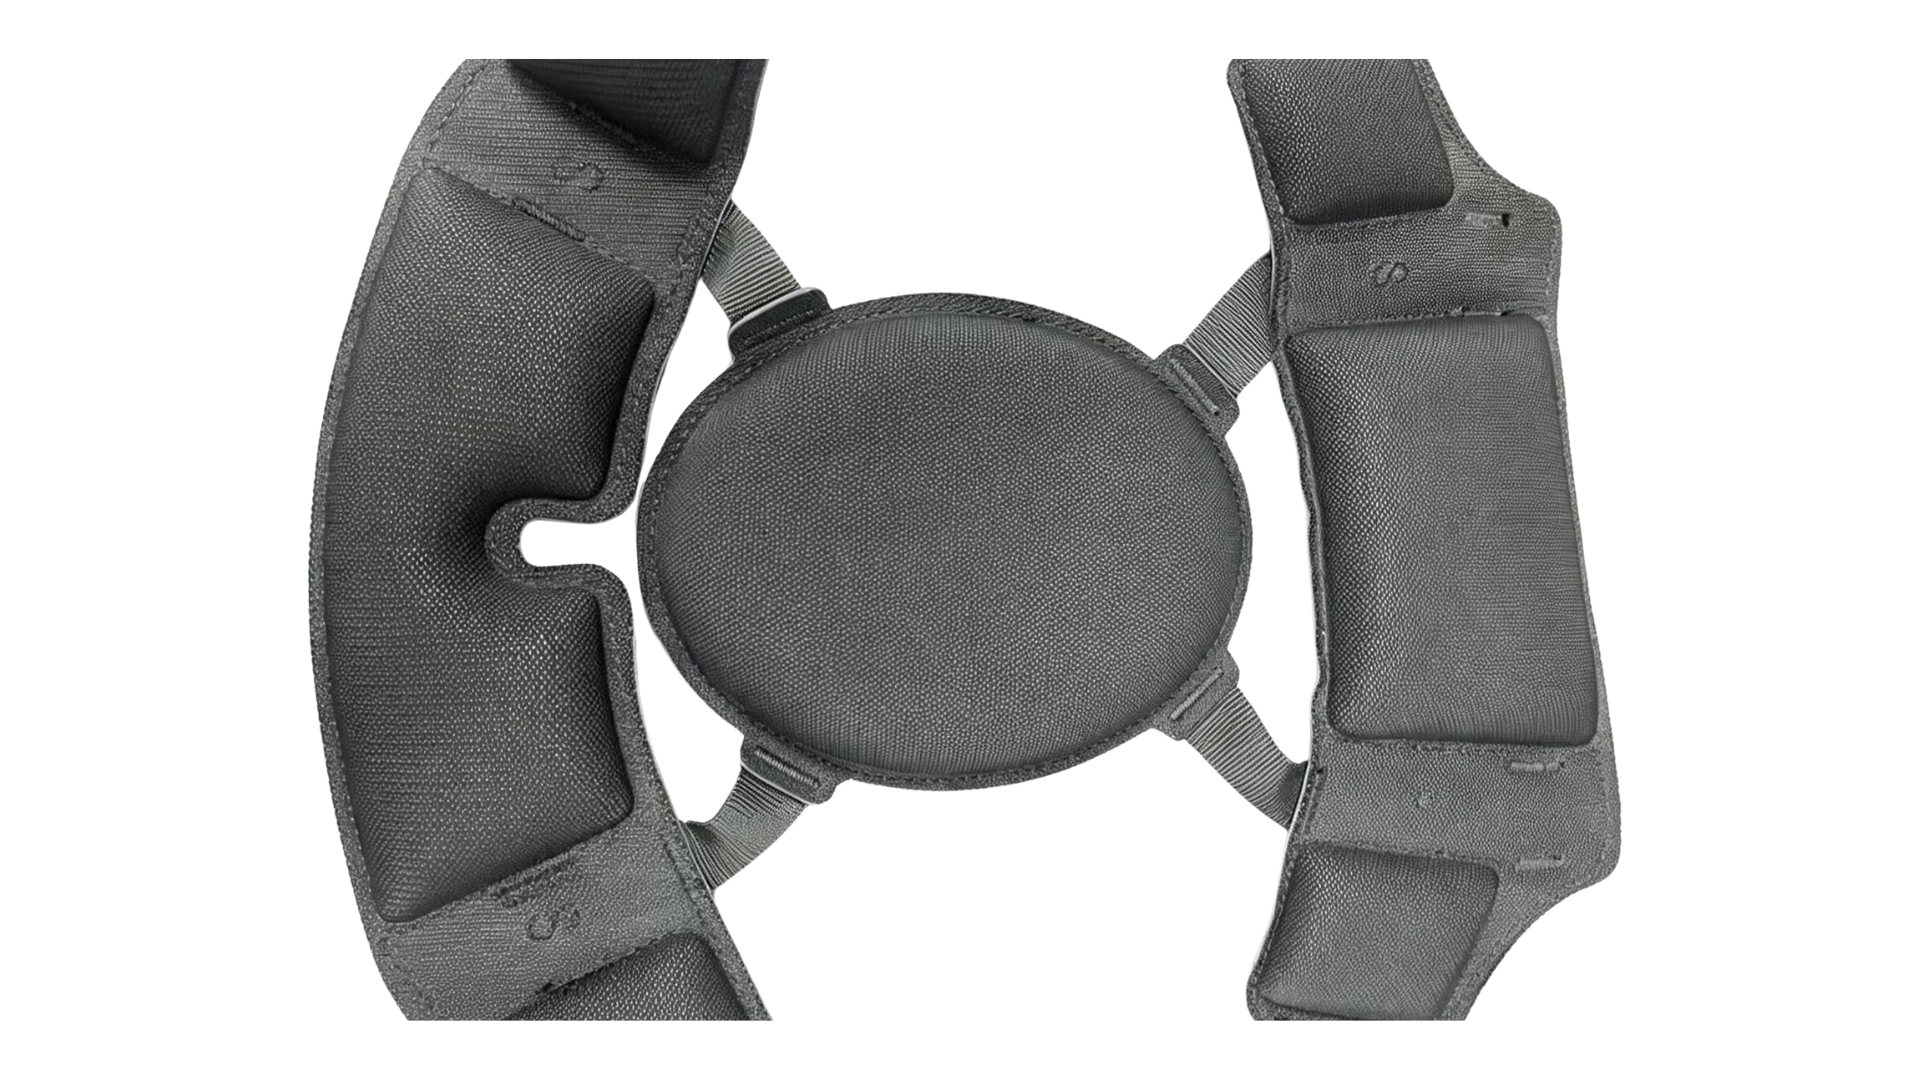
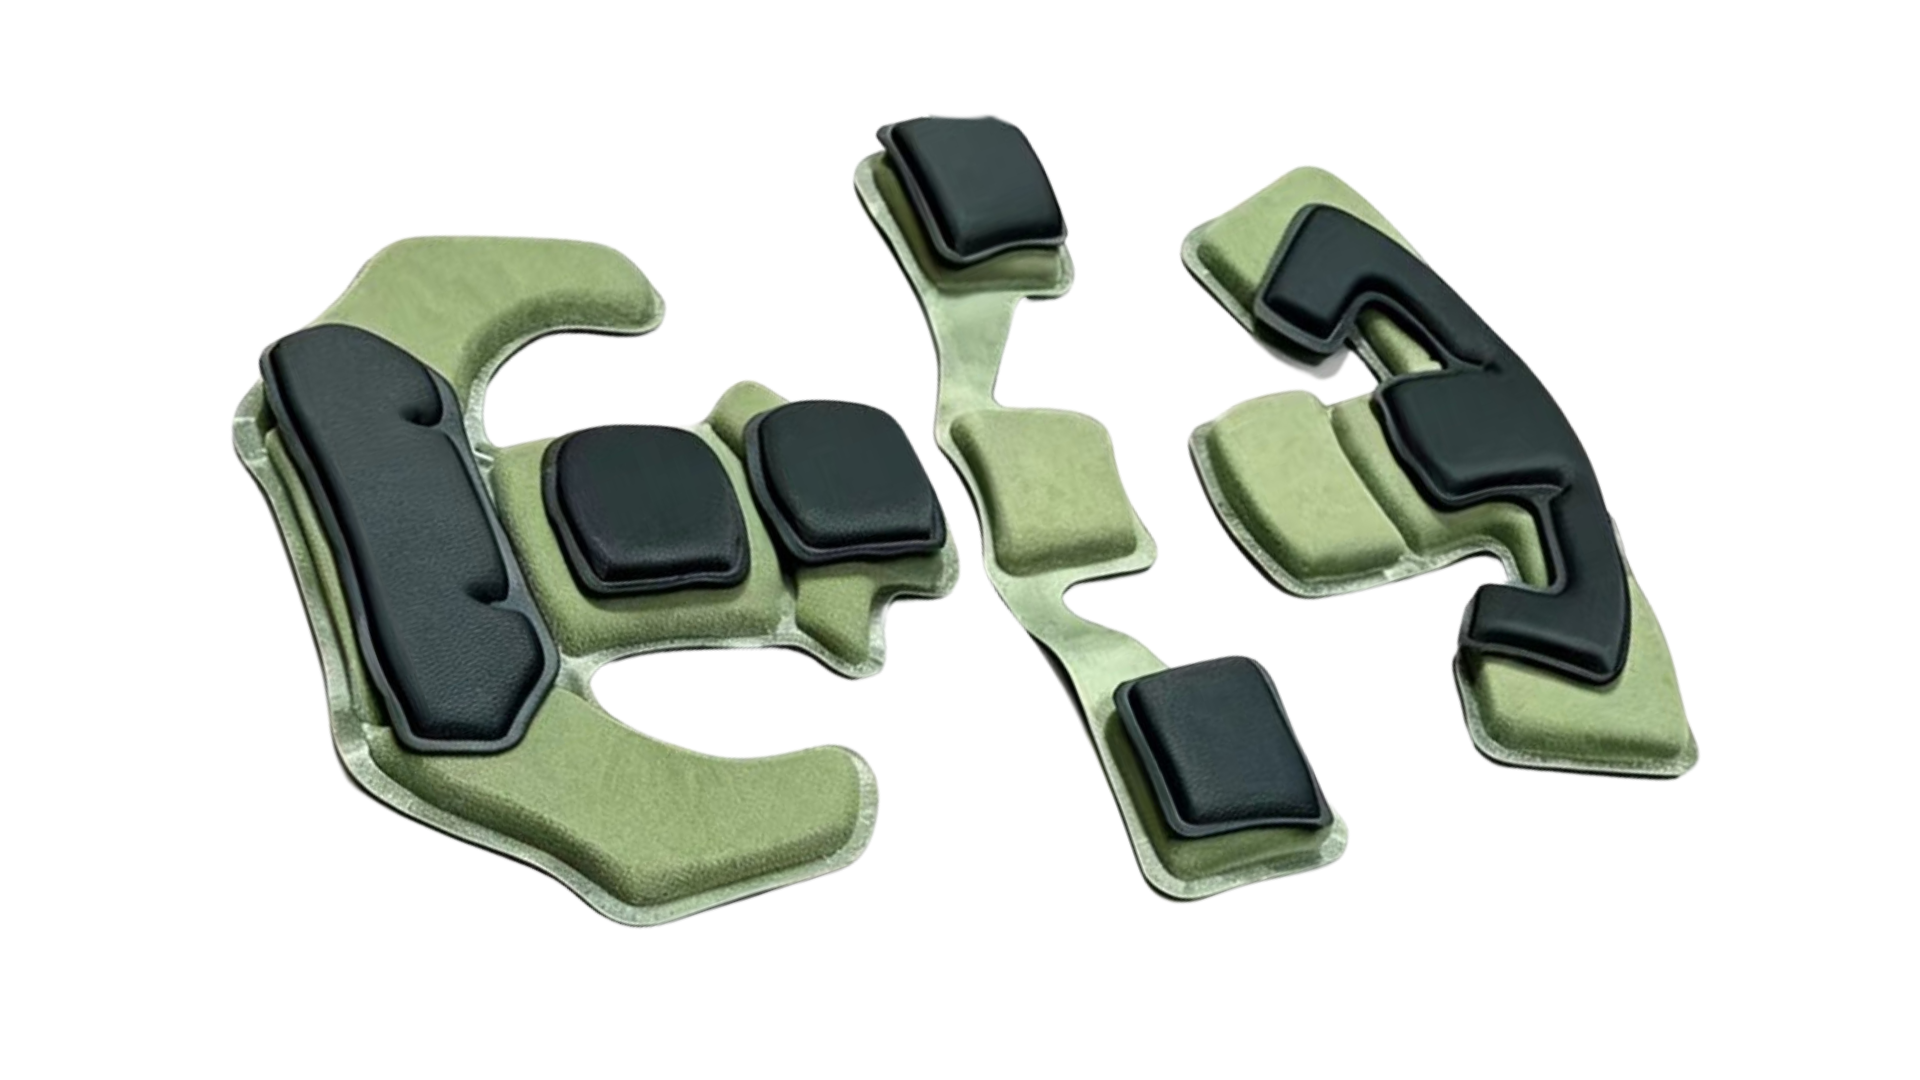
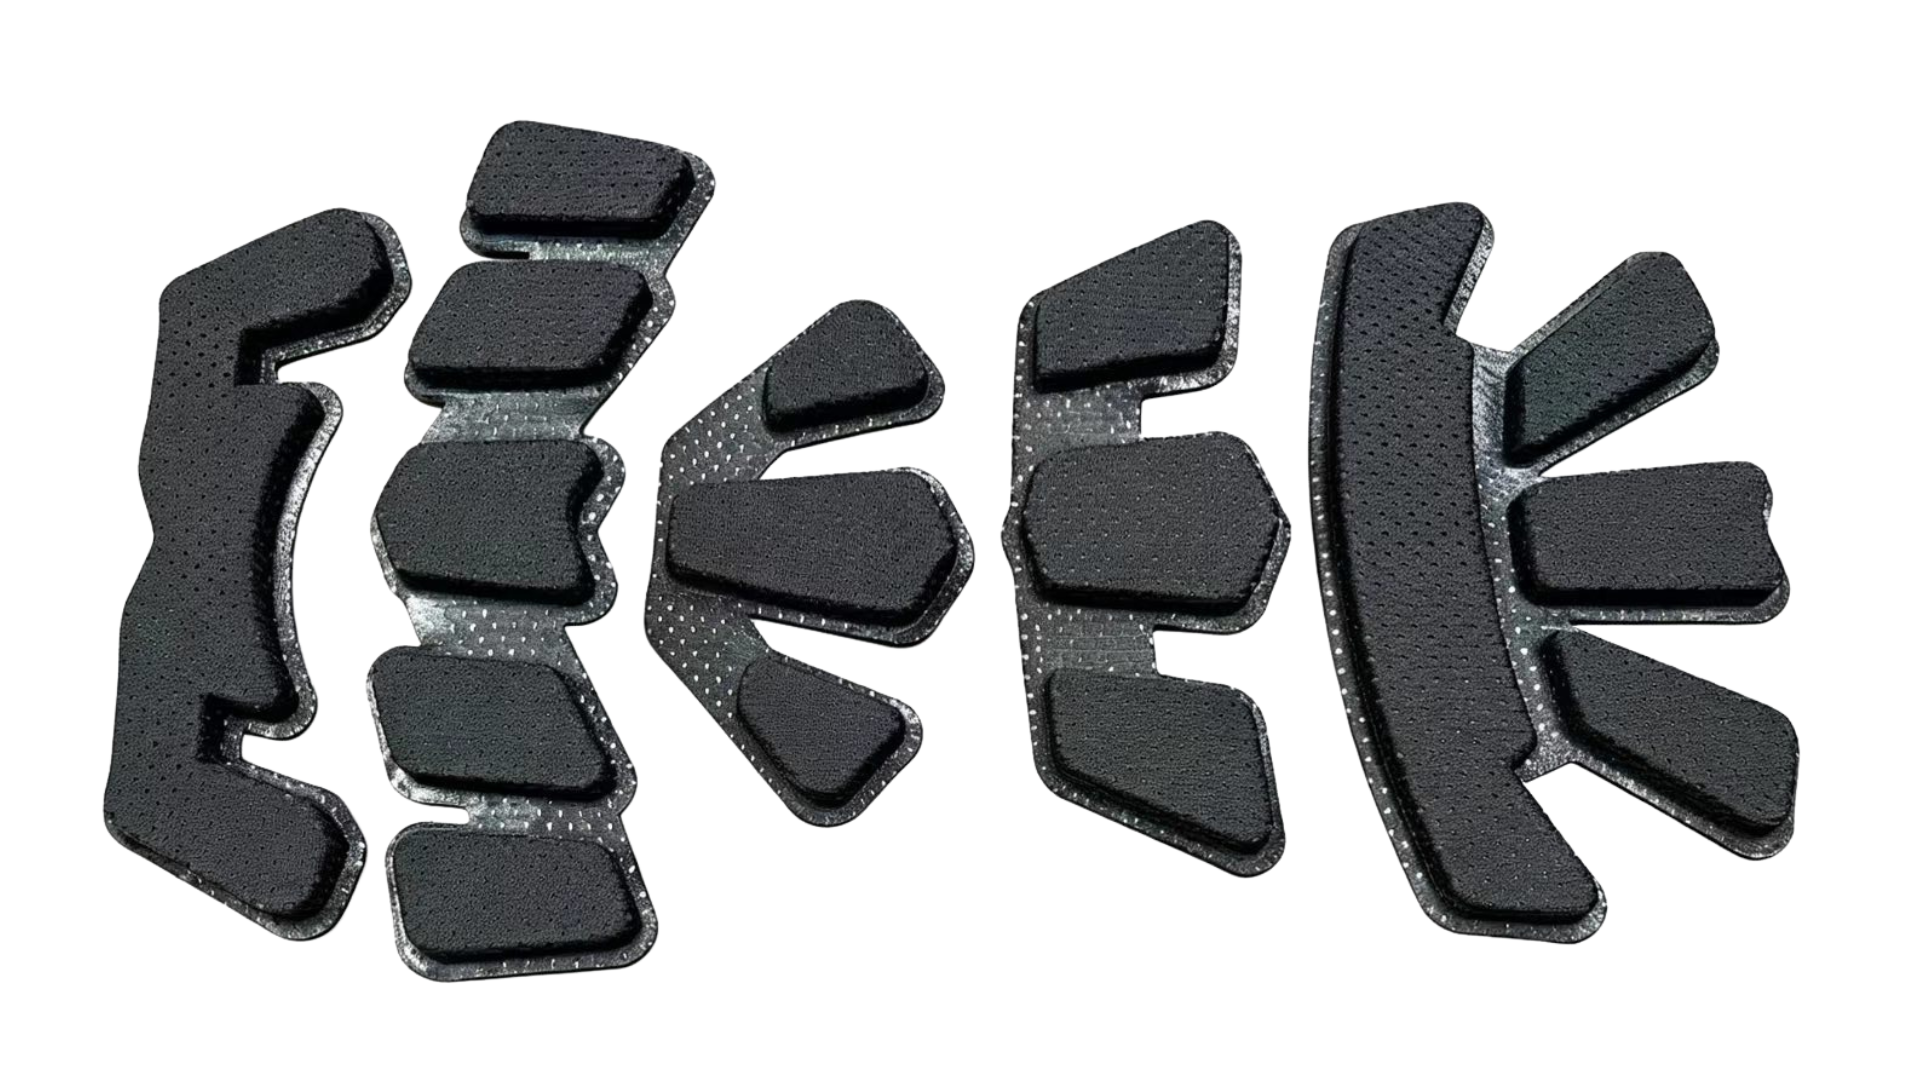
Padding can improve comfort by reducing direct contact between the insert and the head.

But poorly designed padding can also trap heat and sweat, block airflow and develop odor.

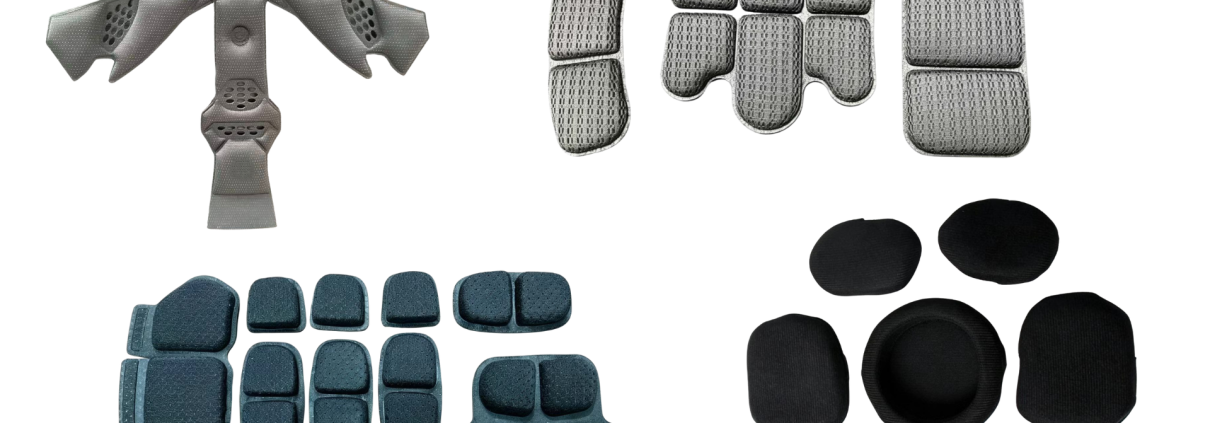
Aurora Sports has experience with fabric selection, foam combinations, liner construction and in-house sewing. Depending on the final product requirements, we can evaluate materials offering characteristics such as:

  • Breathability

  • Moisture management

  • Quick drying

  • Cooling

  • Antibacterial performance

  • Long-wear comfort

  • Washability

Padding thickness, construction and placement can also be developed around ventilation openings and known pressure areas.

The right combination depends on the intended market, performance requirements, comfort target and cost.

8. Making Cleaning and Replacement Easier

Bump caps used throughout a physical workday are naturally exposed to sweat, dust, oil and frequent handling.

If comfort pads are difficult to remove, wash or dry, hygiene and odor can quickly become problems.

Depending on the final design, Aurora Sports can evaluate whether comfort components should be:

  • Removable

  • Washable

  • Replaceable

  • Quick-drying

  • Easy to reinstall

  • Available separately as replacement parts

The attachment method also needs to keep the padding secure during use while still allowing convenient maintenance.

Clear care instructions can further help users understand how to clean, dry and replace these components.

9. Reducing the Need for Difficult Trimming

Some bump-cap inserts use a trim-to-fit concept.

Although this can provide flexibility, it also creates uncertainty for the customer. Users may cut too much material, create uneven edges or wonder whether modifying the insert has affected its intended performance.

A better solution may be to reduce the need for trimming through:

  • Improved sizing

  • Better shell geometry

  • Clearer cap-compatibility guidance

If adjustment is still required, the design can incorporate features such as:

  • Clearly marked cutting guides

  • Defined adjustment zones

  • Symmetrical reference points

  • Simple fitting instructions

  • Comfortable finished edges

  • Clear warnings identifying areas that must not be modified

Any trim-to-fit feature should be reviewed carefully during development and testing. Users should never have to guess which areas of a protective product can be safely modified.

10. Providing Clearer Fit and Compatibility Information

Sometimes the problem begins before the product is even worn.

Terms such as “universal fit” can create expectations that may not reflect every combination of head shape, head size and baseball-cap construction.

Better product information can help.

Aurora Sports can develop clear guidance covering:

  • Intended head-size range

  • Compatible cap profiles

  • Minimum crown depth

  • Fitting and installation

  • Padding removal

  • Cleaning and maintenance

  • Replacement components

  • Intended use

  • Protective limitations

This information can be communicated through product packaging, instruction manuals, websites, technical diagrams and fitting videos.

Clear information makes the product easier for workers to use, easier for employers to issue and easier for distributors to recommend.

11. Clearly Explaining Bump Caps vs. Industrial Safety Helmets

One of the most important aspects of bump-cap development is communicating what the product is—and what it is not.

A bump cap is not a replacement for a hard hat or industrial safety helmet.

Bump caps are generally intended for minor worker-generated contact with stationary objects. They should not be selected for hazards involving falling or flying objects, electrical exposure or other conditions requiring certified industrial head protection appropriate to the hazard.

For this reason, product instructions and marketing should clearly communicate:

  • Intended use

  • Appropriate working environments

  • Limitations of protection

  • Differences from industrial safety helmets

  • Testing or standards applicable to the finished product

Most importantly, no certification or performance claim should be made until the final materials, construction and complete product configuration have been properly evaluated and tested.

From User Feedback to Product Development

Aurora Sports supports the complete helmet-development process, including:

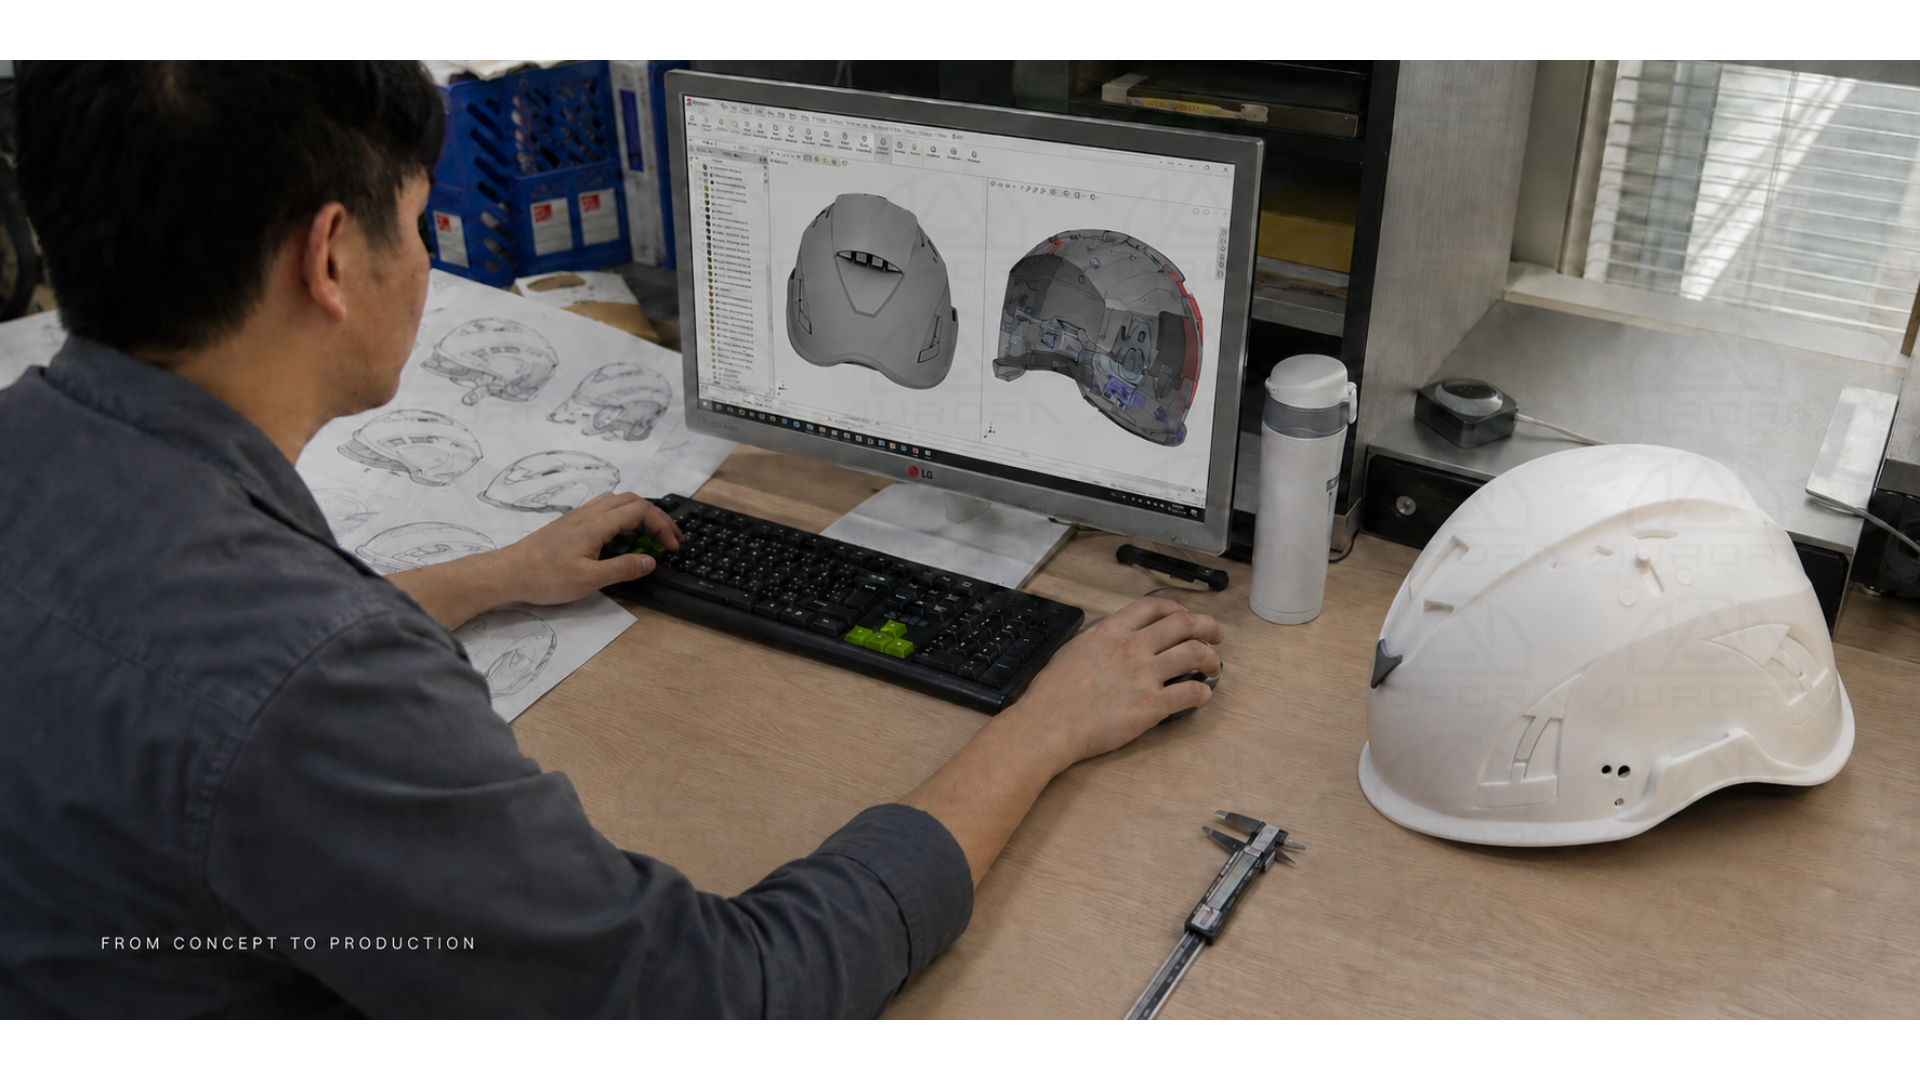
Industrial Design → Engineering → Material Evaluation → Prototyping → Tooling → Injection Molding → Textile Development → Sewing → Assembly → Testing Support → Production Validation → Quality Control

For bump-cap projects, this allows us to develop the insert, textile cap, padding and attachment system as an integrated product rather than treating them as unrelated components.

A typical development process may include:

User Pain-Point Review → Product Requirements → Material Evaluation → Industrial Design → Prototyping → Fit & Wear Evaluation → Tooling → Testing → Production Validation → Quality Control

The goal is not to claim that every comfort or fit issue can be eliminated.

Head shapes, working environments and individual preferences will always vary.

The objective is to identify common problems early, evaluate practical improvements and avoid carrying preventable issues into mass production.

Better Bump Caps Start by Listening

A bump cap may appear to be a simple product, but its performance and comfort depend on many small details.

Fit affects pressure. Pressure affects comfort. Padding affects airflow. Attachment affects stability. Materials affect flexibility, weight and maintenance.

At Aurora Sports, we are bringing our helmet-development and manufacturing experience into the bump-cap category while focusing on what users, employers, safety brands and distributors actually need.

That includes exploring:

  • More flexible TPU inserts

  • Improved comfort padding

  • Better ventilation

  • Greater stability

  • Easier cleaning and maintenance

  • Better fit and compatibility

  • Clearer product information

But every improvement must ultimately be supported by engineering, prototyping, evaluation and appropriate testing.

Because better head protection does not begin with mass production.

It begins with understanding the problem, engineering the solution and testing the result.

Develop a Custom Bump Cap With Aurora Sports

Are you a PPE brand, safety distributor, industrial supplier or company developing a new bump-cap product?

Aurora Sports provides OEM and ODM support for custom bump-cap development.

Tell us about your:

  • Target market

  • Intended working environment

  • Material requirements

  • Cap style

  • Comfort requirements

  • Estimated order quantity

  • Testing requirements

Our team can help evaluate the most practical development path for your project.

Contact Aurora Sports to discuss your next bump-cap project.

Contact Us:

📱 +1 (657) 762-7550

📧 sales@aurorasport.com

What Are Bump Cap Users Really Struggling With? 10 Pain Points We Found

At Aurora Sports, head protection has always been at the center of what we do.

As a helmet manufacturer, we spend a great deal of time thinking about impact protection, fit, comfort, ventilation, materials and—perhaps most importantly—whether people will actually want to wear the product throughout their workday.

As we prepare to add bump caps as a new product category, we wanted to start in the same place we believe good product development should always start:

with the people already using them.

We studied customer feedback and reviews of popular bump caps and bump-cap inserts to understand what users like, what frustrates them and where existing products still leave room for improvement.

Some patterns appeared again and again.

Wearers want something lightweight and discreet. They like the idea of getting basic head protection without looking as though they are wearing a traditional industrial helmet.

But that simplicity introduces its own challenges.

Fit, heat, pressure, movement, cleaning and product positioning can all become problems.

And these problems do not affect only the person wearing the bump cap.

They also affect employers purchasing products for their teams and dealers trying to recommend the right product to their customers.

Here are some of the most important pain points we found.

1. “Universal Fit” Does Not Always Feel Universal

One of the most common challenges is fit.

A bump-cap insert may be marketed as universal, but people have very different head shapes and sizes. Baseball caps also vary considerably in crown height, width and construction.

An insert that fits comfortably inside one cap may feel too wide, too tall or too tight inside another.

For the wearer, this can mean:

  • Pressure around the forehead

  • Tightness at the temples

  • Difficulty adjusting the baseball cap

  • An insert that sits too high

  • Discomfort after several hours of wear

This becomes an even bigger issue for employers.

If a company purchases one model for 100 employees, a “one-size” solution may work very well for some workers and poorly for others.

For dealers, that can turn into returns, complaints and questions about whether the customer purchased the wrong product.

A successful bump-cap design therefore needs to consider fit adaptability, not simply head circumference.

2. Hard Shell Edges Can Create Pressure Points

The protective shell needs enough structure to perform its intended function.

But rigid shell construction can create another problem: concentrated pressure.

Users sometimes report feeling the shell around the forehead, temples, sides or rear of the head—particularly after the cap has been worn for an extended period.

The problem can become worse when the wearer tightens the baseball cap to stop the insert from moving.

This creates a difficult design balance.

The shell needs structure, but the wearer should not constantly feel that structure pressing against the head.

For product developers, areas such as shell geometry, material flexibility, edge design and padding placement can have a major influence on wearing comfort.

3. Heat and Sweat Build Up Faster Than Expected

One of the strongest recurring themes in bump-cap feedback is heat.

A worker may already be wearing the cap in a warm warehouse, workshop, outdoor jobsite or physically demanding environment.

Adding a protective insert creates another layer around the head.

Even inserts with ventilation holes can still trap heat because airflow depends on more than the number of openings in the shell.

The complete system includes:

  • The protective shell

  • Internal padding

  • The wearer’s hair

  • Baseball-cap fabric

  • Cap ventilation holes

  • Space between the head and shell

If these components do not work together, the cap can become hot, sweaty and uncomfortable.

That matters because comfort is directly related to wearing behavior.

A protective product provides little practical benefit if workers regularly remove it because they are too hot.

4. The Insert Can Make a Normal Baseball Cap Look Bulky

The low-profile appearance of a bump cap is one of its biggest attractions.

Many users want some additional head protection without looking as though they are wearing traditional industrial headgear.

But adding an insert inside a baseball cap takes up space.

Depending on the shell geometry and the cap being used, the result may look:

  • Too tall

  • Too round

  • Overfilled

  • Wider than a normal cap

  • Raised noticeably above the head

This creates an interesting product-development challenge.

A bump cap should provide appropriate coverage while still preserving the familiar appearance that attracted the customer to the product in the first place.

For dealers, appearance is also important because customers often compare bump caps visually before they ever compare technical details.

5. The Insert May Move During Work

Another problem appears when the wearer starts moving.

A bump-cap insert that feels fine while standing still may shift when someone:

  • Bends forward

  • Looks upward

  • Climbs

  • Turns quickly

  • Crawls into a confined space

  • Performs repetitive physical work

Many inserts depend heavily on the baseball cap itself to hold them in position.

If the cap is too loose, the insert may move.

If the wearer tightens the cap to solve the problem, pressure and discomfort may increase.

So the real challenge is not simply making an insert tighter.

It is finding a way to create better stability without creating excessive pressure on the wearer’s head.

6. Trim-to-Fit Sounds Simple—Until the Customer Has to Cut It

Some universal bump-cap inserts allow the wearer to trim part of the shell to accommodate different cap depths.

From a product-design perspective, that adds flexibility.

From a customer’s perspective, however, it can also add uncertainty.

The user may wonder:

Where should I cut?

How much should I remove?

Do both sides need to be equal?

What happens if I cut too much?

Will the trimmed edge still be comfortable?

Could modification affect how the product is intended to perform?

For an individual consumer, making a mistake can mean ruining one insert.

For an employer fitting a large workforce, the issue becomes much bigger.

For a dealer, complicated fitting instructions may mean additional customer service, installation questions and possible returns.

Adaptability is valuable—but the adjustment process should be intuitive and repeatable.

7. Padding Helps Comfort—but Creates Its Own Problems

Padding is usually added to improve comfort and reduce direct shell contact.

But padding introduces additional questions.

How much padding is enough?

Where should it be placed?

Does it block ventilation?

Does it absorb sweat?

Can it be removed?

Can it be washed?

How quickly does it dry?

Customer feedback shows why these details matter.

A soft pad can feel comfortable when new, but after repeated use it may absorb perspiration, retain moisture and eventually develop odor.

For workers wearing the same bump cap every day, hygiene becomes an important part of the overall ownership experience.

For employers and dealers, replaceable or washable components can also make a product easier to maintain over its usable life.

8. Workers Want Protection Without Feeling Like They Are Wearing PPE

This is one of the most interesting things about the bump-cap category.

Many customers like bump caps precisely because they do not look like traditional industrial head protection.

The familiar baseball-cap appearance can make the product feel lighter, less intrusive and more natural to wear.

That creates a design opportunity—but also a responsibility.

A bump cap should look approachable without creating confusion about what level of protection it is intended to provide.

This distinction is especially important for distributors and employers.

If the product looks too much like an ordinary baseball cap, the wearer may misunderstand its protective limitations.

If it looks too much like industrial headgear, one of the main reasons customers chose a bump cap may disappear.

Good product design therefore needs to balance appearance, protection and clear communication.

9. A Bump Cap Is Not a Hard Hat

This is one of the most important issues in the entire category.

Bump caps and industrial safety helmets are designed for different working conditions.

A bump cap is generally intended for situations where the wearer may bump their head against stationary objects—for example shelving, low ceilings, equipment or overhead structures.

It should not be confused with head protection selected for hazards involving falling or flying objects or other conditions requiring an appropriate industrial safety helmet.

For manufacturers, dealers and employers, communicating this difference clearly is critical.

A product listing should not simply say what the product can do.

It should also make clear what the product is not designed to do.

Clear positioning protects the end user and helps dealers recommend the correct type of head protection for the application.

10. Dealers Have Pain Points Too

When discussing bump-cap design, it is easy to focus entirely on the wearer.

But dealers and distributors experience many of the consequences of poor product design.

Imagine selling a product described as “universal.”

One customer says it fits perfectly.

Another says it is too tight.

Another says it makes their cap look oversized.

Another wants to know which baseball caps are compatible.

Someone else cut the insert incorrectly and wants a replacement.

Another customer assumed it provided the same protection as a hard hat.

These become dealer problems.

A strong B2B product therefore needs to be easy to explain, easy to size, easy to fit and easy to position correctly.

Clear sizing information, compatible-cap guidance, understandable instructions and accurate protection claims can be nearly as important to a distributor as the physical product itself.

There Are Really Three Customers Behind Every Bump Cap

Looking at these pain points has helped reinforce something we already know from manufacturing helmets:

A head-protection product has to work for more than one person.

The end user wants:

Comfort, lightweight construction, ventilation, stability and a product they are willing to wear all day.

The employer or safety manager wants:

Consistent fitting, appropriate protection, easy maintenance and a solution that employees will actually use.

The dealer or distributor wants:

Clear product positioning, fewer fit-related complaints, simple sizing, fewer returns and a product that is easy to recommend confidently.

A successful bump-cap product has to consider all three.

Why Is Aurora Sports Studying These Problems?

For us, moving into bump caps is a natural extension of what we already do.

Aurora Sports has experience developing and manufacturing helmets and protective headgear. That means we already think every day about issues such as shell materials, impact management, fit, ventilation, padding, retention systems, comfort and manufacturing consistency.

But entering a new product category should not mean simply taking what already exists and producing another version of it.

We believe the better question is:

What problems are people still trying to solve?

That is why we have been studying existing bump-cap products and listening carefully to the experiences of the people who use them.

The reviews are valuable because they reveal things that are difficult to understand from a specification sheet.

A specification can tell you the dimensions of an insert.

A wearer can tell you that after four hours, a particular edge starts pressing against their temple.

A product photo can show ventilation holes.

A worker can tell you whether the cap still feels hot in the middle of a shift.

A product listing can say “universal fit.”

A distributor can tell you how often customers ask whether it will fit their particular cap.

That real-world feedback is where better product development begins.

From Helmet Manufacturing to the Next Generation of Bump Caps

As Aurora Sports prepares to introduce bump caps as an additional product category, our objective is not simply to add another item to our catalog.

We want to understand the category first.

That means examining the entire wearing experience:

Fit. Pressure. Ventilation. Stability. Weight. Padding. Hygiene. Cap compatibility. Appearance. And clear communication about protection.

Some of these problems may appear small individually.

But when someone wears a product for eight hours a day, small problems become big problems.

And when a distributor supplies hundreds or thousands of units, a small design issue can become a major customer-service issue.

That is why we believe better head protection starts before the first production order.

It starts by listening.

At Aurora Sports, our experience in helmet manufacturing gives us the foundation. Understanding the real-world pain points of bump-cap users, buyers and dealers helps us decide where the next generation can be better.

And that is the thinking behind the newest category we are preparing to bring to the Aurora Sports product line.

Contact Us:

📱 +1 (657) 762-7550

📧 sales@aurorasport.com

Custom Helmet Liners & Padding Solutions | Aurora Sports

What Makes a Better Helmet Liner? Materials, Comfort and Customization

The inside of a helmet deserves just as much attention as the outside.

A well-designed helmet interior combines fit, comfort, breathability, durability and application-specific performance. At Aurora Sports, we develop custom helmet liner and padding solutions for different sports, work environments and product requirements.

Our strength is not simply producing padding. It is understanding how different materials, constructions and manufacturing methods perform in real-world use.

Impact Liner and Comfort Padding Have Different Jobs

The molded EPS or EPP liner is part of the helmet’s impact-management system, while removable comfort padding sits closer to the wearer’s head to improve fit, pressure distribution and wearing comfort.

A complete helmet padding system may include:

  • Crown and side padding

  • Front and rear padding

  • Head-lock padding

  • Chin-strap padding

  • Ventilation openings and channels

  • Removable hook-and-loop attachments

Aurora Sports can customize padding shapes, thicknesses, foam densities and constructions according to the helmet geometry, intended application and target market.

Material Selection Matters

Helmet padding can use a wide range of materials, including PU foam, EVA foam, memory foam, multi-layer foam constructions, AFO, D3O and other specialized cushioning or impact-management materials, depending on the helmet design and performance requirements.

Different materials offer different characteristics in terms of:

  • Softness and comfort

  • Compression and resilience

  • Impact-energy management

  • Thickness and weight

  • Moisture resistance

  • Durability

  • Long-term shape retention

The textile surface is equally important. Fabric options may include breathable mesh, stretch fabrics, moisture-wicking textiles, quick-drying materials and other functional fabrics.

Aurora Sports helps brands select and combine the appropriate foam, functional material, fabric and construction to achieve the required balance of comfort, fit, performance and cost.

Manufacturing Know-How Makes the Difference

Producing helmet padding may appear straightforward, but developing a reliable liner system is far from simple.

Many factories are familiar with processes such as cold pressing and hot pressing, but knowing how to operate the equipment does not automatically result in a durable finished product.

For example, poorly developed cold-pressed padding may experience edge or seam separation after repeated exposure to sweat and moisture. Problems like this may only become visible after extended real-world use.

Preventing these issues requires experience with:

  • Foam and fabric compatibility

  • Adhesive selection

  • Lamination methods

  • Edge and seam construction

  • Compression behavior

  • Moisture and sweat exposure

  • Intended wearing environment

This is where Aurora Sports adds value.

We develop liner solutions around the specific demands of sports, outdoor activities and working environments, considering not only how the padding looks when it leaves the factory, but also how it is expected to perform during actual use.

Cooling, Antibacterial and Functional Helmet Liners

Different wearing environments may require different liner technologies.

For hot-weather applications, cooling fabrics can provide a cooler contact sensation, while moisture-wicking structures help move perspiration away from the skin.

For helmets worn frequently in warm or humid conditions, silver-ion antibacterial textiles can be considered to help control odor-causing bacteria. Antibacterial claims should be supported by applicable supplier or laboratory testing data.

For winter sports, motorcycle helmets and other cold-weather applications, thermal or graphene-based liner materials can be incorporated to help improve warmth and wearing comfort.

Aurora Sports can also evaluate combinations of functional fabrics, breathable foams and specialized materials according to the intended environment and product positioning.

Cold-Pressed and Hot-Pressed Helmet Padding

Both cold-press and hot-press techniques can be used to manufacture shaped helmet padding.

Cold pressing can be suitable for materials or constructions that require limited heat exposure, while hot pressing uses controlled heat and pressure to create more defined three-dimensional shapes efficiently and consistently.

The appropriate process depends on the foam, fabric, adhesive, geometry and performance requirements.

Our focus is not simply choosing a manufacturing method—it is selecting a construction that performs reliably throughout the intended life and use of the product.

Removable Padding for Cleaning and Replacement

Removable helmet padding can make cleaning, maintenance and replacement easier.

Depending on the selected materials and construction, pads may be detached, gently hand-washed and air-dried.

Care instructions should always be developed according to the specific foam, fabric, adhesive and functional treatment used, especially when cooling, antibacterial or thermal materials are involved.

Custom Helmet Liner and Padding Development at Aurora Sports

Aurora Sports supports custom helmet liner and padding development as part of our OEM and ODM helmet manufacturing services.

Our capabilities include:

  • Custom padding shapes and thicknesses

  • PU, EVA and memory foam options

  • Multi-layer foam constructions

  • AFO and D3O material integration

  • Foam and fabric selection

  • Breathable and quick-drying materials

  • Cooling-fabric liners

  • Silver-ion antibacterial textile options

  • Thermal and graphene-based liner options

  • Cold-press and hot-press manufacturing

  • Removable padding systems

  • Head-lock and chin-strap padding

  • Sample development and mass-production support

From everyday comfort padding to specialized liner systems for demanding sports and work environments, Aurora Sports helps brands develop interiors that balance comfort, fit, durability, functionality and production requirements.

More importantly, we understand that successful helmet padding development depends on the details—material compatibility, construction, manufacturing method and how the product performs after repeated real-world use.

Developing a new helmet or looking to improve an existing liner system? Contact Aurora Sports to discuss your application, materials and customization requirements.

Contact Us:

📱 +1 (657) 762-7550

📧 sales@aurorasport.com

Helmet Padding Development Process: From Physical Helmet to Production-Ready Liner

Developing custom helmet padding is not simply a matter of cutting foam to fit inside a shell. The shape of the helmet, available internal space, size range, comfort requirements, and production method all need to be considered before the padding can move into tooling and mass production.

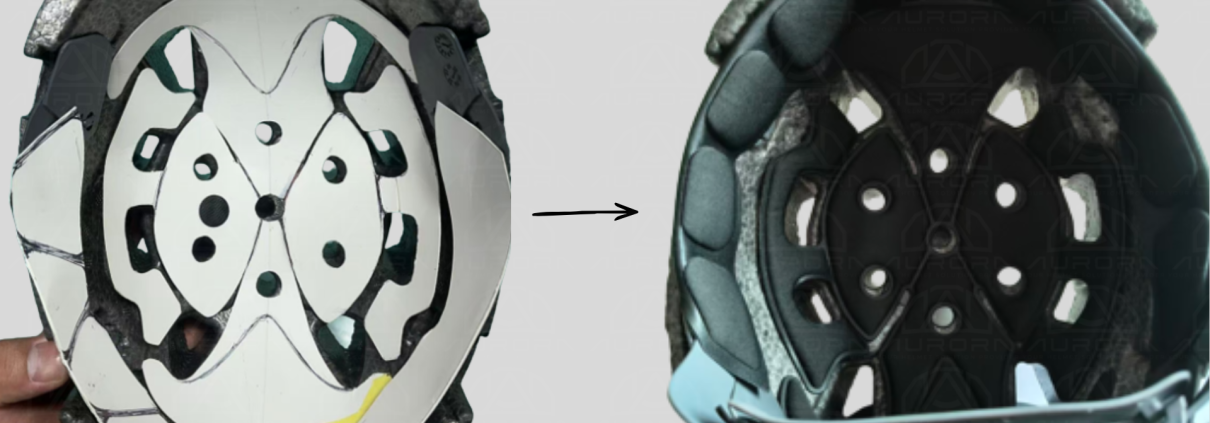
At Aurora Sports, we can develop custom helmet liners and interior padding directly from a customer’s physical helmet sample. This approach allows us to evaluate the actual interior geometry and create a padding system that is better matched to the product.

Step 1: Create the Liner Pattern From the Physical Helmet

Once we receive the helmet samples, our development team begins by studying the interior shape of the helmet.

We use the physical helmet as the basis for creating the initial liner pattern, taking into account the available internal space and the areas where the padding needs to sit.

Working directly from the actual helmet helps us develop a pattern that corresponds closely with the finished product rather than relying only on drawings or estimated dimensions.

For existing helmet models, this can be an efficient way to begin a custom padding development project.

Step 2: Produce a Manually Cut Prototype

Before investing in production tooling, we first create a manually cut prototype.

This prototype allows the customer and our development team to evaluate the basic shape, fit, and comfort of the proposed padding.

At this stage, adjustments can still be made relatively easily. For example, the pattern may need to be modified in certain areas to improve positioning or overall fit inside the helmet.

The goal is to confirm the basic liner concept before moving to the tooling stage.

Step 3: Evaluate Whether Multiple Helmet Sizes Can Share Tooling

For helmet programs with several shell or size options, tooling cost can become an important part of the initial investment.

During development, we review whether different helmet sizes can use the same liner tooling where practical.

If one padding pattern or tooling configuration can be shared across multiple sizes, it may help reduce the number of molds or cutting tools required at the beginning of the project.

Not every helmet size can necessarily share the same liner design, so this needs to be evaluated based on the actual helmet dimensions and fit requirements.

However, reviewing this possibility early in the development process can help customers control tooling investment and simplify future production.

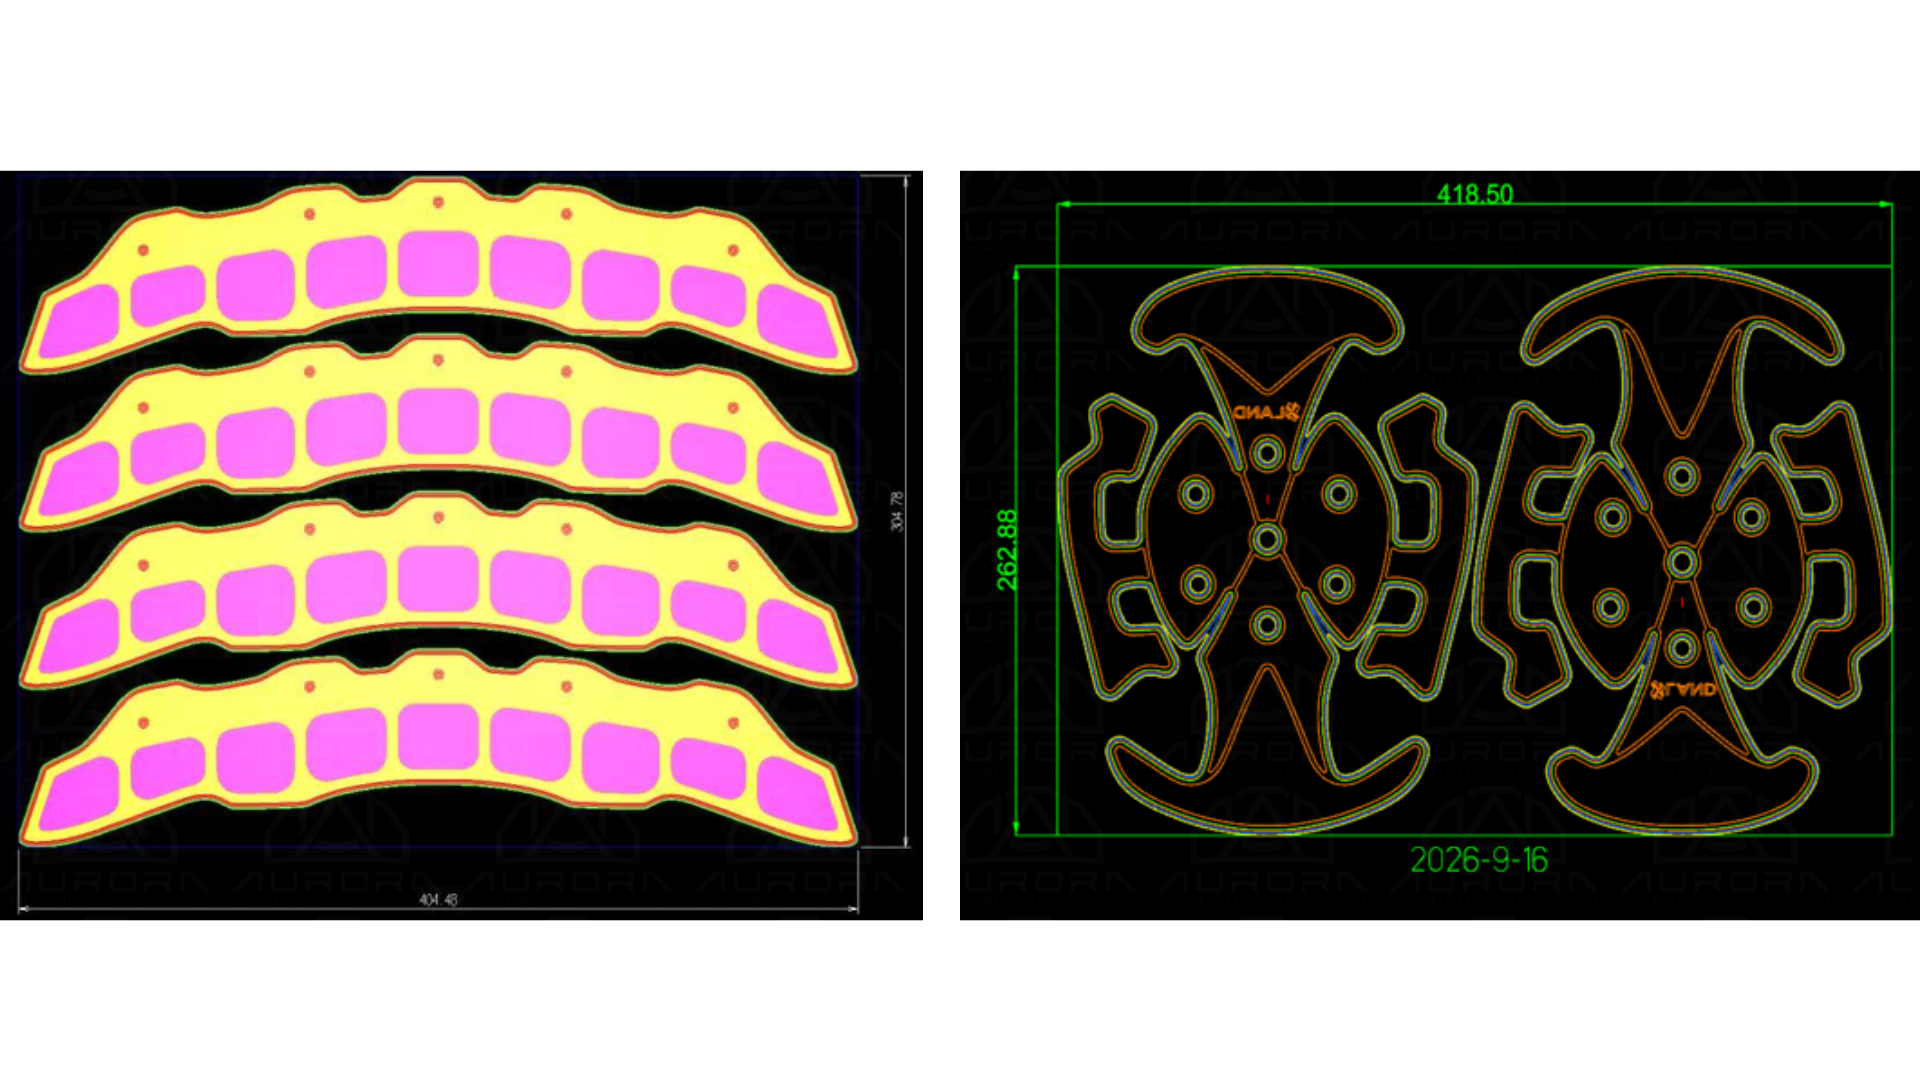
Step 4: Finalize the Padding Drawings and Patterns

After the manually cut prototype has been reviewed and approved, we finalize the production drawings and liner patterns.

This step converts the approved prototype into a more standardized specification that can be used for tooling and sample production.

Any adjustments identified during the fitting stage are incorporated before the final pattern is released.

Completing this stage carefully is important because the approved drawings become the basis for the production version of the helmet padding.

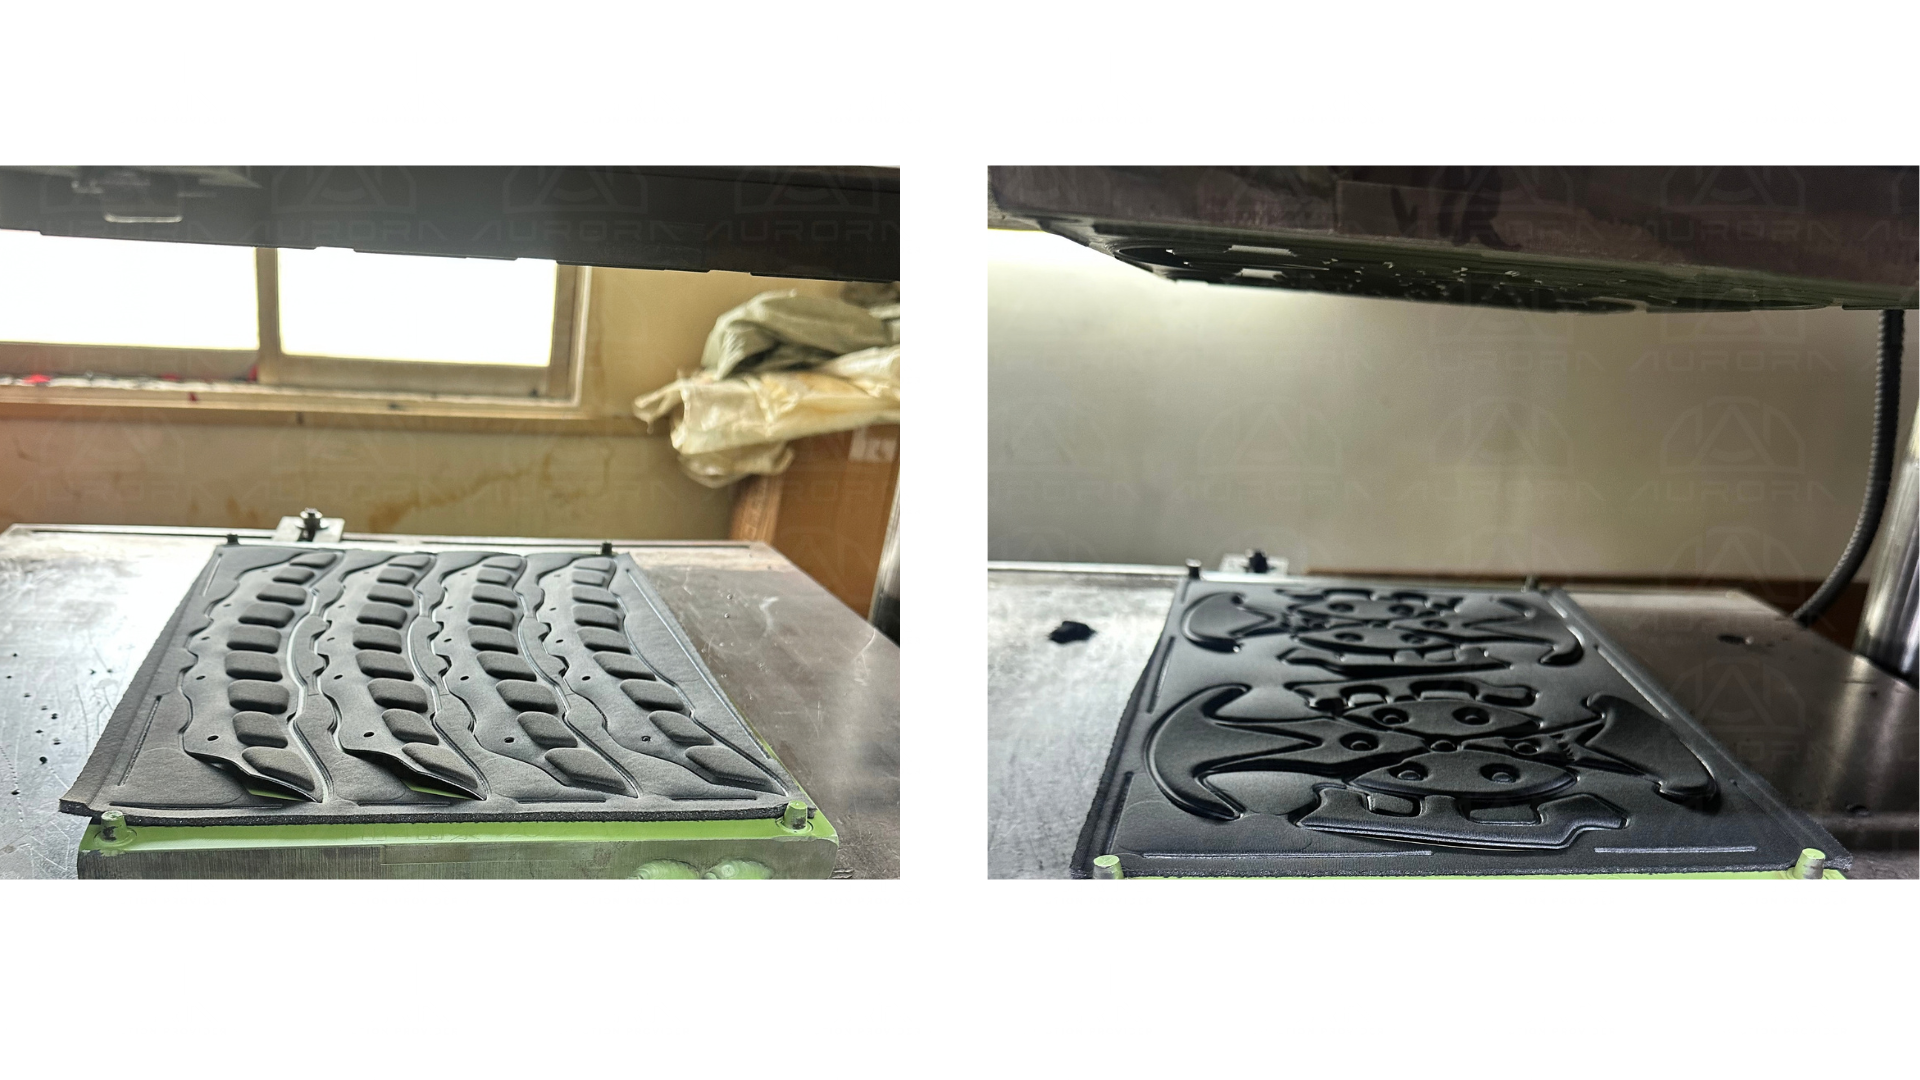
Step 5: Produce Cutting Tooling and Finished Samples

Once the final pattern is approved, we proceed with the required cutting mold or production tooling.

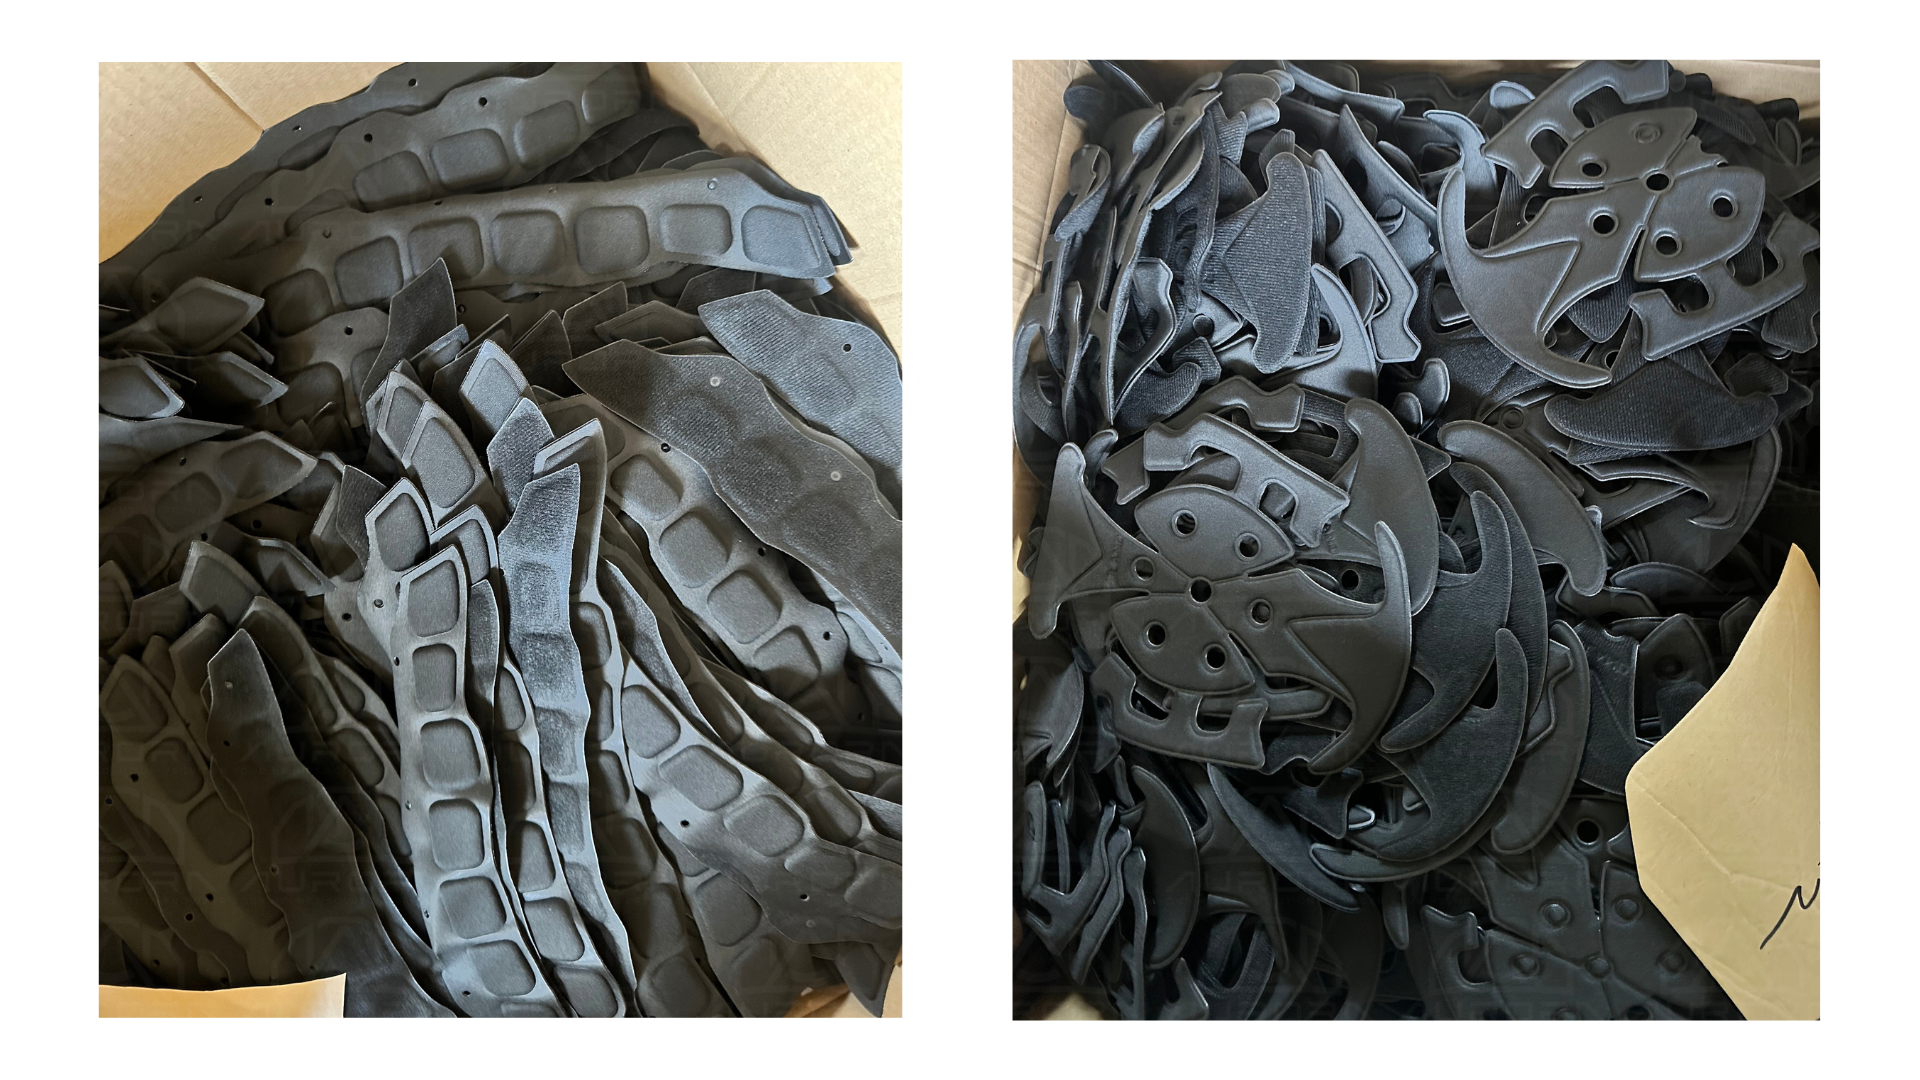
The tooling is then used to produce finished samples for final review.

These samples allow the customer to check the completed padding in the helmet before moving into larger-scale production.

The development sequence is therefore:

Physical helmet → liner pattern → hand-cut prototype → fitting review → tooling evaluation → final drawings → cutting tooling → finished samples

This process helps reduce unnecessary tooling changes by resolving the main fit and pattern questions before production tools are made.

Why Start With a Hand-Cut Helmet Padding Prototype?

One of the most important parts of this process is producing the initial prototype before opening tooling.

Going directly from a concept to production tooling can create unnecessary cost if the liner shape still needs adjustment.

A manually cut sample provides an opportunity to review:

  • Overall liner shape

  • Position inside the helmet

  • Fit against the existing helmet interior

  • Basic wearing comfort

  • Differences between helmet sizes

  • Potential for shared tooling

  • Areas requiring pattern adjustment

Once these points are confirmed, the project can move forward with greater confidence.

Reducing Helmet Liner Tooling Costs

For OEM and ODM helmet projects, development cost is always an important consideration.

One way to manage this cost is to determine whether several helmet sizes can share the same padding pattern or tooling.

For example, if two helmet sizes have similar internal dimensions, it may be possible to use one cutting tool with only minor adjustments to the liner configuration.

Where this approach is practical, it can help reduce:

  • Initial tooling investment

  • Number of production tools

  • Development complexity

  • Future replacement-tool requirements

The feasibility depends on the helmet design, so it should be reviewed using the actual physical samples rather than assumed in advance.

Custom Helmet Padding Development for Existing Helmet Models

This development process is particularly useful for brands that already have an existing helmet but need a new or improved internal padding solution.

Instead of developing an entirely new helmet structure, the padding can be designed around the customer’s current product.

This may be suitable for projects involving:

  • Replacement helmet liners

  • Upgraded interior padding

  • Private-label helmet programs

  • Different comfort configurations

  • New padding materials

  • New helmet size ranges

  • OEM and ODM helmet projects

By working from the physical helmet, the development team can create the padding around the actual internal geometry of the product.

From Prototype to Production

A successful helmet padding project should move through a controlled development process rather than jumping directly into tooling.

At Aurora Sports, our typical approach is to first understand the physical helmet, create the initial liner pattern, make a hand-cut prototype, review size compatibility, and only then finalize the production tooling.

This step-by-step process helps customers evaluate fit and comfort while also identifying opportunities to reduce tooling investment before mass production begins.

If you have an existing helmet and would like to develop custom helmet padding, replacement liners, comfort pads, or OEM interior components, you can send us physical helmet samples for evaluation.

Our team can review the helmet structure, create the initial padding pattern, prepare prototypes, and help determine the most practical route toward tooling and finished production samples.

Contact Aurora Sports to discuss your custom helmet padding or liner development project.

📱 +1 (657) 762-7550

📧 sales@aurorasport.com

ABS Helmet Shell Painting and Decoration: A Complete Guide

The appearance of a helmet involves more than selecting a color. Surface preparation, coating compatibility, graphic application, curing and final inspection all influence how the finished shell looks and how consistently it can be reproduced in production.

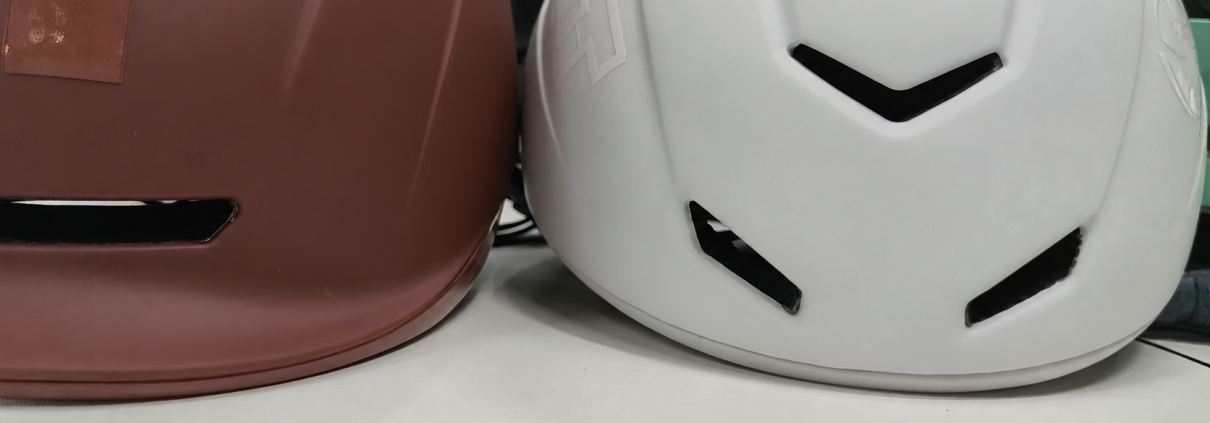
ABS, or acrylonitrile butadiene styrene, is widely used for injection-molded helmet shells. Depending on the design and tooling, an ABS shell can be produced in a molded-in color or decorated after molding with compatible paint, logos, decals and hydro-dipped patterns.

For helmet brands, distributors and OEM buyers, understanding these options makes it easier to balance appearance, production quantity, lead time and cost.

ABS shell decoration generally falls into three categories:

  1. Molded-in colors and textures

  2. Painted surface finishes

  3. Logos, decals and hydrographic patterns

The appropriate solution depends on the ABS grade, helmet design, mold construction, artwork, order quantity and desired appearance.

Molded-In Colors and Textures

Not every ABS helmet shell needs to be painted. Pigment can be blended with the ABS resin before injection molding, creating a solid base color throughout the shell material.

The tooling can also give the molded shell a smooth or textured surface. Because this texture comes from the mold itself, changing it may require tooling modification or new tooling.

Advantages of Molded-In Color

  • Color is incorporated into the shell material

  • Surface scratches are less likely to reveal a contrasting painted layer

  • Fewer secondary finishing steps may be required

  • Suitable for consistent, higher-volume production

  • Practical for standard solid-color helmet programs

Molded-in color is often an efficient choice for industrial safety helmets and other products requiring consistent solid colors. When a project needs a more polished or specialized appearance, compatible paint and decoration can be applied after molding.

ABS Helmet Shell Finishing Options

1. Gloss Finish

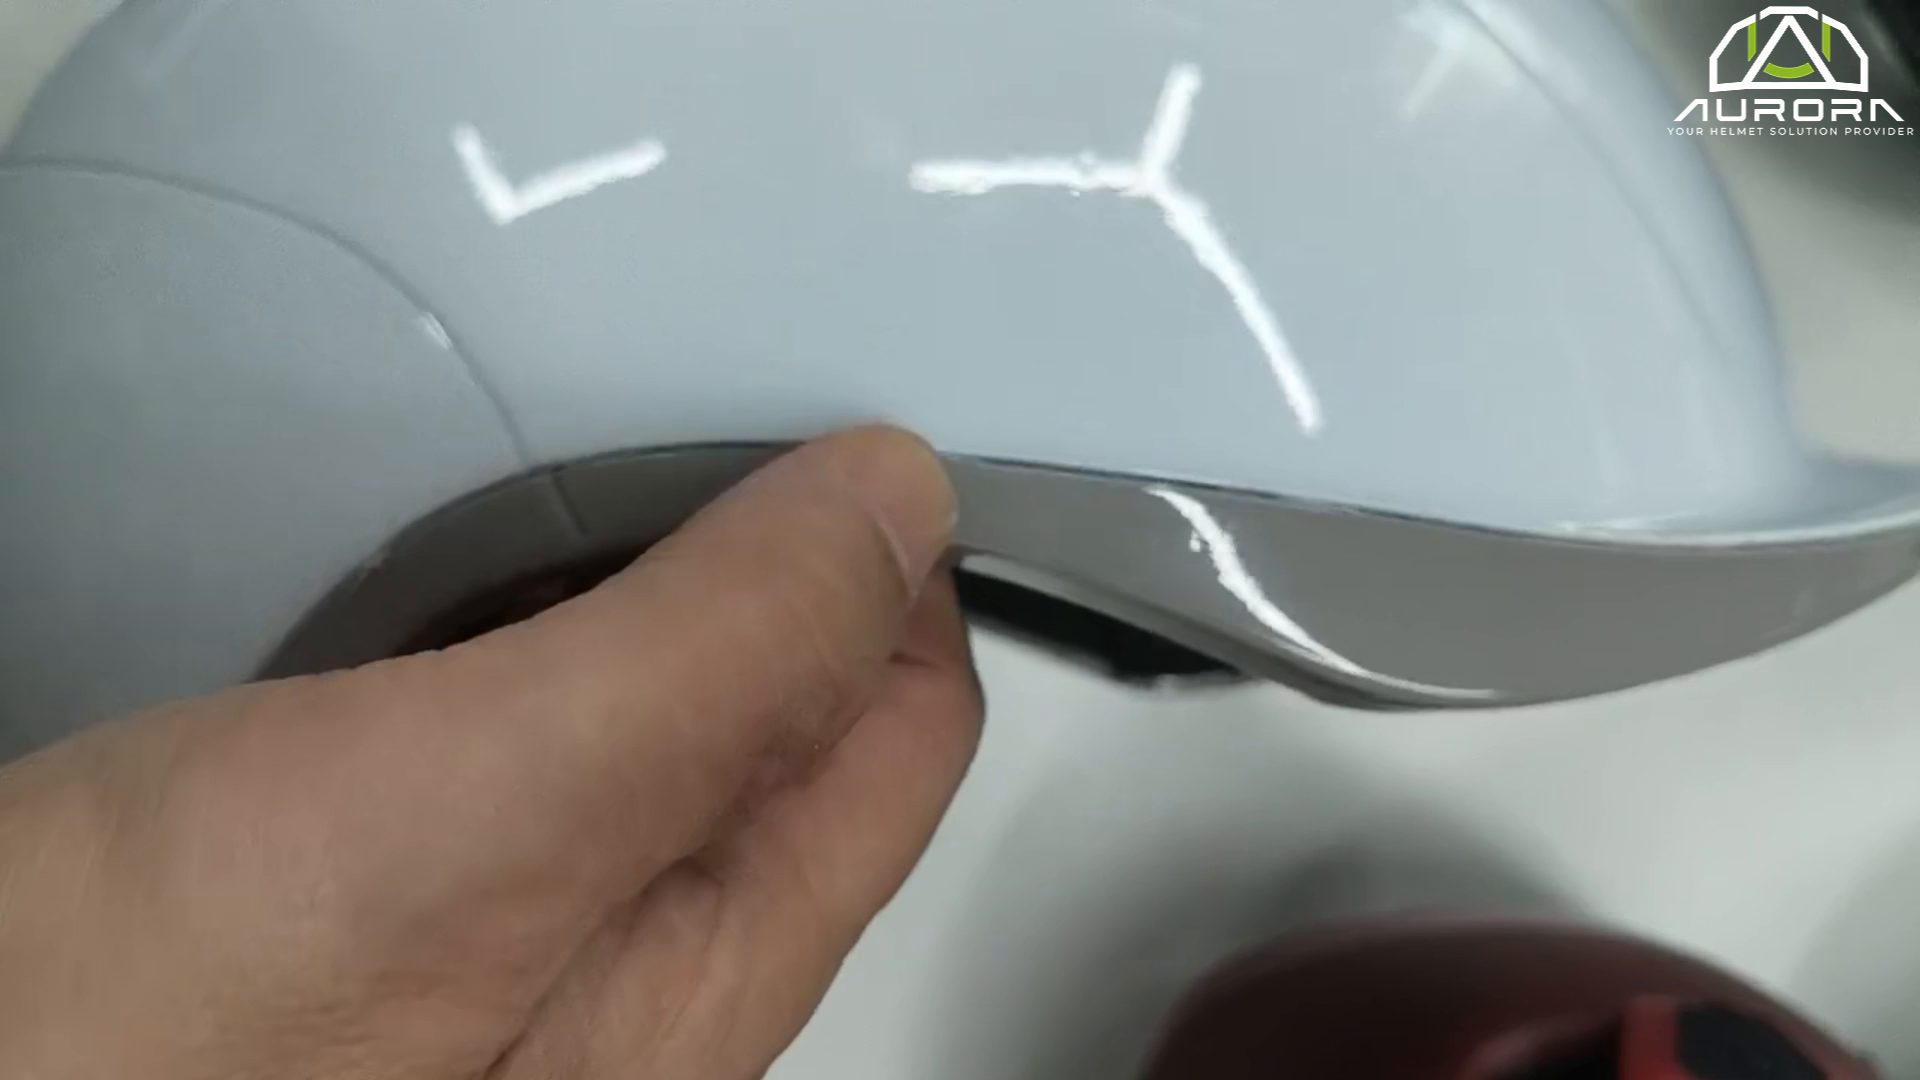
A gloss finish creates a smooth, reflective appearance that can make colors look bright and polished. It also provides strong visual contrast for logos and decorative graphics.

Gloss surfaces can make fingerprints, dust, scuffs and scratches more noticeable, especially on dark colors. The final appearance and cleaning requirements depend on the specific coating system.

2. Matte Finish

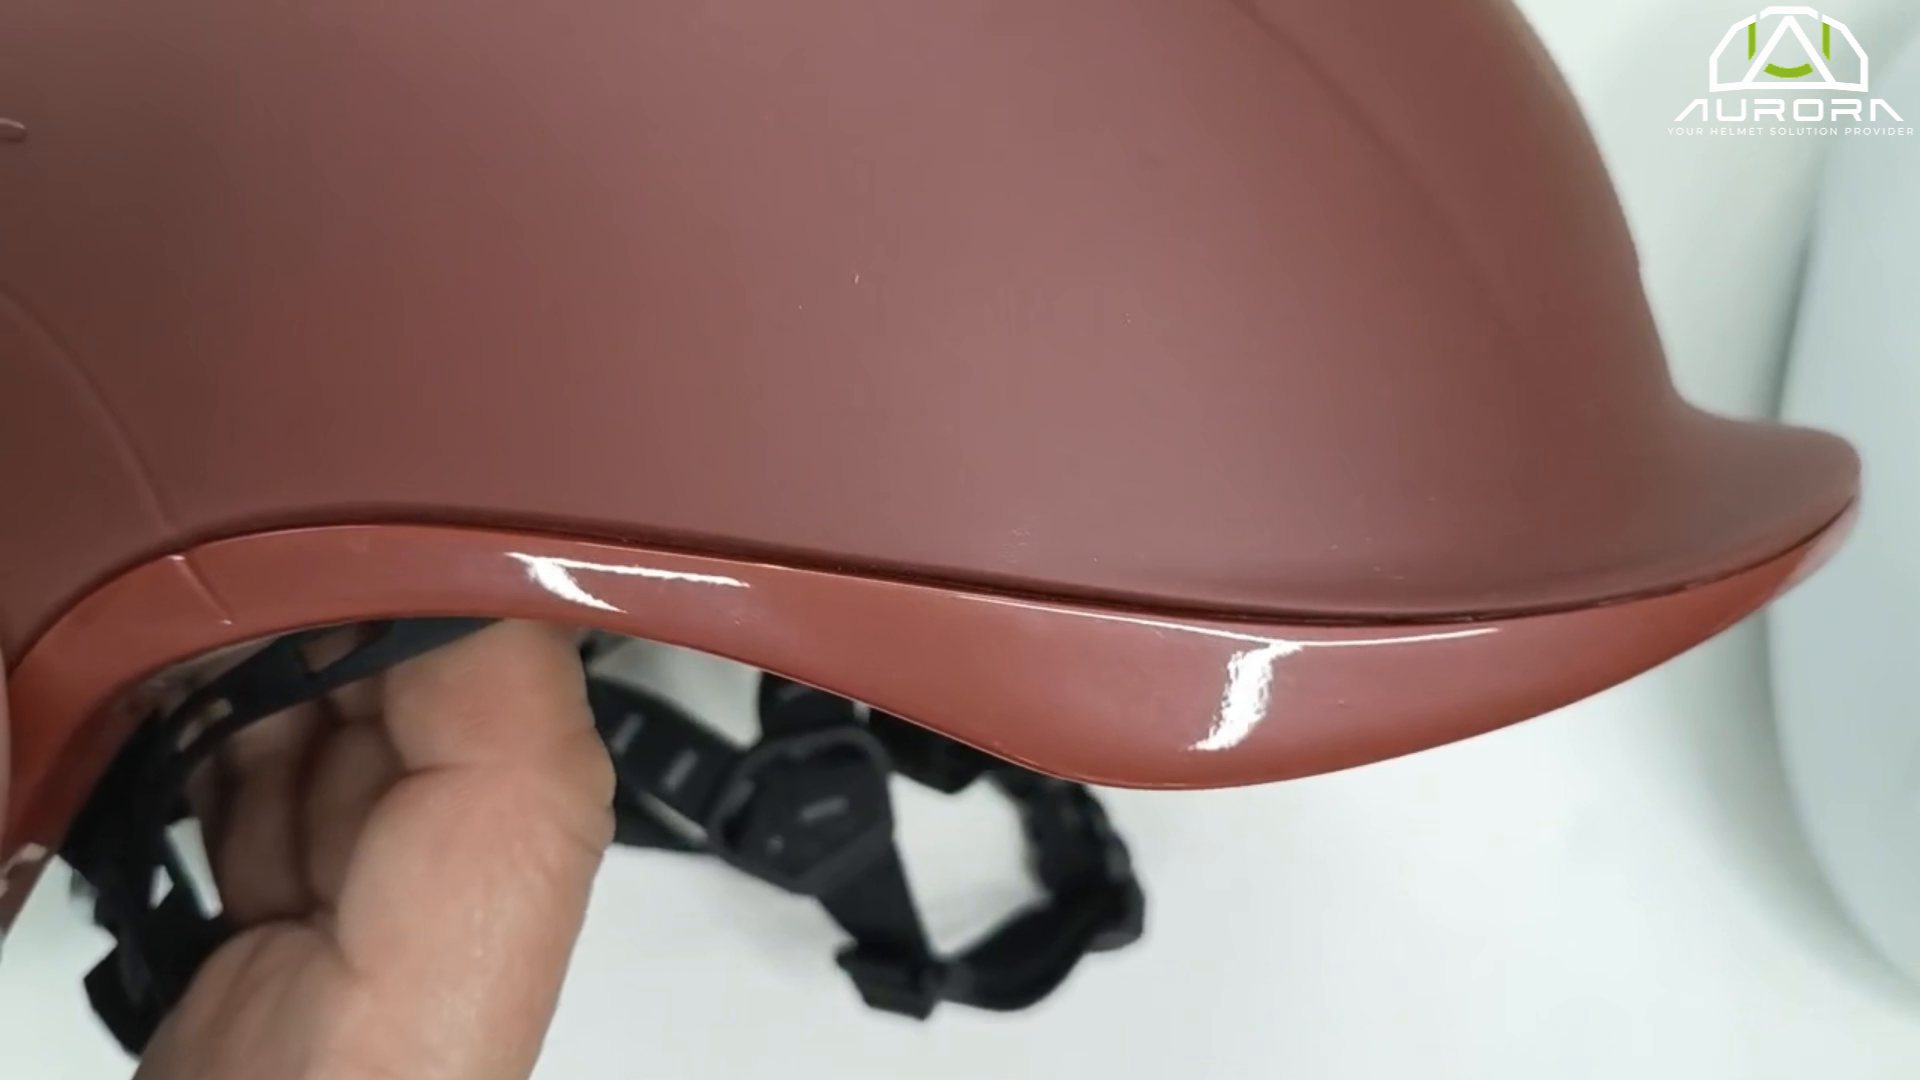
A matte finish reduces surface reflection and creates a more understated, technical appearance. It is commonly selected for outdoor, equestrian, industrial and sports helmet designs.

Matte surfaces should be cleaned according to the care instructions for the approved coating because aggressive polishing can create uneven or shiny areas.

3. Satin Finish

Satin provides a subtle sheen between gloss and matte. It gives the shell more visual depth than a fully matte surface without producing the strong reflections of a high-gloss finish.

4. Metallic Finish

For compatible projects, metallic coatings can add fine reflective particles to the painted surface. The final effect depends on the paint formulation, application method and approved topcoat, so metallic options should be sampled and confirmed before production.

Logo and Graphic Decoration Methods

After molding and any required painting, logos, product markings and decorative graphics can be added. The appropriate method depends on the shell geometry, artwork, coverage area, number of colors and production quantity.

Screen Printing

Screen printing applies relatively simple artwork to selected areas of an ABS shell. Ink passes through a prepared mesh screen onto the surface, with separate screens generally required for different colors.

It is well suited for:

  • Brand logos and product names

  • Warning information

  • Symbols and identification marks

  • One-color or limited-color artwork

  • Repeat OEM production

Screen printing works best on suitable, defined areas. It is generally less appropriate for photographic graphics or artwork that must wrap around deep curves and ventilation openings.

Water-Slide Decals

Water-slide decals can reproduce detailed logos, fine artwork and multiple colors. The printed design is released from its backing with water, positioned on the shell and carefully smoothed into place.

Depending on the production system, a compatible clearcoat may be applied to help integrate and protect the graphic.

Hydro Dipping

Hydro dipping—also known as water-transfer or hydrographic printing—can apply a continuous decorative pattern over a large portion of a three-dimensional ABS shell.

A printed film is placed on water and prepared for transfer. The shell is then carefully passed through the floating pattern so the design follows its curves. The basecoat, hydrographic film, activator and clearcoat must all be compatible with the specific ABS material and production requirements.

Hydro dipping is commonly used for:

  • Carbon-fiber-style patterns

  • Camouflage

  • Geometric designs

  • Wood-inspired textures

  • Repeating decorative patterns

  • Customized full-shell appearances

A water-slide decal places specific artwork in a selected area, while hydro dipping can decorate a much larger surface. A hydro-dipped carbon-fiber pattern is decorative only; it does not provide the material properties of a genuine carbon-fiber composite shell.

The Role of a Compatible Clearcoat

Depending on the decoration system, a compatible clearcoat may be applied over paint, decals or hydrographic patterns. It can help protect the decorated surface, unify its appearance and establish the final gloss, satin or matte level.

There is no universal clearcoat suitable for every helmet shell. The complete coating system must be selected according to the ABS grade, underlying decoration, curing requirements and intended appearance.

Decorative coatings should not be described as improving the helmet’s protective performance. The complete helmet construction must still be developed and evaluated for the applicable safety requirements.

How the ABS Helmet Painting Process Works

1. Shell Inspection and Cleaning

The molded shell is inspected and cleaned to remove dust, oils, mold-release residue and other contaminants that could affect adhesion or appearance.

2. Surface Preparation

Depending on the ABS grade and coating system, a compatible primer or surface treatment may be used. Unsuitable chemicals or curing conditions can damage the plastic or lead to coating failure.

3. Base Color Application

A compatible solid or metallic base color is applied according to the approved specification. Coverage and coating thickness are controlled to support consistent production.

4. Graphics and Decoration

Logos or decorative artwork can be added using screen printing, water-slide decals or hydro dipping.

5. Clearcoat and Curing

When required, a compatible clearcoat is applied and the shell is cured under conditions suitable for the ABS material and coating formulation.

6. Quality Inspection

Finished shells may be inspected for:

  • Approved color match

  • Surface consistency

  • Coating adhesion

  • Graphic placement

  • Hydrographic coverage

  • Gloss or texture consistency

  • Visible cosmetic defects

An approved reference sample helps establish the expected visual standard before mass production.

ABS vs. PC Helmet Shell Decoration

ABS and polycarbonate, or PC, are both used in helmet manufacturing, but their forming and decoration methods can differ.

ABS shells are commonly injection molded, making molded-in colors, mold-created textures and secondary processes such as painting, screen printing, decals and hydro dipping possible.

Thin PC shells are often thermoformed and may use graphics applied to a flat PC sheet before forming, depending on the helmet construction. Those pre-forming graphic methods should not automatically be presented as ABS shell processes.

Paints, inks, primers, activators and curing conditions must always be selected for the specific shell material.

How to Choose the Right ABS Shell Decoration

Brands should consider:

  • Desired color and visual style

  • Molded-in color versus painted color

  • Complexity of logos and artwork

  • Shell geometry and ventilation openings

  • Surface texture

  • Production volume

  • Target price and lead time

  • Coating and material compatibility

  • Repeatability in mass production

For example, a high-volume industrial helmet may use a molded-in solid color with a screen-printed logo. An equestrian or sports helmet might combine compatible paint with a detailed decal and a gloss, satin or matte appearance. A carbon-fiber-style or camouflage pattern may be better suited to hydro dipping.

Different Applications Require Different Helmet Shells

The right shell material depends on the helmet’s intended use, construction and required performance. ABS and PC both provide valuable properties, but they are not interchangeable, and one is not automatically stronger in every helmet design.

Thicker, injection-molded ABS shells are often selected for their rigidity, durability and rugged construction. This makes ABS common in industrial safety helmets, some equestrian helmets, some snowboarding helmets and other demanding or higher-speed applications where a more substantial outer shell may be preferred.

Thin PC shells are frequently selected when low weight, aerodynamic shaping and integration with an EPS liner are important. PC is commonly used in bicycle helmets, short-track speed-skating helmets, some equestrian helmets and selected sections of snowboarding helmets.

The final material should be chosen according to the helmet’s design, impact-management system, target activity and applicable testing standard. Aurora Sports can help brands evaluate ABS, PC and combined shell constructions to determine the most appropriate option for each OEM or ODM helmet project.

Frequently Asked Questions

Can an ABS Helmet Shell Be Painted?

Yes. ABS can be painted when the surface preparation, paint formulation, application method and curing conditions are compatible with the specific resin grade.

Can an ABS Helmet Be Produced Without Paint?

Yes. Pigment can be added to the ABS resin before injection molding, allowing the shell to be manufactured in a solid molded-in color.

Can Logos Be Printed Directly on an ABS Shell?

Yes. Simple logos, text and product markings can often be screen printed onto suitable shell areas. Detailed or multicolor artwork may be better suited to a water-slide decal.

Can ABS Helmet Shells Be Hydro Dipped?

Yes. Compatible hydrographic systems can apply carbon-fiber-style, camouflage and other repeating patterns over curved ABS shell surfaces.

What Is the Difference Between Hydro Dipping and a Decal?

A decal applies an individual graphic to a selected location. Hydro dipping transfers a continuous pattern over a much larger three-dimensional area.

Can an ABS Shell Have a Carbon-Fiber Appearance?

Yes. Hydro dipping can create a decorative carbon-fiber-style pattern. However, the shell remains ABS and should not be marketed as genuine carbon fiber.

Can ABS Have a Molded Texture Without Paint?

Yes, when the texture is incorporated into the mold. Creating or changing that texture may require tooling work.

Do Helmet Decals Require a Clearcoat?

It depends on the decal and production system. Water-slide graphics are often protected with a compatible clearcoat, but the process must be confirmed for the specific ABS shell and coating specification.

Custom ABS Helmet Decoration at Aurora Sports

Aurora Sports provides ABS shell customization as part of its OEM and ODM helmet development and manufacturing services.

Available project options may include:

  • Molded-in solid colors

  • Custom color matching

  • Compatible solid-color painting

  • Gloss, satin and matte appearances

  • Metallic finishes, subject to project confirmation

  • Screen-printed logos

  • Water-slide decals

  • Hydro-dipped patterns

  • Mold-created surface textures, depending on the tooling

  • Final assembly and quality inspection

Aurora Sports helps customers evaluate shell material, color, artwork and production requirements together. This supports designs that are visually distinctive, practical to manufacture and repeatable from approved sample to volume production.

Whether you are developing an industrial safety helmet, equestrian helmet, sports helmet or private-label product line, our team can help determine a suitable ABS shell construction and decoration process.

Have a custom helmet concept? Contact Aurora Sports to discuss your OEM or ODM project, artwork, color requirements, production quantity and target market.

📱 +1 (657) 762-7550

📧 sales@aurorasport.com

PC Helmet Shell Painting & Coating Processes: A Complete Guide

The appearance of a polycarbonate (PC) helmet shell involves much more than simply spraying a layer of paint. Professional helmet shell painting and coating usually requires multiple stages to achieve the desired color, texture, graphics, durability, and overall product quality.

For helmet manufacturers, distributors, brands, and OEM buyers, understanding the different helmet coating processes can help when selecting the right finish for a new helmet project.

In general, PC helmet finishing can be divided into two main areas:

  1. Surface coating and finishing effects — including glossy, matte, soft-touch, metallic, gradient, and chameleon finishes.
  2. Graphic application methods — including screen printing, water-slide decals, and other decorative processes.

The final coating system is selected according to the helmet design, production quantity, target market, durability requirements, and desired price level.


1. Glossy Helmet Finish

A glossy helmet finish creates a smooth, highly reflective surface that gives the helmet a bright and polished appearance.

Glossy coatings can increase the visual depth of colors and make printed graphics appear more vivid.

Advantages of a Glossy Helmet Coating

  • Bright and premium appearance
  • Strong color saturation
  • Easy to wipe and clean
  • Suitable for logos and decorative graphics
  • Minor surface scratches may sometimes be polished

Points to Consider

Glossy surfaces tend to show fingerprints, dust, scuffs, and scratches more clearly, particularly under strong lighting.

PC helmet shells naturally have a relatively glossy appearance after injection molding. Depending on the required design, this surface may sometimes remain visible. However, painted or decorated helmets normally require additional coating layers for appearance and protection.


2. Matte Helmet Finish

A matte helmet coating produces a low-reflection surface that diffuses light rather than reflecting it.

This creates a modern, understated appearance that is popular for industrial helmets, sports helmets, outdoor helmets, and premium safety equipment.

Advantages of Matte Helmet Finishes

  • Modern and professional appearance
  • Reduced light reflection
  • Minor scuffs can be less noticeable
  • Suitable for understated or premium product designs

Maintenance Considerations

Matte surfaces can be sensitive to oils, fingerprints, aggressive cleaners, and excessive rubbing.

Unlike glossy coatings, matte finishes generally should not be polished because polishing can change the surface texture and create permanently shiny areas.

As a result, repairing a damaged matte helmet coating can be more difficult than repairing a glossy surface.


3. Soft-Touch and Rubberized Helmet Coatings

A soft-touch helmet coating, sometimes referred to as rubber paint or rubberized coating, gives the helmet a smooth, slightly elastic surface with a distinctive tactile feel.

This finish is often used when manufacturers want to create a more premium product experience.

Benefits of Soft-Touch Helmet Coatings

  • Comfortable tactile feel
  • Improved grip
  • Premium matte appearance
  • Differentiates the product from standard painted helmets

Soft-touch coatings generally cost more than conventional paint and require tighter control of surface preparation, coating thickness, spraying, and curing.

Depending on the paint formulation, different degrees of elasticity and softness can be achieved.


Graphic Application Methods for PC Helmet Shells

After the base coating has been completed, logos, patterns, branding, and other decorative graphics can be applied.

The most appropriate helmet printing method depends largely on the complexity of the artwork and the production quantity.


4. Water-Slide Decals for Helmet Graphics

Water-slide decals are suitable for applying detailed, multi-color graphics to curved helmet surfaces.

They are particularly useful when the design includes intricate artwork that would be difficult to reproduce through conventional screen printing.

Typical Water-Slide Decal Process

Step 1: Surface Preparation

The helmet shell must be thoroughly cleaned and prepared to ensure good adhesion.

Matte or textured surfaces may require additional attention because reduced surface contact can make decal application more challenging.

Step 2: Decal Transfer

The printed decal is placed in water until the decorative film can separate from its backing paper.

It is then carefully positioned on the PC helmet shell.

Step 3: Removal of Water and Air

A flexible tool is used to remove trapped water and air bubbles and ensure that the decal conforms to the helmet’s curved surface.

Step 4: Drying

The decal is allowed to dry fully before subsequent coating operations.

Why a Protective Clearcoat Is Important

A water-slide decal normally requires a suitable protective clearcoat.

The clearcoat helps protect the helmet graphics from:

  • UV exposure
  • Abrasion
  • Scratching
  • Chemicals
  • Moisture
  • General handling and wear

It also helps integrate the graphic with the surrounding coating, creating a smoother and more professional finished appearance.


5. Screen Printing on Helmet Shells

Helmet screen printing is one of the most practical methods for applying simple logos, text, symbols, and limited-color graphics.

Ink is transferred directly onto the helmet surface through a prepared mesh screen.

Screen Printing Is Suitable For:

  • Company logos
  • Brand names
  • Warning symbols
  • Simple text
  • One-color designs
  • Limited-color graphics
  • High-volume helmet production

Advantages

  • Cost-effective for repetitive production
  • Consistent results
  • Efficient for mass production
  • Suitable for OEM branding

However, screen printing is generally less suitable for photographic images, highly detailed artwork, or complicated multi-color gradients.

The durability of printed graphics depends on the ink system, surface preparation, curing conditions, and any subsequent protective coating.


6. Chameleon and Color-Shift Helmet Paint

A chameleon helmet finish, also known as a color-shift coating, creates one of the most visually distinctive effects available for PC helmet shells.

Depending on the viewing angle and lighting, the surface appears to shift between different colors.

This effect is commonly used for premium or highly customized helmet designs.

Typical Chameleon Helmet Painting Process

Step 1: Dark Basecoat

A black or other dark basecoat is commonly applied first.

The dark background increases contrast and allows the special-effect pigments to produce a stronger color-changing appearance.

Step 2: Chameleon Paint

Several thin layers of specialized pearlescent or interference-effect paint are sprayed over the basecoat.

These pigments reflect light differently according to the viewing angle, creating the characteristic color-shift effect.

Step 3: Protective Clearcoat

A transparent clearcoat is then applied.

In addition to protecting the special-effect paint, the clearcoat increases visual depth and can make the color-changing effect appear richer and more pronounced.

Why Chameleon Coatings Cost More

Compared with standard solid colors, chameleon helmet finishes require:

  • Specialized pigments
  • More expensive coating materials
  • Multiple paint layers
  • Accurate spraying
  • Experienced operators
  • Additional quality control

For this reason, chameleon coatings are usually offered as a premium helmet customization option.


7. Protective Clearcoat for Helmet Shells

A helmet clearcoat is one of the most important stages in many professional PC helmet finishing systems.

It is applied over the underlying paint, graphics, or decorative effect to provide both protection and the desired final appearance.

Main Functions of a Helmet Clearcoat

UV Protection
Helps reduce deterioration and fading caused by sunlight.

Abrasion Resistance
Protects the underlying paint and graphics from normal handling and wear.

Graphic Protection
Helps seal printed graphics and decals beneath a protective layer.

Surface Integration
Creates a more uniform surface between graphics and surrounding paint.

Appearance Control
Different clearcoat formulations can create:

  • High-gloss finishes
  • Semi-gloss finishes
  • Satin finishes
  • Matte finishes

The clearcoat therefore plays both a protective and decorative role in the overall helmet coating process.


Matte vs. Glossy Helmet Finish: Which Is Better?

There is no universal answer. The best choice depends on the desired appearance, maintenance requirements, application environment, and target customer.

Feature Matte Helmet Finish Glossy Helmet Finish
Appearance Modern, understated and low-reflection Bright, vivid and highly reflective
Minor Scuffs Often less noticeable Usually more visible
Scratches Difficult to polish or locally repair Minor scratches may sometimes be polished
Fingerprints Oils can produce noticeable marks Fingerprints are visible but usually easier to clean
Cleaning Requires careful cleaning Generally easier to maintain
Polishing Usually not recommended Often possible
Repairability More difficult to blend locally Generally easier for minor surface defects
Best For Modern, tactical and understated designs Bright, colorful and graphic-heavy designs

Neither finish is automatically more durable. Performance depends heavily on the quality of the coating system, material compatibility, surface preparation, curing, and production control.


How a Professional PC Helmet Painting Process Works

A typical PC helmet shell painting process can include the following stages:

1. PC Shell Preparation

The molded helmet shell is cleaned and prepared so that subsequent coatings can adhere correctly.

2. Basecoat Application

A solid color, matte paint, soft-touch coating, metallic effect, or other base finish is sprayed onto the helmet.

3. Graphic Application

Logos and decorative designs can then be added through screen printing, water-slide decals, or other suitable methods.

4. Special-Effect Coating

Pearlescent, chameleon, gradient, or other specialty finishes can be added when required.

5. Protective Clearcoat

A transparent topcoat may be applied to protect the underlying decorative layers and create the required glossy, satin, or matte appearance.

6. Inspection and Quality Control

The finished helmet shell should be checked for coating consistency, color accuracy, graphic positioning, surface defects, and overall appearance.


Choosing the Right Helmet Shell Coating Process

For an OEM or custom helmet project, the best finishing solution depends on several factors:

  • Helmet shell material
  • Desired appearance
  • Logo and graphic complexity
  • Production quantity
  • Required durability
  • Target market
  • Product positioning
  • Budget
  • Manufacturing lead time

For example, screen printing may be ideal for a simple company logo on a large production order, while water-slide decals may be more appropriate for detailed graphics. A soft-touch finish can create a premium tactile experience, while a chameleon coating provides a distinctive high-end appearance.

The best solution is therefore not necessarily the most complicated coating process, but the process that balances design, cost, durability, manufacturability, and market requirements.


Different Applications Require Different Helmet Shells

PC shells are commonly chosen when a helmet needs to be lightweight, aerodynamic and closely integrated with an EPS impact liner. Their ability to be formed into thin, detailed shapes makes them especially useful for bicycle helmets, short-track speed-skating helmets, some equestrian helmets and selected sections of snowboarding helmets.

For applications that call for a thicker, more rigid and rugged outer shell, injection-molded ABS may be more appropriate. ABS is frequently used in industrial safety helmets, some equestrian helmets, some snowboarding helmets and other demanding environments.

The right material depends on the helmet’s complete construction, intended activity and required testing standard. Aurora Sports can help brands evaluate PC, ABS and combined shell designs to determine the best solution for each OEM or ODM helmet project.


Frequently Asked Questions About Helmet Painting and Coating

Can a polycarbonate helmet shell be painted?

Yes. PC helmet shells can be painted using an appropriate coating system designed to be compatible with polycarbonate. Correct material selection and process control are important because unsuitable chemicals or coatings can potentially affect PC material performance.

What is the difference between matte and glossy helmet coatings?

Glossy finishes reflect more light and create brighter, deeper colors, while matte finishes diffuse light and create a softer, non-reflective appearance. They also have different cleaning and repair requirements.

Can logos be printed directly onto helmet shells?

Yes. Simple logos and text can often be applied using screen printing or other direct-printing methods. More complicated artwork may require decals or other decorative processes.

Does a helmet decal need a clearcoat?

For professional water-slide decal applications, a compatible protective topcoat is normally used to seal and protect the graphic against wear and environmental exposure.

What is a chameleon helmet finish?

A chameleon or color-shift finish uses special-effect pigments that display different colors depending on viewing angle and lighting conditions. It normally involves a dark basecoat, color-shift paint, and protective clearcoat.


Conclusion

The quality of a PC helmet shell finish depends on much more than color alone. Surface preparation, paint compatibility, graphic application, curing, coating thickness, clearcoat selection, and quality control all contribute to the final result.

From glossy and matte helmet finishes to soft-touch coatings, screen printing, water-slide decals, and chameleon paint, each process has its own advantages, limitations, and cost considerations.

For helmet brands, distributors, and OEM buyers, understanding these processes makes it easier to select a finishing solution that provides the right balance of appearance, durability, production efficiency, and cost.

Contact Us:

📱: +1 (657) 762-7550
📧: sales@aurorasport.com

Why Helmet Samples Matter—and Why We Charge Sample Fees

When evaluating a helmet supplier, price is important—but it should never be the only consideration.

A helmet is a protective product that must balance fit, comfort, safety, materials, construction, components, appearance, and manufacturing quality. Many of these details are difficult to evaluate properly from photos, specifications, or quotations alone.

That is why we often encourage customers to request a physical sample before making a final supplier or product decision.

A Sample Helps You Make a Fair Comparison


Two helmets may look similar in a photograph and even have similar specifications, but once you hold and wear them, the differences can become much clearer.

A physical sample allows you to evaluate:

  • Helmet shape and headform
  • Fit and comfort
  • Weight and balance
  • Padding quality
  • Strap and buckle quality
  • Fit-system adjustment
  • Surface finishing and color
  • Component workmanship
  • Overall construction and appearance

For example, even a small component such as the internal gears of a headlock adjustment system can influence how smoothly the dial turns and how securely the helmet adjusts.

These are details that are difficult to judge from a price sheet.

The more completely you understand the product, the more meaningful your comparison between suppliers becomes.


For this reason, we believe requesting a sample is not simply an expense; it is an essential part of the decision-making and development process. Skipping this step can create unnecessary risk, while a properly evaluated sample can help identify potential issues before moving into mass production.


Samples Can Save Much More Than They Cost

A sample gives both the customer and the manufacturer an opportunity to identify questions early.

You may discover that you prefer a different head shape, padding thickness, strap material, adjustment system, color, finish, or component configuration.

Making these decisions during the sample stage is far easier than changing them after production has already started.

For a customized OEM or ODM project, samples become even more important because they allow us to verify the design step by step before committing to mass production.

A small investment in sampling can help prevent a much larger mistake later.

It can also help move the project forward faster because both sides have a physical reference for discussing quality, fit, appearance, and required improvements.


Why Do We Charge Sample Fees?


In helmet manufacturing, a sample is usually not simply a finished product taken from a warehouse shelf.

Producing a small quantity often requires many of the same manufacturing steps used for production, but without the efficiency of a large production run.

Depending on the sample, this may include:

  • Mold and machine setup
  • Material preparation
  • Color matching
  • Component preparation
  • Printing or decoration
  • Manual assembly
  • Special packaging
  • Quality inspection
  • Engineering or technical coordination

Because these costs are spread across only one or a few pieces, the actual cost per sample is naturally higher than the mass-production unit price.

For many standard samples based on existing products, our normal policy is to charge approximately 1.5 times the production unit price.

This is not intended to generate profit from samples. It is simply a practical way to share the real cost of small-quantity production.


Helmet Accessories Also Have Sampling Costs

The same principle applies to helmet components and accessories.

Customers sometimes assume that small parts should be provided free of charge because they are inexpensive in mass production.

However, items such as:

  • Headlock adjusters
  • Fit systems
  • Liners
  • Padding
  • Visors
  • Straps
  • Buckles
  • Injection-molded components

still require materials, molds, machine setup, labor, assembly, and inspection.

Take a headlock adjuster as an example.

It may contain several small precision-molded components, including internal gears. The geometry and tolerances of those parts can directly influence whether the adjustment dial turns smoothly and performs consistently.

Producing only a few pieces still requires the mold to be installed, the machine to be prepared, material to be processed, the components to be assembled, and the finished system to be inspected.

The part may be small.

The production process behind it is not.

That is why reasonable sample fees also apply to helmet accessories and components.


Why We Believe This Is Fair

Some suppliers may provide free samples as a way to attract new business.

We understand that approach, but we believe a healthy long-term partnership should be based on fairness, transparency, and mutual respect rather than simply giving away development work in order to win an order.

Our customers invest their time, ideas, market knowledge, and business resources into a project.

Our engineers, technicians, production teams, and suppliers invest their knowledge, labor, materials, equipment, molds, and time.

Both investments should be respected.

A reasonable sample fee allows us to prepare samples properly and give the project the attention it deserves.

In return, the customer receives something much more valuable than a promotional giveaway:

a real product that can be evaluated, compared, tested, worn, discussed, and improved before a larger commitment is made.


See the Product Before You Decide


We are confident in our design, manufacturing, and quality, but we do not expect customers to rely only on what we say.

We would rather you see the helmet, hold it, wear it, adjust it, inspect the components, and compare it carefully.

If you are evaluating several helmet suppliers, we encourage you to compare more than price.

Compare the fit.

Compare the comfort.

Compare the finishing.

Compare the adjustment system.

Compare the components.

Compare the workmanship.

And most importantly, compare whether the manufacturer truly understands the product you are trying to build.

A sample makes that comparison possible.

A sample is not simply one helmet. It is an important step toward making the right product—and choosing the right manufacturing partner.

At Aurora Sports, we believe fairness should guide the way we work with customers, suppliers, and our own team.

Fairness creates trust, and trust creates stronger long-term partnerships.

Contact Us:

📱: +1 (657) 762-7550
📧: sales@aurorasport.com

OEM vs. Ready-Made Helmets: Which Manufacturing Solution Is Right for Your Brand?

Launching a helmet brand involves more than choosing colors and adding a logo. One of the first decisions you need to make is whether to customize a ready-made helmet or develop an original product through OEM or ODM helmet manufacturing.

Both options can work well, but they serve different business goals. A ready-made helmet can help you enter the market faster and with a lower initial investment. OEM or ODM manufacturing gives you greater control over the helmet’s design, features, fit and brand identity.

Understanding the difference can help you choose the right helmet manufacturing solution for your budget, timeline and target market.

What Is a Ready-Made Helmet?

A ready-made helmet is an existing helmet model that has already been designed, tooled and prepared for production. The manufacturer may already have the molds, materials and production process in place.

Brands can often customize an existing helmet with options such as:

  • Logo printing
  • Custom colors
  • Packaging
  • Labels and instruction manuals
  • Interior padding
  • Straps, buckles and adjusters
  • Selected accessories

This approach is sometimes called private-label helmet manufacturing, white-label helmet manufacturing or open-mold helmet manufacturing.

Because the main helmet structure already exists, brands can avoid much of the time and expense involved in creating new tooling.

Advantages of Ready-Made Helmets

Faster Product Launch

Ready-made helmets generally require less development time because the shell, liner and basic construction have already been created. Once colors, branding and packaging are approved, production can move forward more quickly.

This makes ready-made helmet manufacturing a practical option for brands that want to test a new market, expand an existing product line or launch with a shorter timeline.

Lower Initial Investment

Developing a completely new helmet can involve engineering, prototypes, tooling and testing. Choosing an existing helmet design reduces many of these upfront expenses.

For startups and growing brands, this can provide a more manageable path into the helmet industry.

Reduced Development Risk

An existing model may already have an established production process and defined material specifications. Depending on the model and intended market, certification reports or testing information may also be available for review.

However, brands should always confirm whether existing certifications apply to the exact materials, components, branding and configuration they intend to sell.

More Customization Than You May Expect

Ready-made does not necessarily mean generic. Depending on the helmet and order quantity, brands may be able to customize its appearance, padding, adjustment system, chin strap, accessories and packaging.

The result can still feel consistent with your brand without requiring an entirely new helmet mold.

When Should You Choose a Ready-Made Helmet?

A ready-made or open-mold helmet may be the better choice if:

  • You want to launch quickly
  • You have a limited initial development budget
  • You want to test market demand before investing in new tooling
  • An existing helmet already meets most of your requirements
  • Your main customization needs involve colors, logos or packaging
  • You want to add a new helmet category to your product line

For many new helmet brands, this is the most practical place to begin.

What Is OEM Helmet Manufacturing?

OEM stands for Original Equipment Manufacturer. In helmet manufacturing, OEM commonly refers to producing a helmet according to a brand’s requirements, specifications or existing design.

The brand may provide technical drawings, product requirements, reference samples or a detailed design concept. The helmet manufacturer then supports engineering, material selection, prototyping, tooling, testing and mass production.

OEM helmet manufacturing provides more control than private labeling, but it also requires a greater investment of time and resources.

What Is ODM Helmet Manufacturing?

ODM stands for Original Design Manufacturer. With ODM helmet development, the manufacturer contributes more directly to the product’s design and engineering.

A brand may begin with an idea, a target user or a list of required features rather than a production-ready design. The manufacturer’s research and development team helps turn that concept into a manufacturable helmet.

ODM development can include:

  • Product design
  • 2D sketches and 3D modeling
  • Structural engineering
  • Fit-system development
  • Material recommendations
  • Prototype production
  • Mold and tooling development
  • Product testing support
  • Packaging development
  • Mass production

This option is useful for brands that want a more distinctive helmet but do not have a complete in-house helmet engineering team.

Advantages of OEM and ODM Helmets

A More Distinctive Product

OEM and ODM manufacturing allow brands to create a helmet that is more difficult for competitors to duplicate. The shell shape, ventilation, fit system, padding, accessories and overall appearance can be developed around your market.

Greater Control Over Features

Instead of adapting your requirements to an existing model, you can develop features for a particular sport, activity or work environment.

Depending on the project, this could include:

  • A unique shell profile
  • Custom ventilation placement
  • Specialized impact-liner construction
  • A proprietary helmet adjuster
  • Custom padding and fit
  • Magnetic or traditional buckles
  • Integrated visors or face protection
  • Accessory attachment systems
  • Headlamp compatibility
  • Hearing-protection compatibility
  • Brand-specific trim and finishes

Stronger Brand Identity

A custom helmet can carry your brand identity through its shape, color combinations, surface details and user experience—not only through a printed logo.

This can help a helmet stand out in a crowded market and support a stronger long-term product strategy.

Development for a Specific Market

Different helmet categories have different performance requirements and user expectations. OEM and ODM projects can be developed around the needs of cycling, climbing, equestrian sports, industrial safety, skate sports and other applications.

The required safety standards should be identified at the beginning of the project because they can influence the helmet’s structure, materials and testing plan.

Challenges of OEM and ODM Development

Higher Upfront Cost

Custom helmet development may require design work, prototypes, molds, tooling and laboratory testing. These expenses are generally higher than the cost of customizing a ready-made helmet.

Longer Development Timeline

Creating a new helmet involves several stages. Design revisions, prototype evaluations, tooling adjustments and testing can add time before mass production begins.

Larger Production Commitment

A fully customized helmet may require a higher minimum order quantity because the factory must prepare dedicated materials, tooling and production processes.

Brands should consider projected sales volume before committing to a completely original design.

OEM vs. Ready-Made Helmets: A Quick Comparison

Factor Ready-Made or Open-Mold Helmet OEM/ODM Helmet
Initial investment Lower Higher
Development time Shorter Longer
Customization Colors, logos, packaging and selected components Shape, structure, fit, features, materials and accessories
Tooling Existing molds New or modified molds may be needed
Product uniqueness Moderate High
Development risk Lower Requires more planning and validation
Best suited for Startups, market testing and fast product-line expansion Established brands and differentiated long-term products

How to Choose the Right Helmet Manufacturing Option

Before selecting a manufacturing approach, ask the following questions.

What Is Your Launch Timeline?

If you need inventory quickly, an existing helmet model may be the most realistic option. If your launch schedule allows time for product development, OEM or ODM manufacturing can provide greater design freedom.

What Is Your Development Budget?

Your budget should include more than the unit price. Consider design, prototypes, tooling, testing, packaging and production quantities.

A ready-made helmet can reduce initial development costs, while a custom helmet may offer greater long-term value through product differentiation.

How Much Customization Do You Actually Need?

If an existing helmet already has the shape, fit and features you need, custom colors and branding may be enough.

If your product requires a different structure, proprietary adjustment system or specialized accessory integration, OEM or ODM development is likely the better choice.

Which Safety Standards Apply?

The intended activity and sales market determine which helmet standards may apply. Requirements can vary between industrial safety helmets, climbing helmets, bicycle helmets, equestrian helmets and skate helmets.

A helmet manufacturer should understand the intended use and target market before development begins. Testing and certification requirements should never be treated as an afterthought.

What Quantity Do You Expect to Sell?

Ready-made helmets can be more appropriate for an initial market test. Custom tooling becomes easier to justify when expected sales volumes support the investment.

Can You Start With a Ready-Made Helmet and Develop a Custom Model Later?

Yes. This can be an effective growth strategy.

A brand can begin with an existing helmet to learn about customer preferences, sizing, colors, features and price expectations. Once demand has been established, that information can guide the development of a more customized OEM or ODM helmet.

This staged approach can reduce risk while giving the brand a path toward a more distinctive product line.

Why Work With Aurora Sports?

Aurora Sports is an experienced helmet manufacturer and OEM/ODM helmet supplier supporting brands through product selection, customization, development and production.

Our capabilities include:

  • Existing helmet molds for faster private-label projects
  • OEM and ODM helmet development
  • In-house research and development support
  • Helmet adjuster and fit-system options
  • Custom colors, logos and packaging
  • Prototype and sample development
  • Mold and tooling development
  • Material and component selection
  • Testing and certification support
  • Mass production and quality control

Aurora Sports manufactures helmets for multiple categories, including cycling helmets, climbing helmets, equestrian helmets, industrial safety helmets and skate helmets.

Whether you need to customize an existing helmet or create a new helmet from the ground up, our team can help identify a manufacturing route that fits your product goals, budget and launch schedule.

Ready-Made or OEM: Which One Is Better?

Neither solution is automatically better. The right choice depends on where your brand is today and where you want it to go.

Choose a ready-made or private-label helmet when speed, affordability and lower development risk are your priorities.

Choose OEM or ODM helmet manufacturing when you need a distinctive product, specialized features and greater control over the final design.

The most important step is finding a helmet manufacturer that can explain the tradeoffs clearly and help you plan for both your first production order and your long-term growth.

Start Your Helmet Manufacturing Project

Not sure whether an existing helmet or a custom-developed helmet is right for your brand?

Contact Aurora Sports to discuss your target market, helmet category, required features, estimated quantity and certification needs. Our team can help you compare available helmet models with OEM and ODM development options.

Your brand. Your market. The right helmet manufacturing solution.

Contact Us:

📱: +1 (657) 762-7550
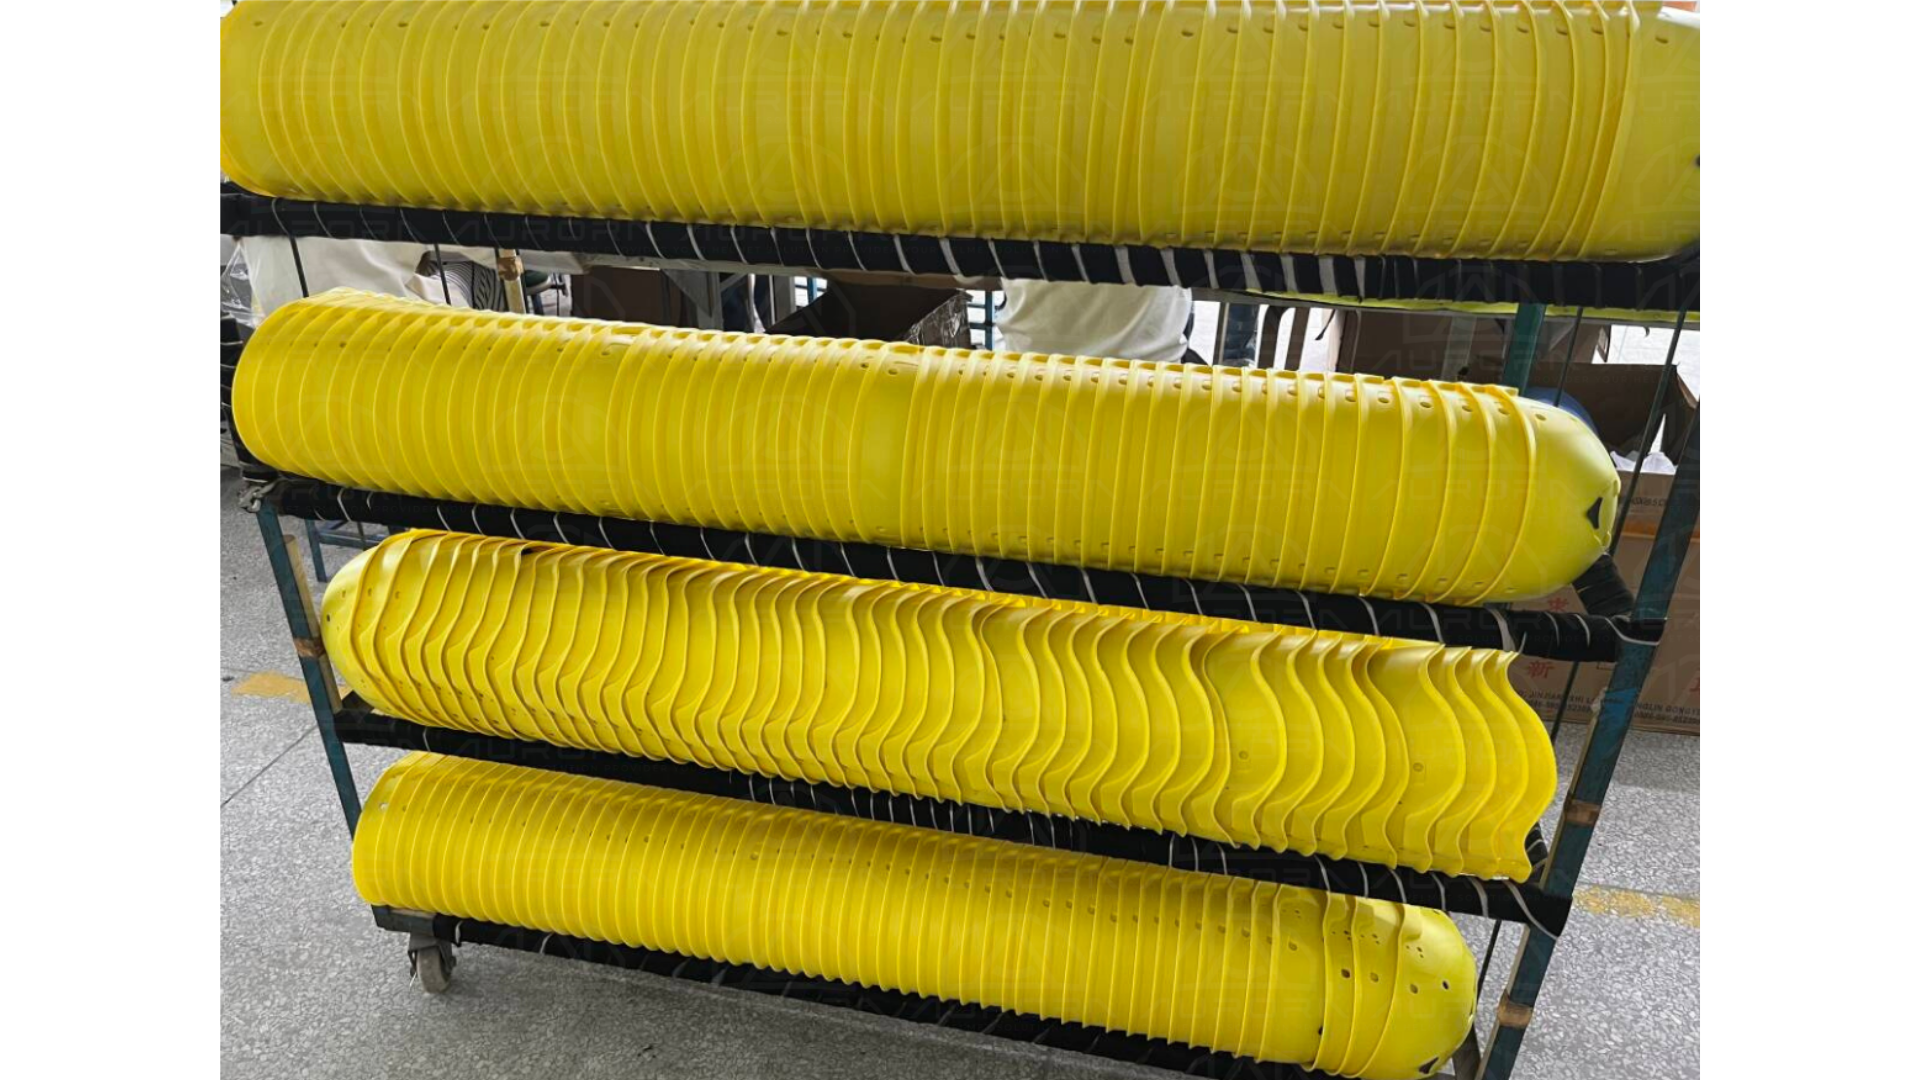
📧: sales@aurorasport.com

From Helmet Idea to Mass Production: What an OEM/ODM Helmet Manufacturer Really Does

A successful helmet is not created by designing the shell first and solving everything else later. Fit, materials, ventilation, tooling, testing, components, decoration, and production all need to work as one connected system.

A helmet project can begin in many different ways.

An established brand may already have complete CAD files and technical specifications. A distributor may want to customize an existing helmet for a new market. A startup may have only a sketch, a reference product, or an idea for solving a particular problem.

The starting point may be different, but the challenge is the same:

How do you turn an idea into a helmet that is safe, functional, manufacturable, and consistent enough for reliable mass production?

This is where an experienced OEM/ODM helmet manufacturer should become more than simply a factory.

The right manufacturing partner helps connect product design, engineering, materials, tooling, testing, quality control, and production from the beginning of the project.


A Helmet Is More Than a Shell

A helmet is a complete protective system.

The outer shell, impact-absorbing liner, fit system, retention straps, comfort padding, ventilation, accessories, and decoration all need to work together.

Changing one area can influence several others.

Larger ventilation openings may affect the EPS structure. A different shell material may require another tooling or manufacturing method. Adding a visor, light, hearing-protection system, or other accessory may influence weight, balance, coverage, and attachment points.

Even cosmetic decisions matter. A paint, graphic, coating, or printing method needs to be compatible with the shell material and production process.

For this reason, helmet-development decisions should not be made independently.

At Aurora Sports, we look at the complete helmet architecture so that the original design intent can be translated into a practical and repeatable production plan.


Article content

OEM, ODM, or Private Label?

These terms are often used together, but they represent different ways of developing a helmet.

Understanding the difference can help you choose the most efficient path for your project.

OEM Helmet Manufacturing

OEM, or Original Equipment Manufacturing, is generally best suited to customers who already own or control the product design and need a manufacturing partner to bring it into production.

An OEM project may begin with:

  • CAD files or technical drawings
  • Product specifications
  • Approved samples
  • Material requirements
  • Testing or performance requirements
  • Branding and packaging specifications

Before tooling begins, the design should still be reviewed from a manufacturing perspective.

Something that works well in a rendering or prototype may need adjustment for molding, tolerances, assembly, material behavior, or repeatable production.

Aurora can support OEM projects with design-for-manufacturing review, tooling, component production, material sourcing, trial production, testing support, decoration, assembly, packaging, and quality control.

ODM Helmet Development

ODM, or Original Design Manufacturing, is a better fit when a company has a product idea or market direction but still needs development and engineering support.

The project may begin with a sketch, reference image, performance goal, target market, or simply an idea.

From there, the development process can include industrial design, helmet structure, fit and retention systems, material selection, prototyping, engineering, tooling, testing support, and production planning.

ODM works best when the customer brings knowledge of its brand, market, and users, while the manufacturer contributes helmet engineering and manufacturing experience.

The goal is not simply to create an attractive concept.

The goal is to develop a production-ready helmet.

Private-Label Helmet Manufacturing

Not every project requires a completely new helmet platform.

For brands looking for a faster and more cost-effective path to market, an existing open-mold helmet may be the right starting point.

Depending on the model and project requirements, customization can include:

  • Shell colors and finishes
  • Logos and graphics
  • Water decals or screen printing
  • Padding and straps
  • Selected components
  • Product labels
  • Instruction manuals
  • Retail packaging

Starting with an existing platform can reduce development time and tooling investment while still allowing the finished product to have a clear brand identity.


Good Helmet Manufacturing Starts Before Production

Some of the most important decisions are made long before the first production helmet comes off the line.

At the beginning of a project, the development team should understand:

  • Helmet category
  • Intended user
  • Target market
  • Applicable safety requirements
  • Coverage and fit
  • Materials and construction
  • Weight
  • Ventilation
  • Comfort
  • Accessories
  • Target cost
  • Expected production volume

These requirements influence almost every decision that follows.

A lightweight, highly ventilated cycling helmet will require a very different development approach from an industrial safety helmet, equestrian helmet, climbing helmet, or other protective product.

Early engineering involvement also makes it easier to identify conflicts while changes are still relatively simple.

That is why we believe manufacturing feasibility should be considered while the helmet is being designed—not only after the design has been approved.


Article content

Choosing the Right Helmet Construction

There is no single manufacturing method that is right for every helmet.

The most suitable construction depends on the helmet category, safety requirements, desired weight, appearance, performance, manufacturing process, and target cost.

EPS In-Mold Construction

In-mold construction typically combines a thin polycarbonate outer shell with an EPS impact-absorbing liner during molding.

It is commonly used for lightweight, ventilated applications such as bicycle, mountain-bike, gravel, urban, and e-bike helmets.

ABS Shell Construction

Injection-molded ABS is often selected when the product requires a more rigid and durable outer shell.

The ABS shell can then be combined with EPS, a fit system, retention straps, padding, and other components to create the complete helmet.

Injection-Molded Components

Injection molding is also important far beyond the outer shell.

It may be used for fit-system components, adjustment dials, visors, structural parts, buckles, and other functional elements.

Small components can have a major influence on user experience. For example, in a headlock adjustment system, the internal gear design, tolerances, and engagement can directly affect how smoothly the dial turns and how consistently the fit system adjusts.

Carbon Fiber and Composite Construction

For certain premium or performance-focused applications, carbon fiber and other composite materials may be considered for full shells, hybrid structures, reinforcement, or lightweight design.

Polycarbonate Vacuum Forming

Vacuum forming can be used to create thin polycarbonate shells and other thermoformed components.

In many bicycle helmets, the formed PC shell is integrated with the EPS liner during the in-mold process.

The important point is that the manufacturing method should follow the product requirements rather than forcing every helmet into the same construction.


From Concept to a Production-Ready Helmet

Every project is different, but a complete helmet-development program may include:

  1. Product requirements and market definition
  2. Industrial design
  3. Engineering and design-for-manufacturing review
  4. Prototype development
  5. Tooling and mold making
  6. Material and component development
  7. Trial production
  8. Testing and product validation
  9. Engineering optimization
  10. Graphics and finishing
  11. Assembly and quality control
  12. Mass production, packaging, and delivery

In reality, development is rarely a perfectly straight line.

A prototype may reveal a fit issue. Trial production may identify an assembly problem. Testing may show that a structure needs improvement. A material may behave differently in mass production than it did in an early sample.

This is normal.

The important thing is to identify those issues early enough to understand the root cause and improve the design or process before full production.

A successful prototype is important—but it does not automatically mean successful mass production.


Article content

Quality Is Built Into the Process

Quality control should not begin with the final inspection.

By that point, many important decisions have already been made.

Consistent production depends on controlling materials, tooling, tolerances, molding conditions, component interfaces, assembly methods, finishing, and inspection standards throughout the process.

Depending on the project, quality control may include:

  • Incoming material inspection
  • In-process inspection
  • Dimensional verification
  • Fit and assembly checks
  • Cosmetic inspection
  • Final-product inspection
  • Packaging inspection

The objective is simple:

Carry the approved product standard from the sample stage into repeatable mass production.

A good sample shows what is possible.

A good manufacturing system makes that result repeatable.


Confidentiality Matters in Product Development

New helmet projects often involve more than manufacturing information.

Customers may need to share CAD files, technical drawings, samples, proprietary mechanisms, product concepts, specifications, or future business plans.

These materials deserve to be handled responsibly.

For confidential OEM and ODM projects, Aurora can establish a nondisclosure agreement before sensitive technical information or samples are reviewed.

We believe confidentiality is not only a contractual requirement.

It is also part of professional ethics, respect for intellectual property, and the trust required for a long-term development relationship.


Why Integrated Manufacturing Matters

Helmet development can involve designers, engineers, toolmakers, molding specialists, component suppliers, testing teams, finishing teams, assembly workers, and quality-control personnel.

When these functions are disconnected, communication becomes more difficult.

A change made by one supplier may create a problem for another. Engineering questions can take longer to resolve. Production feedback may not reach the original designer quickly enough.

Aurora brings many of these capabilities together through one connected development and manufacturing system, including:

industrial design, prototyping, CNC machining, tooling, EPS molding, in-mold manufacturing, plastic injection, vacuum forming, composite processing, painting, decoration, assembly, testing support, quality control, and packaging.

For our customers, the value is not simply having more processes in one place.

The real value is that information can move between development and production more efficiently.

A tooling issue can become engineering feedback.

A testing result can improve the structure.

An assembly difficulty can lead to a design change.

A production problem can become a better standard for the next project.

That is how manufacturing experience becomes useful product-development knowledge.


Choosing the Right Development Path

The best way to start depends on how much of the product has already been developed.

Choose OEM when you already control the design and need engineering review, tooling, and manufacturing support.

Choose ODM when you have an idea, market direction, or product requirement but need help developing the helmet itself.

Choose private label when a proven existing platform meets your needs and speed to market or lower development investment is the priority.

Whichever path you choose, we believe one principle is especially important:

Bring the manufacturing team into the project early.

Decisions involving materials, fit, ventilation, components, tooling, accessories, graphics, and testing are much easier to manage before mass production begins.


Article content

Develop Your Next Helmet With Aurora Sports

For more than three decades, Aurora Sports has worked with helmet development and manufacturing across sports, mobility, outdoor, and occupational-safety applications.

But experience, to us, is not simply a number of years.

It is what we have learned from prototypes, tooling, testing, production, quality challenges, and successful product launches—and how we use those lessons to make the next product better.

Whether you are developing a completely new helmet, moving an existing design into production, or customizing an open-mold platform, our team can help you evaluate the most appropriate OEM, ODM, or private-label development path.

Start by sharing your helmet category, target market, project requirements, and current development stage.

If your project contains confidential information, we can put an NDA in place before reviewing detailed technical files or samples.

Your idea. Our engineering. Built for production.

Contact Aurora Sports to discuss your next helmet project.

Contact Us:

📱: +1 (657) 762-7550
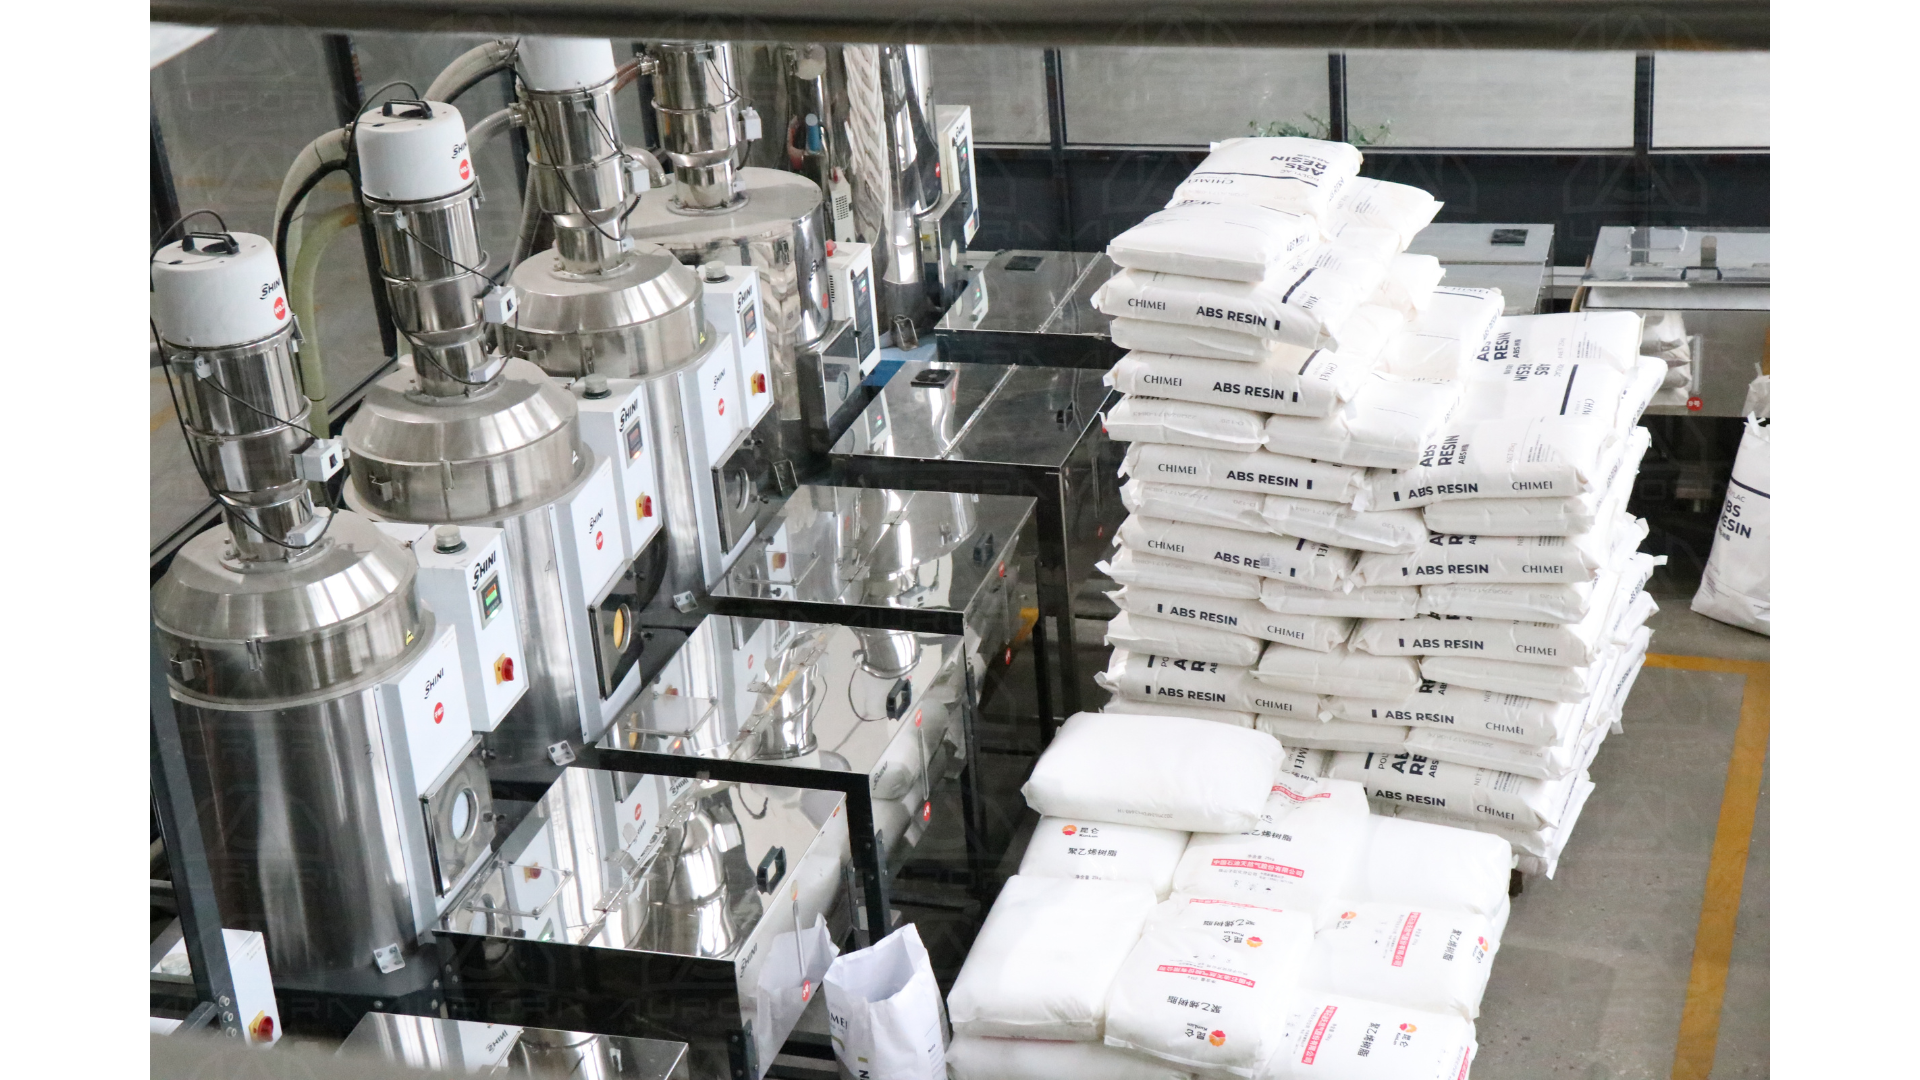
📧: sales@aurorasport.com

Helmet Adjusters: The Small Component That Makes a Big Difference

How the right helmet fit system can improve comfort, stability, serviceability, and product differentiation—and how Aurora Sports supports OEM/ODM development from concept to mass production.

A helmet can only perform as intended when it fits correctly and remains securely positioned on the wearer’s head.

That is why the helmet adjuster—also known as a helmet fit system, retention system, headlock, or dial-fit system—is such an important part of helmet development.

Although it may appear to be a relatively small component, the adjuster can have a major influence on comfort, stability, sizing, ventilation, weight, usability, and the overall user experience.

At Aurora Sports, we work with brands to select, integrate, customize, and develop helmet adjusters for a wide range of sports and safety helmet applications.

More Than Just a Dial

A well-designed helmet adjuster does much more than simply tighten the helmet.

It can help:

  • Distribute pressure more evenly around the head
  • Improve helmet stability during movement
  • Fine-tune the fit for different head shapes
  • Adjust helmet height and positioning
  • Improve comfort during extended use
  • Maintain proper alignment between the helmet, straps, and padding
  • Support easier replacement and after-sales service

Depending on the application, the fit system can also influence the helmet’s interior architecture, ventilation channels, shell and EPS design, strap configuration, appearance, and overall product positioning.

For this reason, we recommend considering the adjuster early in the helmet development process rather than treating it as a component to select at the end.

Helmet Fit-System Options

Aurora Sports offers a broad range of helmet adjuster solutions for applications including:

  • Bicycle helmets
  • Children’s helmets
  • Climbing helmets
  • Skate helmets
  • Equestrian helmets
  • Short-track and sports helmets
  • Industrial and safety helmets
  • Other custom helmet applications
Article content
(Adjuster Summary upon request)

Depending on the product requirements, available features can include:

Rotating Dial Adjustment

Dial-fit systems allow users to quickly tighten or loosen the helmet, with many designs offering convenient one-handed operation while the helmet is being worn.

Vertical & Multi-Axis Adjustment

More advanced systems can provide vertical, fore-and-aft, or 3-axis adjustment, allowing the user to fine-tune helmet height, tilt, and retention tension.

Lightweight Fit Structures

For performance-oriented helmets, lightweight floating structures can reduce unnecessary bulk while maintaining comfort and stability.

Replaceable Fit Systems

A replaceable adjuster can make after-sales service easier by allowing worn or damaged components to be changed without replacing the entire helmet.

Enhanced Dial Grip

Rubber-overmolded dials, thumb wheels, and other textured designs can improve grip and make adjustment easier, including when wearing gloves.

Reflective & LED Features

For commuter, cycling, and visibility-focused applications, fit systems can incorporate reflective elements or optional LED lighting with steady or flashing modes.

Webbing & Bracket Integration

Different bracket and webbing configurations can help maintain helmet position and improve alignment between the adjustment system and the retention straps.

Multiple Size Configurations

Fit systems can be developed around different head-size ranges, including applications for children, adults, and different regional headforms.

Logo & Brand Customization

Logos, colors, dial graphics, finishes, and other visual details can be customized to strengthen the overall brand identity of the helmet.

Open-Mold Helmet Adjusters for Faster Development

Not every helmet project requires a completely new fit system.

Aurora Sports has a range of open-mold helmet adjusters that can provide brands with an efficient starting point for new product development.

Using an existing adjuster can help reduce:

  • Development time
  • Tooling investment
  • Initial engineering cost
  • Prototype iterations
  • Time to market

An open-mold solution can be particularly useful for brands that want to:

  • Launch a new helmet efficiently
  • Test a new product category
  • Expand an existing helmet line
  • Compare different fit-system concepts
  • Reduce initial tooling investment

Depending on the project, an existing adjuster may also be customized through changes to color, materials, sizing, branding, webbing, padding interfaces, dial design, or other compatible components.

Open Mold or Custom Development?

The right choice depends on the project.

If an existing adjuster already meets the product’s fit, performance, cost, and design requirements, an open-mold solution can be the most efficient path.

If the helmet requires a distinctive fit experience, unique geometry, specialized adjustment range, proprietary styling, or deeper integration into the helmet structure, a custom OEM/ODM adjuster may be more appropriate.

Aurora can help evaluate both directions before major tooling investment begins.

Article content

OEM/ODM Helmet Adjuster Development

Aurora Sports is an experienced OEM/ODM helmet manufacturer, which means our work can extend beyond supplying existing components.

We can collaborate with customers to develop a fit system specifically around the requirements of a new helmet.

OEM Development

For OEM projects, Aurora can manufacture according to the customer’s established design, specifications, drawings, or performance requirements.

ODM Development

For ODM projects, our team can support development from an earlier stage, helping transform an idea, reference product, sketch, functional requirement, or design direction into a manufacturable helmet fit system.

Depending on the project, development may include:

  • Adjuster structure and geometry
  • Integration with shell and EPS architecture
  • Head-size range
  • Vertical and multi-axis adjustment
  • Dial shape and ergonomics
  • Adjustment force and incremental feel
  • Material selection
  • Weight optimization
  • Durability and serviceability
  • Replaceable component design
  • Webbing and bracket integration
  • Padding compatibility
  • LED or reflective features
  • Color and surface finish
  • Logo customization
  • Prototype development
  • Tooling
  • Testing support
  • Pilot production
  • Mass production

Protecting Your Design with an NDA

We understand that many helmet-development projects involve confidential product concepts, proprietary mechanisms, CAD files, drawings, prototypes, and unreleased product plans.

Before sharing sensitive information, customers are welcome to put a Non-Disclosure Agreement (NDA) in place with Aurora.

If your company already has an NDA, our team can review it. Alternatively, Aurora can provide our standard NDA template for your review.

Once the confidentiality agreement is established, your team can share more detailed information with us so our engineers can evaluate the project properly.

This is especially important for custom adjuster development involving:

  • Proprietary adjustment mechanisms
  • New mechanical structures
  • Custom helmet architecture
  • Patent-pending concepts
  • Unreleased products
  • Confidential CAD or STEP files
  • Competitive reference products
  • Brand-specific design features

Our goal is to create an environment where customers can discuss their development needs openly while protecting the intellectual property involved in the project.

Article content

Choosing the Right Adjuster for Your Helmet

There is no single fit system that is ideal for every helmet.

The most suitable adjuster depends on factors such as:

Target user Children, recreational users, professional athletes, industrial workers, and other user groups may require very different adjustment systems.

Headform and size range Different markets and helmet categories may require different internal geometries and adjustment ranges.

Activity and movement A performance sports helmet may require greater stability and lower weight, while an industrial helmet may prioritize durability and glove-friendly operation.

Helmet architecture The shell, EPS liner, ventilation channels, padding, webbing, and fit system must work together as one complete system.

Target price A simple dial system may be appropriate for an entry-level helmet, while premium products may benefit from multi-axis adjustment, lightweight construction, or additional features.

Serviceability For products intended for long-term professional use, replaceable components can provide additional value.

Brand positioning A distinctive fit system can become an important part of the customer’s experience and help differentiate one helmet from another.

The Adjuster Should Be Designed as Part of the Helmet

One of the most important lessons in helmet development is that individual components should not be considered in isolation.

The adjuster interacts with:

  • Shell geometry
  • EPS liner
  • Comfort padding
  • Retention straps
  • Headform
  • Ventilation
  • Accessories
  • Weight distribution
  • Overall helmet balance

A successful fit system is therefore not simply the best adjuster on its own—it is the adjuster that works best with the complete helmet.

Article content

By evaluating the fit system early, brands can reduce the risk of compatibility problems later in tooling, testing, or mass production.

Build a Better Helmet Fit System with Aurora Sports

Whether you need an efficient open-mold helmet adjuster or want to develop a completely customized fit system for a new product line, Aurora Sports can support the process from component selection and engineering through prototyping, tooling, testing support, and mass production.

With decades of helmet development and manufacturing experience, our goal is to help customers create products that are not only protective, but also comfortable, stable, intuitive to use, manufacturable, and differentiated in the market.

Have a Helmet Adjuster Concept?

If you already have a concept, drawing, reference, CAD file, or performance requirement, contact our team to discuss the project.

An NDA can be arranged before confidential design information is shared.

Let’s develop a helmet fit system that works not only as a component—but as part of a better helmet.

Contact Us:

📱: +1 (657) 762-7550
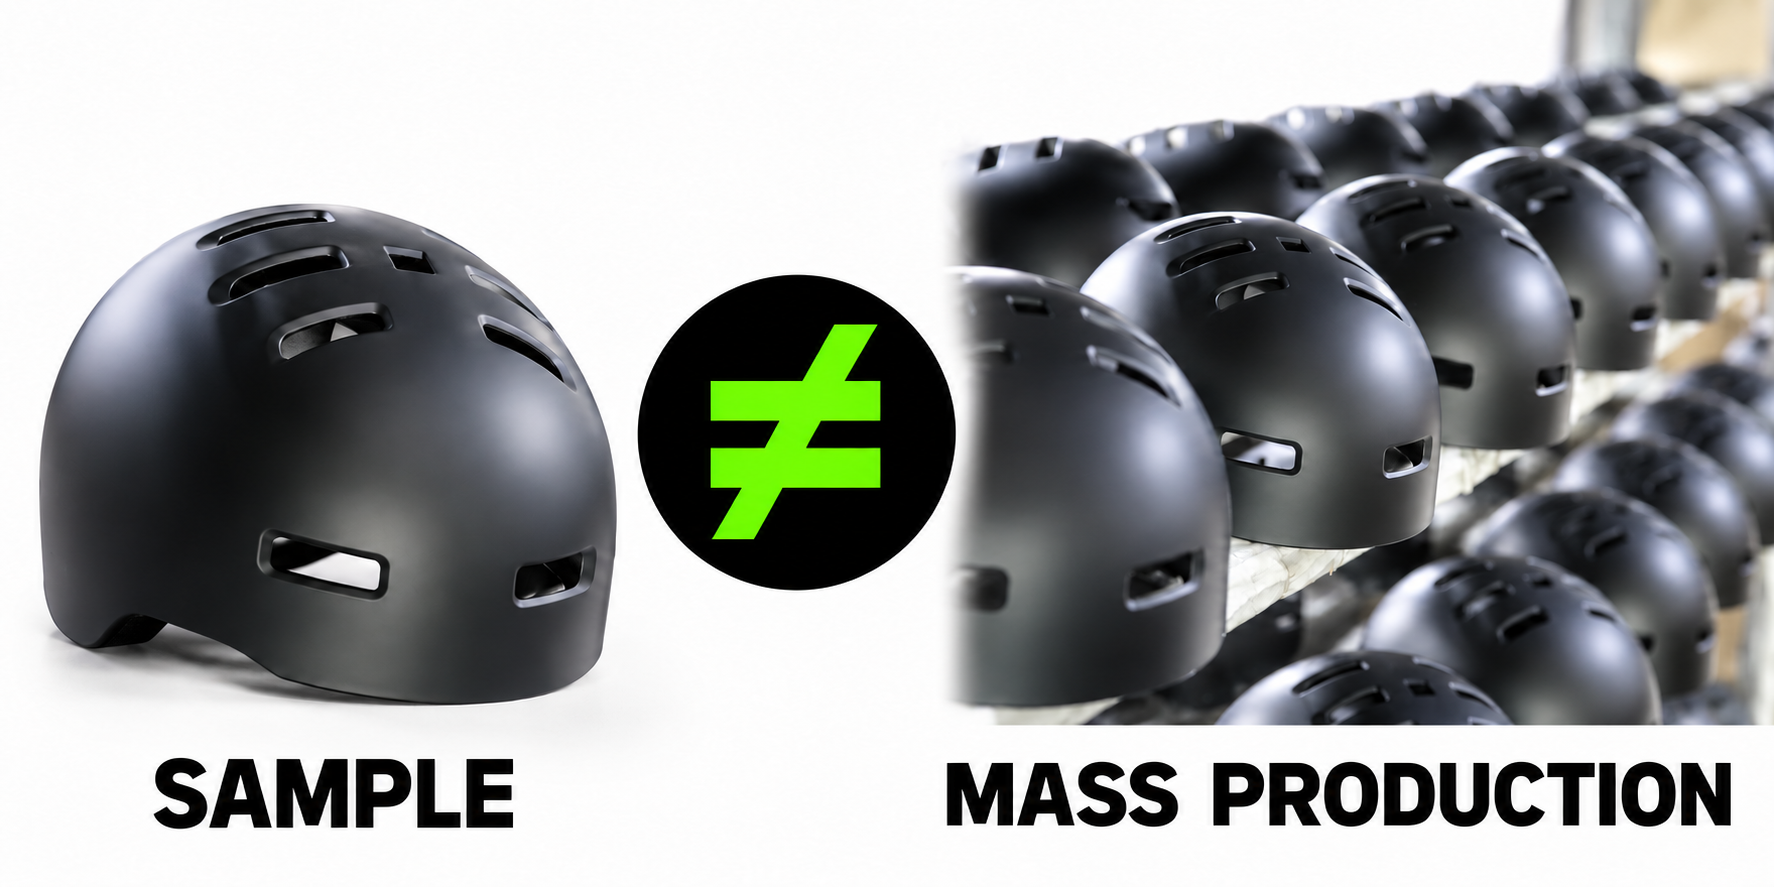
📧: sales@aurorasport.com